| | 1985 Lap Rialto 2 (hopefully a more concise version of it) - this may take me time to update it. |  |
|
|
|
| Author | Message |
|---|
phade

Posts : 475
Join date : 2011-08-19
Location : Kent / South East London
| | Subject: Re: 1985 Lap Rialto 2 (hopefully a more concise version of it) - this may take me time to update it. Sat Oct 27, 2012 10:58 pm | |
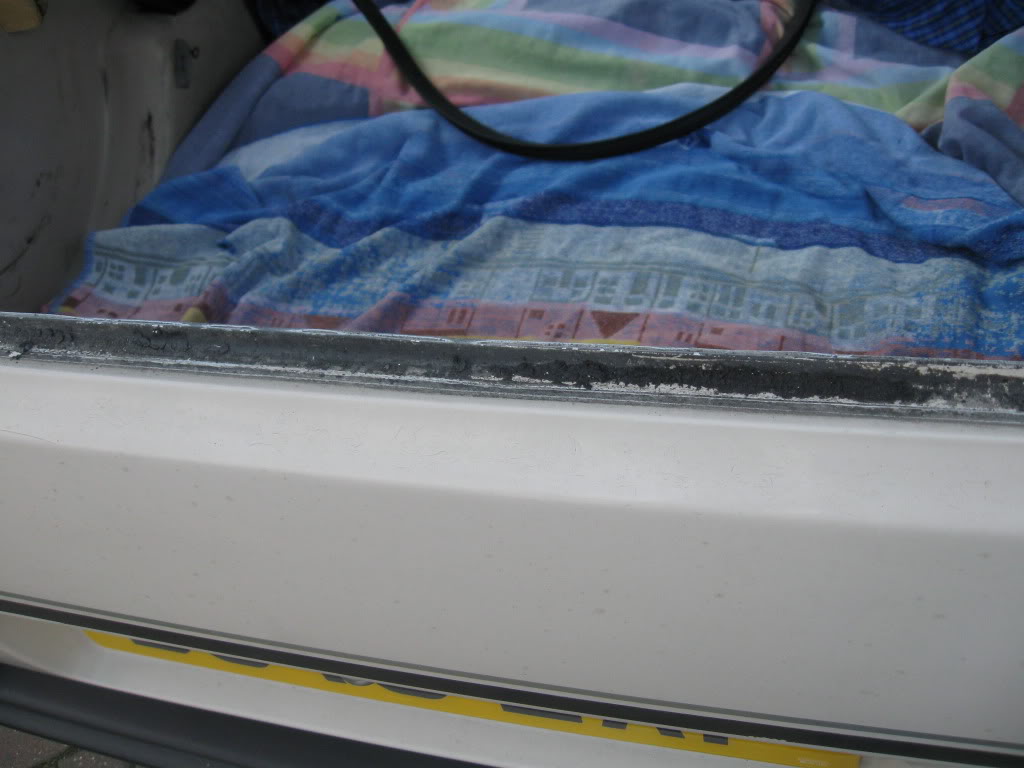
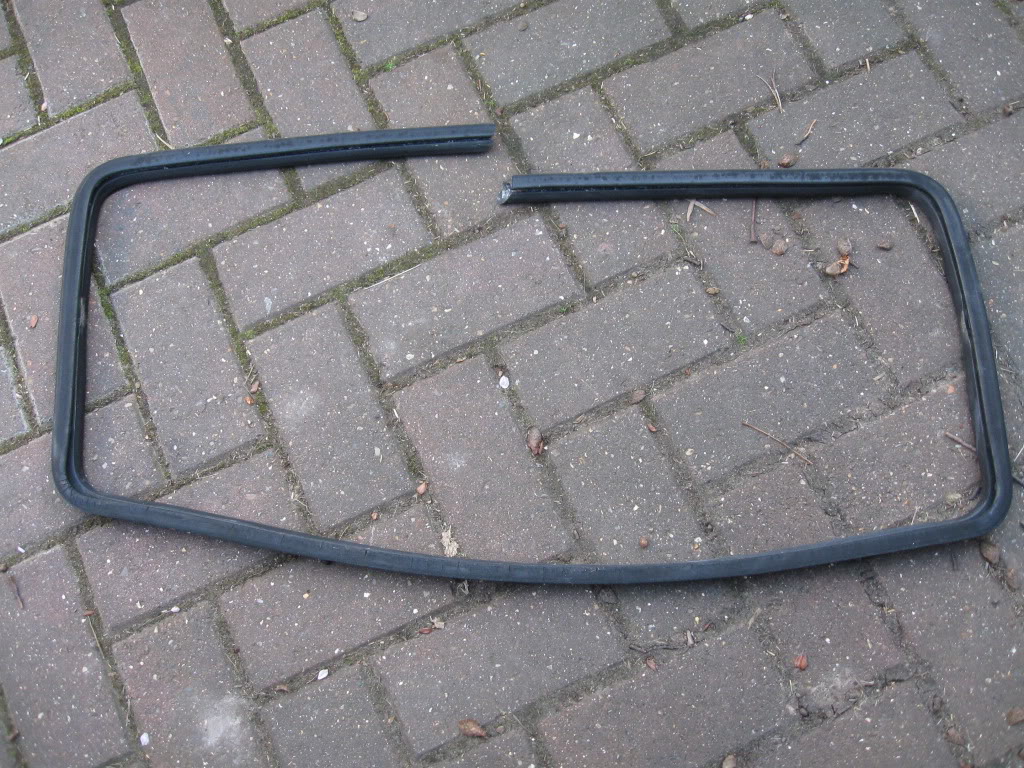
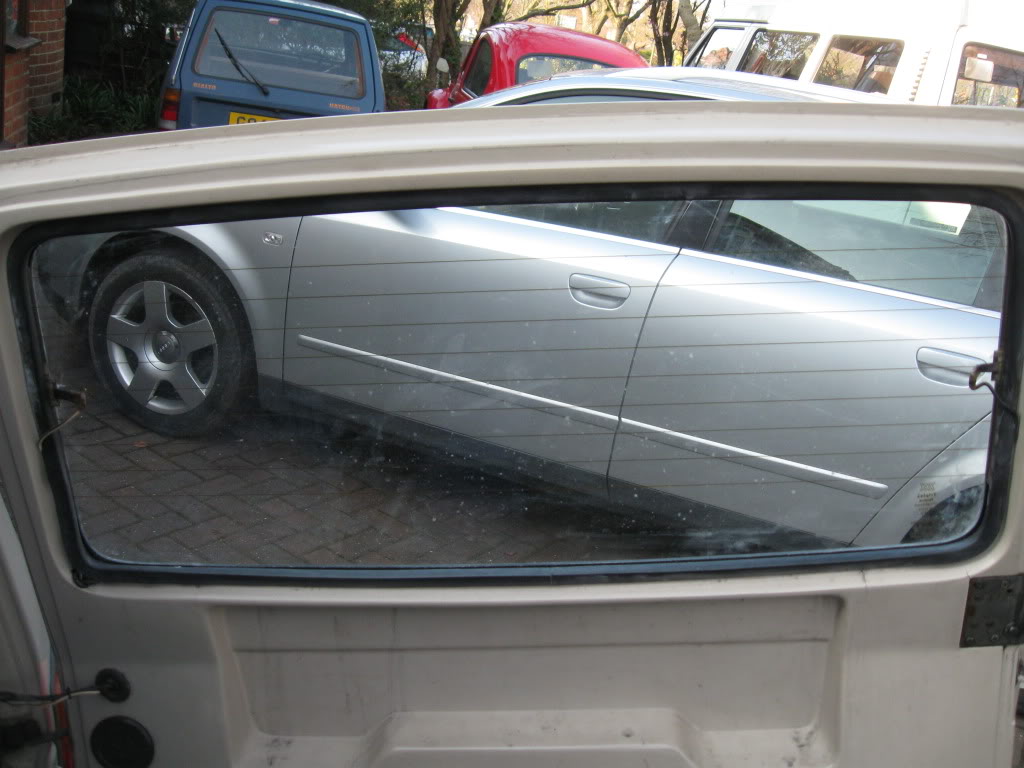
| Post by Azzy 8th October 2011
Glad to see the glass windows in, I really dislike those perspex ones. | |
|
| | |
phade
Posts : 475
Join date : 2011-08-19
Location : Kent / South East London
| | Subject: Re: 1985 Lap Rialto 2 (hopefully a more concise version of it) - this may take me time to update it. Sat Oct 27, 2012 11:03 pm | |
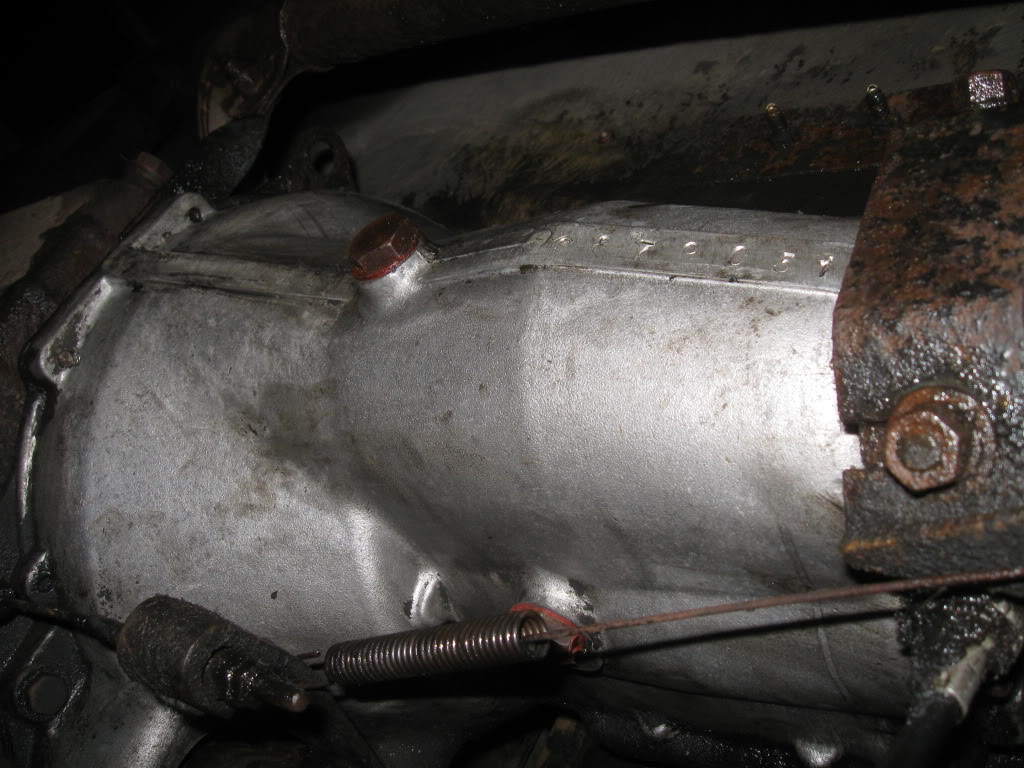
| 9th October 2011
Had a look at the propshaft today Hi everyone, Here are a few pics of what I have found when I had a look underneath my Rialto 2 earlier. The rear end of the propshaft appears to be bolted in place. A mixture of old and newer nuts and bolts were used.  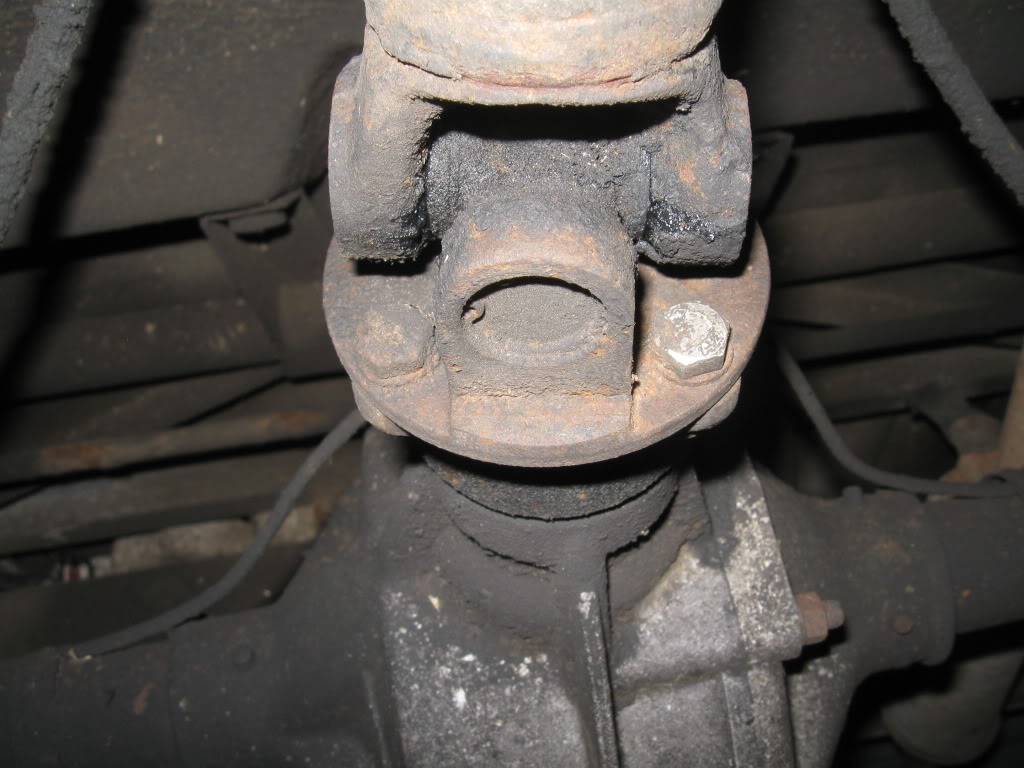 Oil leak from the back of the gearbox (most likely rear gearbox oil seal):- 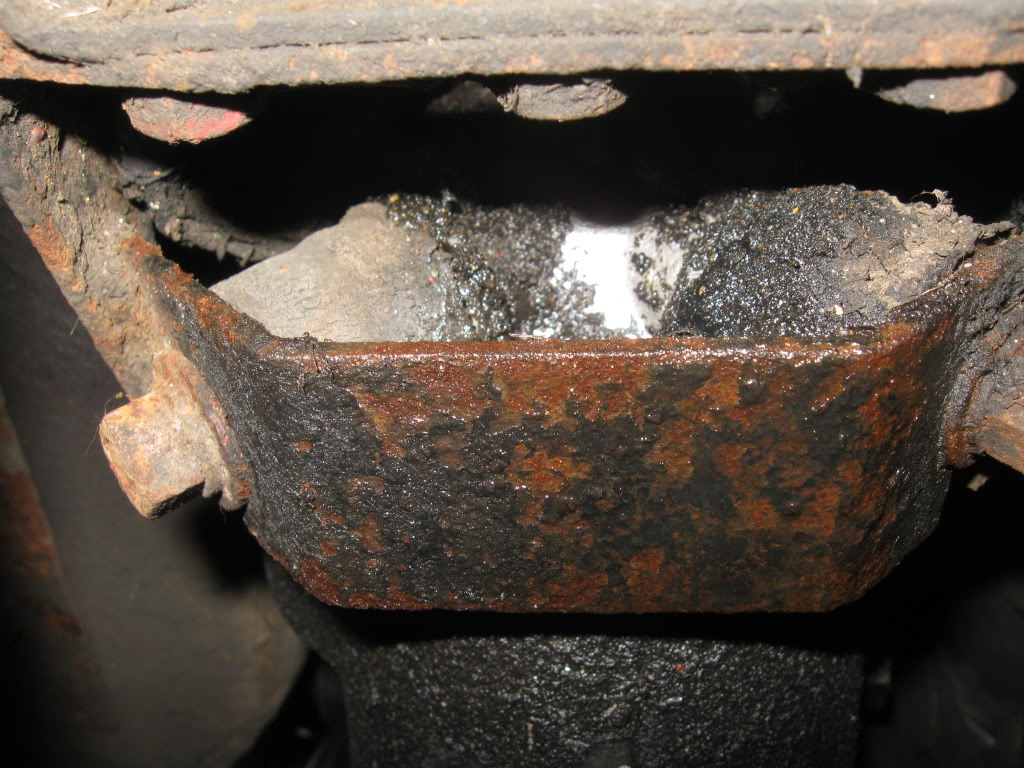 Vibration caused by three loose front propshaft bolts (two of them nearly fell off):- 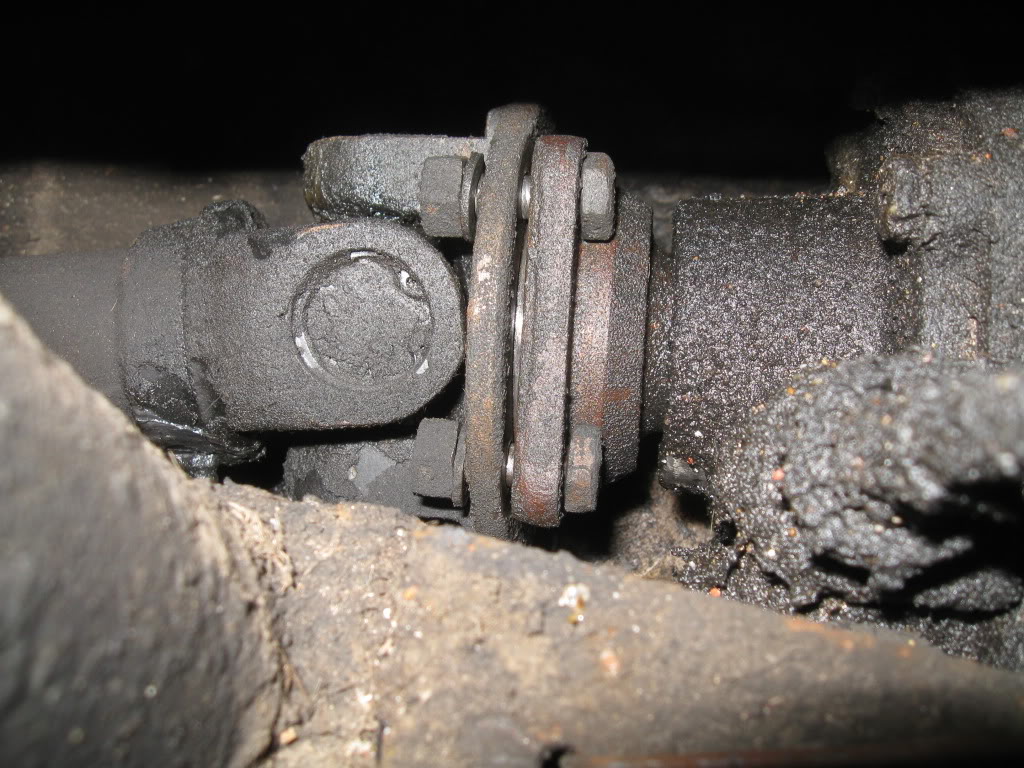 I have just sprayed the propshaft nuts and bolts with phCrackIt and will be removing the propshaft in about 1/2 hour's time or so and I will also be replacing the rear gearbox's oil seal. | |
|
| | |
phade
Posts : 475
Join date : 2011-08-19
Location : Kent / South East London
| | Subject: Re: 1985 Lap Rialto 2 (hopefully a more concise version of it) - this may take me time to update it. Sat Oct 27, 2012 11:18 pm | |
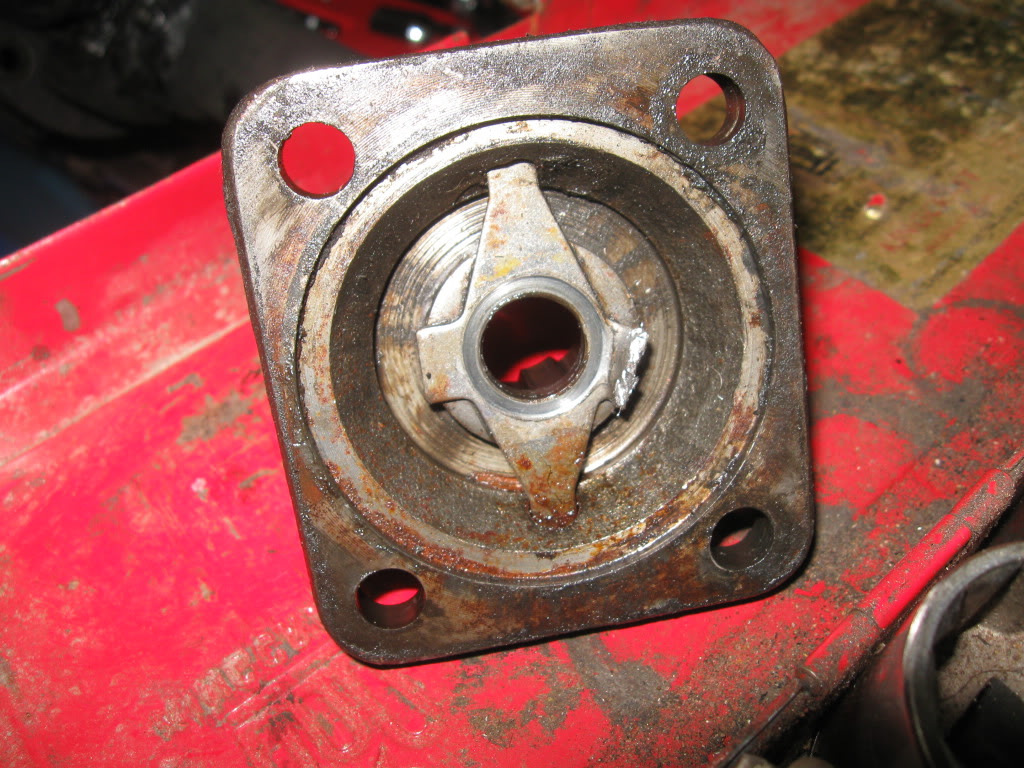
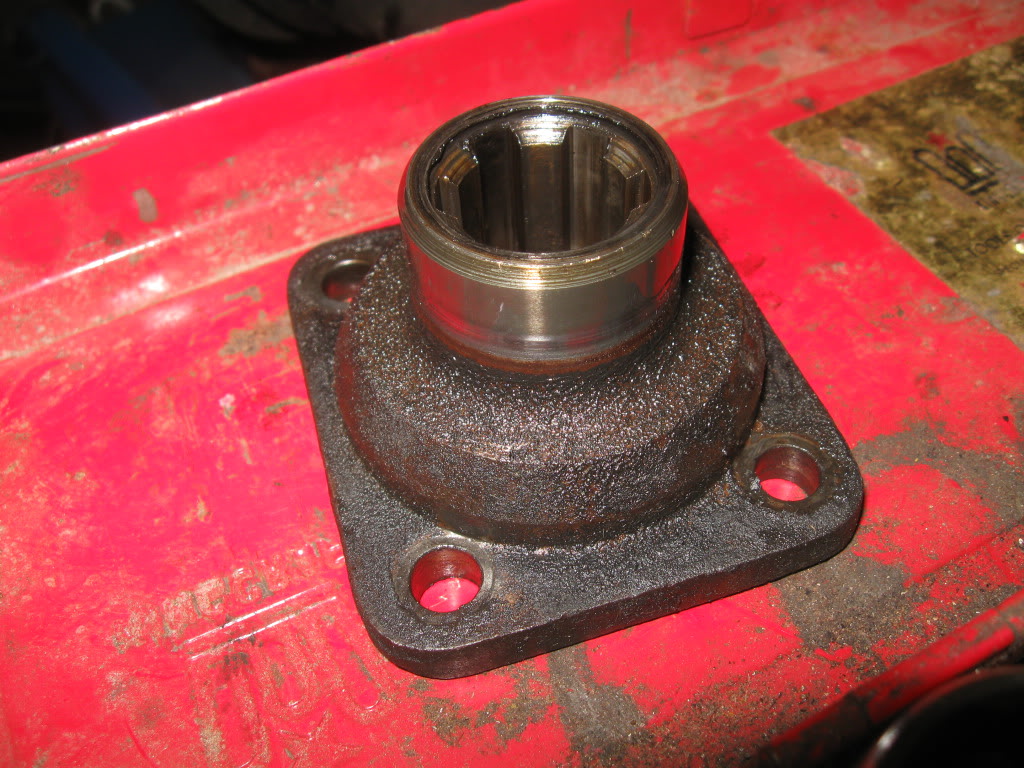
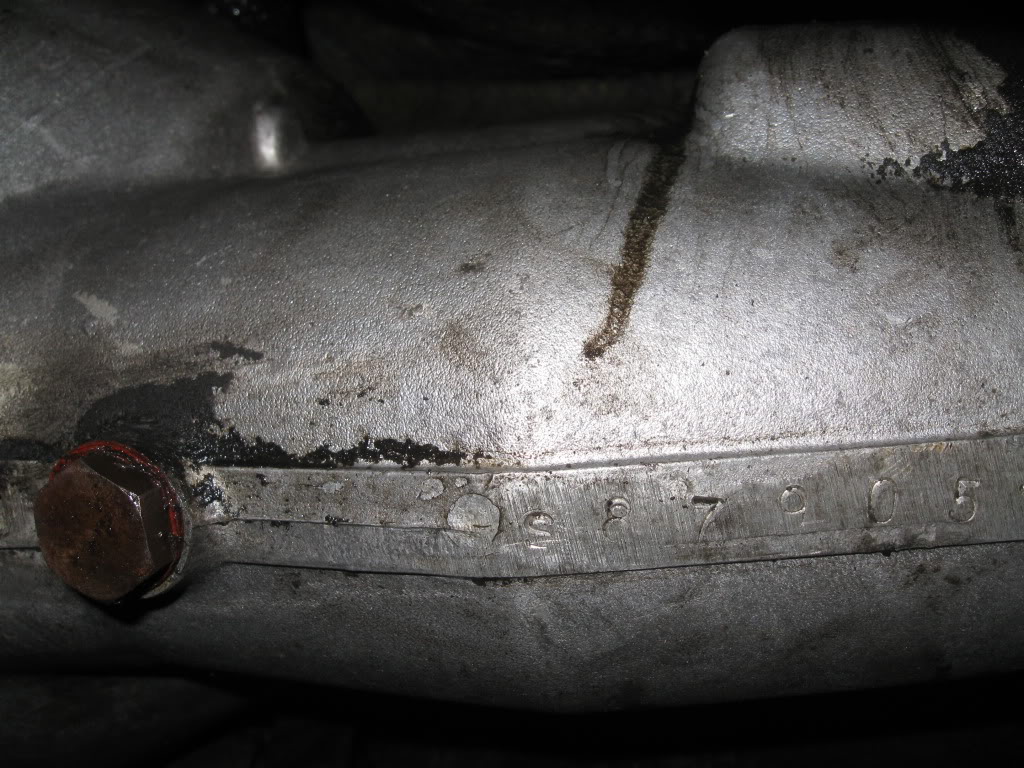
| 9th October 2011
A few more pics.....Rear end of propshaft removed. Those nuts and bolts felt tight enough and was probably not removed for a very long time (two of the bolts I have removed also had stripped threads). I had to break the rust seal to disconnect it from the differential:-  Gearbox end of the propshaft. There is clearly oil on the face of the front propshaft UJ, so I suspect that the rear gearbox seal needs to be replaced anyway:-  Gearbox propshaft flange. The propshaft bolts at this end were barely tightened at all. I suspect these were tightened up with only spanners (or a ratchet at best) rather than using a torque wrench. All of the propshaft bolts were loose and 3 of them nearly fell off !!  Rear gearbox oil seal leaking badly This will be replaced tomorrow night/sometime during the week:- 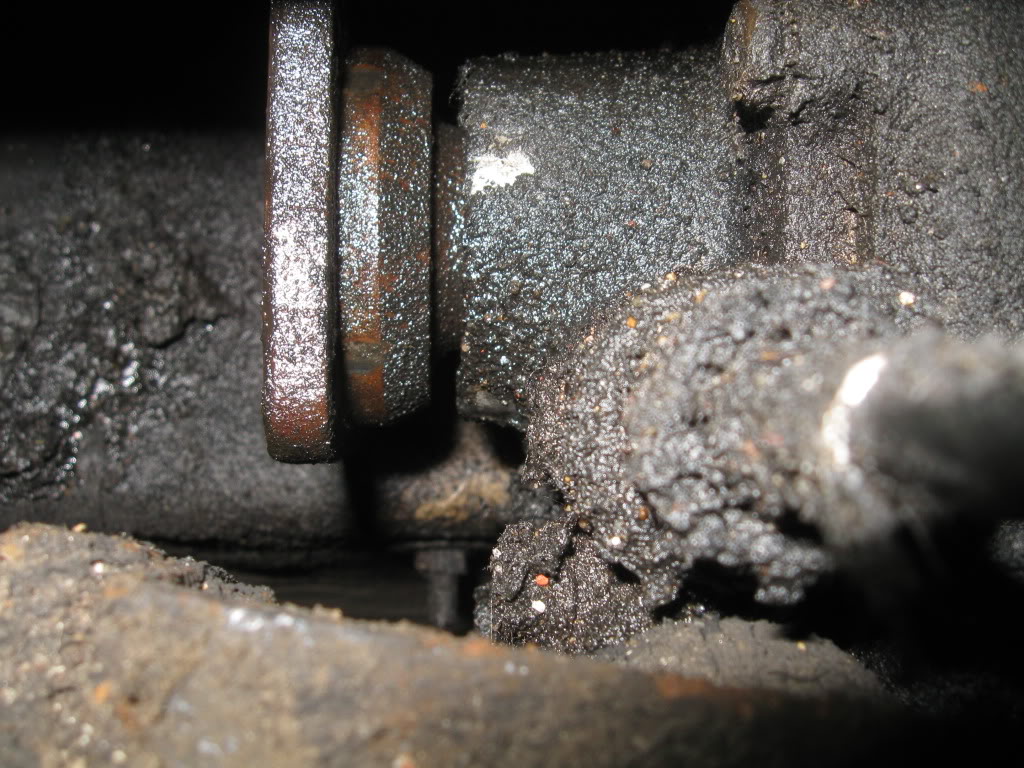  The gearbox end of the propshaft did not have the correct grease nipple fitted. It was far too short in length and it was no wonder that I couldn't grease the front UJ of the propshaft !!! The correct one is the longer grease nipple in the pic:-  The correct length of grease nipple fitted to the front UJ of the propshaft. I have now finally manage to grease that UJ, which needed doing to say the least:- 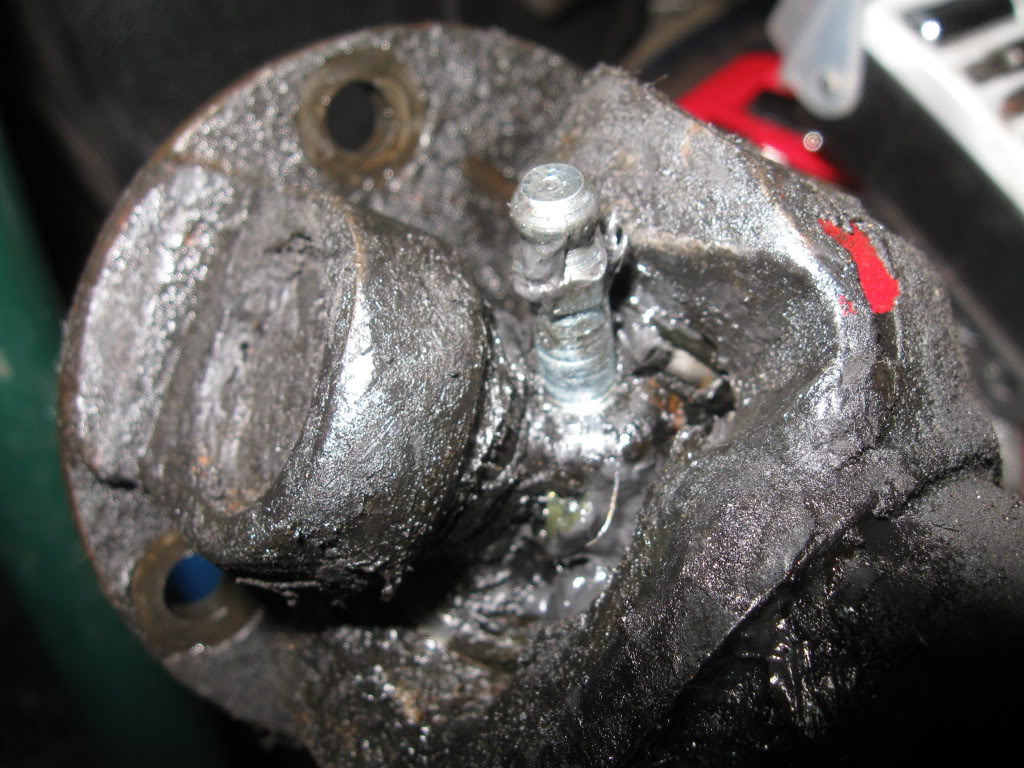 | |
|
| | |
phade
Posts : 475
Join date : 2011-08-19
Location : Kent / South East London
| |
| | |
phade
Posts : 475
Join date : 2011-08-19
Location : Kent / South East London
| | Subject: Re: 1985 Lap Rialto 2 (hopefully a more concise version of it) - this may take me time to update it. Sat Oct 27, 2012 11:34 pm | |
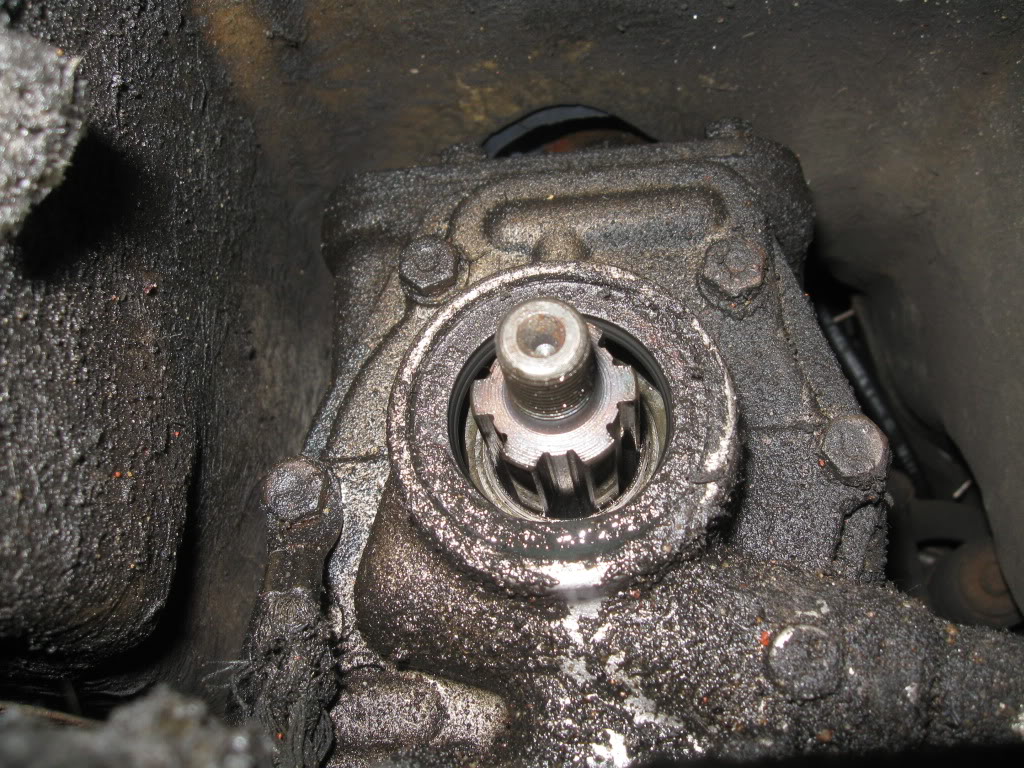
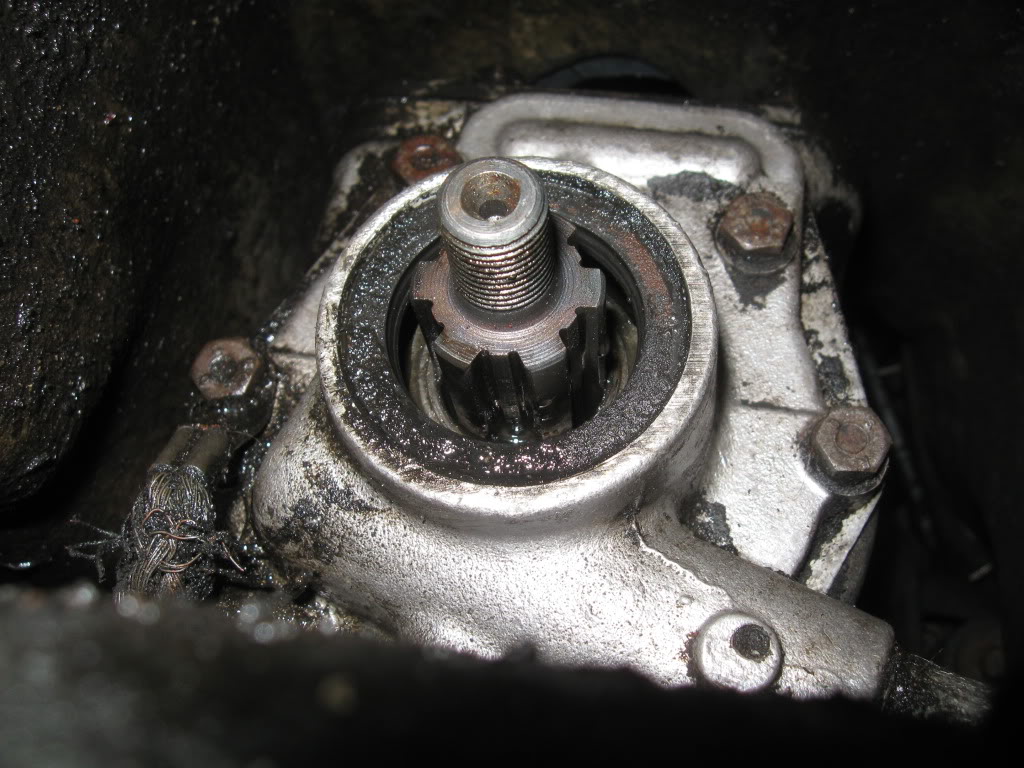
| 12th October 2011
A bit more work I did tonight....Hi everyone, I've managed to do a bit more work on my Rialto 2 tonight, which was to replace the gearbox's rear oil seal and refit the propshaft flange. Removing the old oil seal with an oil seal removal tool:- 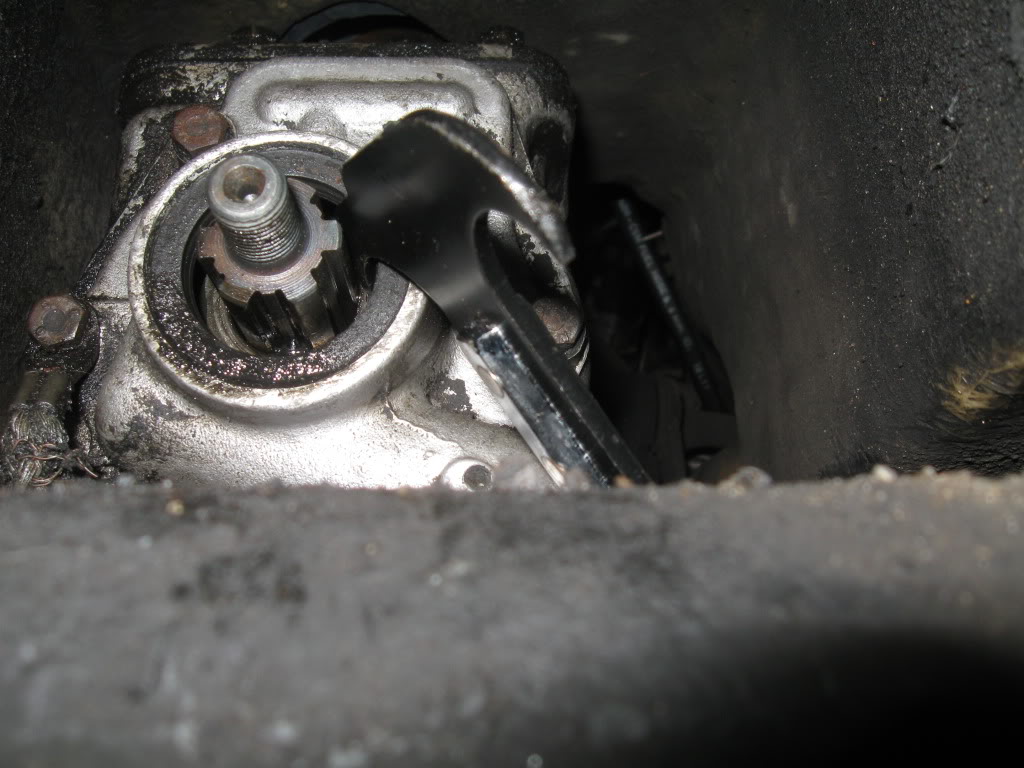 Old oil seal removed. The old oil seal has had it:- 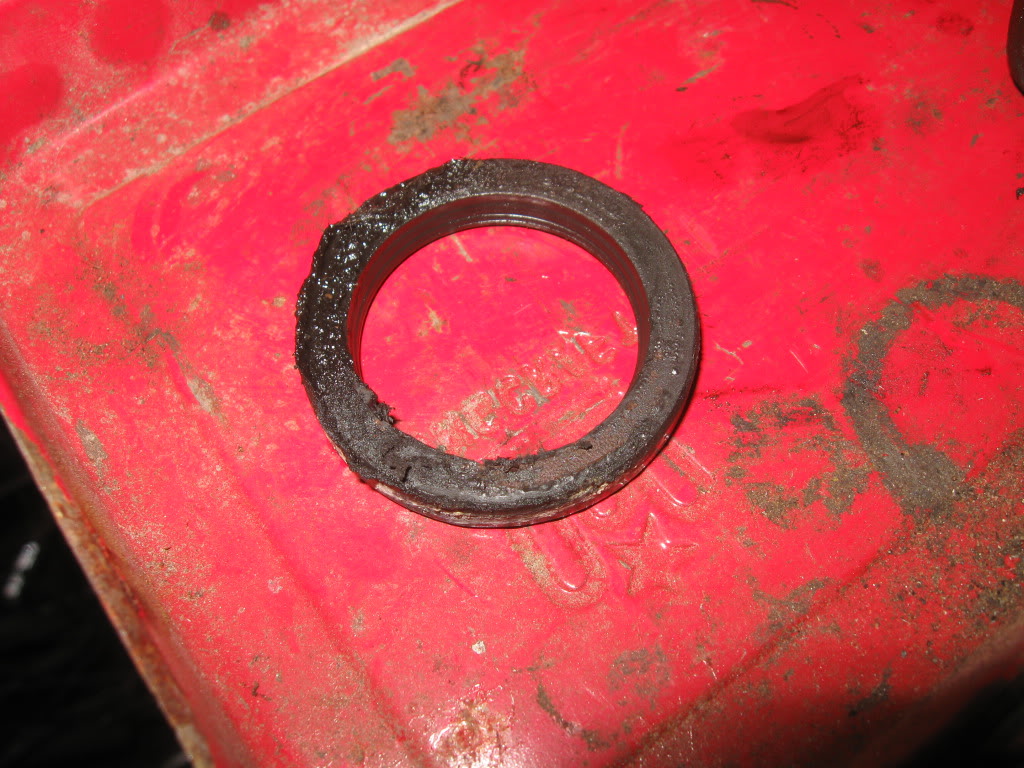  New oil seal fitted (I used a 46mm socket as a drift). I smeared the new oil seal with LM grease to prevent the new seal from being burnt off by the propshaft flange when it initially turns. I learnt that trick when I have fitted rear hub oil seals to both of my VW Beetles in the past. 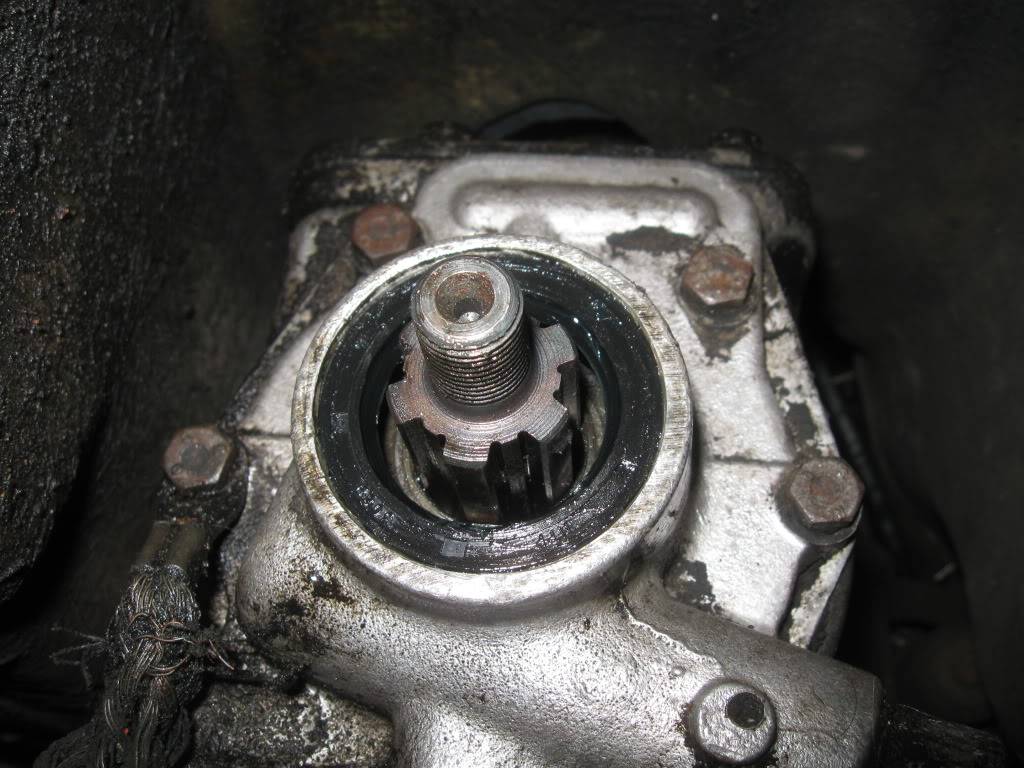 Propshaft flange being tightened correctly to 50 lbft. I used two old propshaft bolts, a very large screwdriver (wedged against the chassis) and a torque wrench to tighten it properly:- 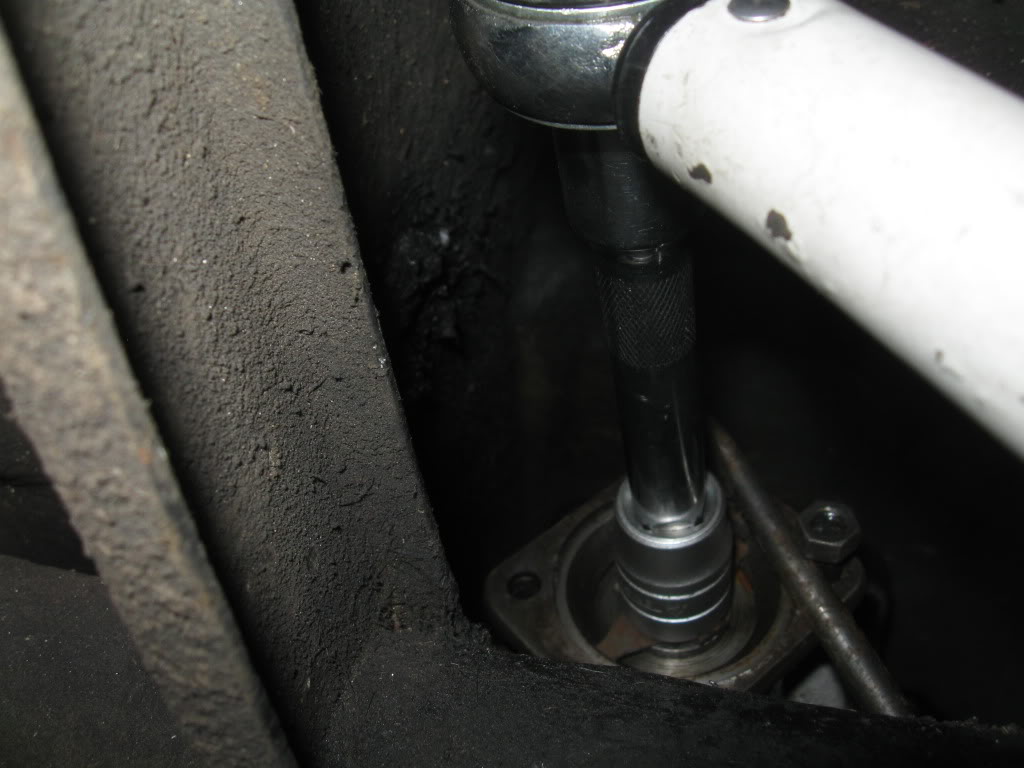 New locking tab washer fitted and nut locked in place using both of the locking tabs:- 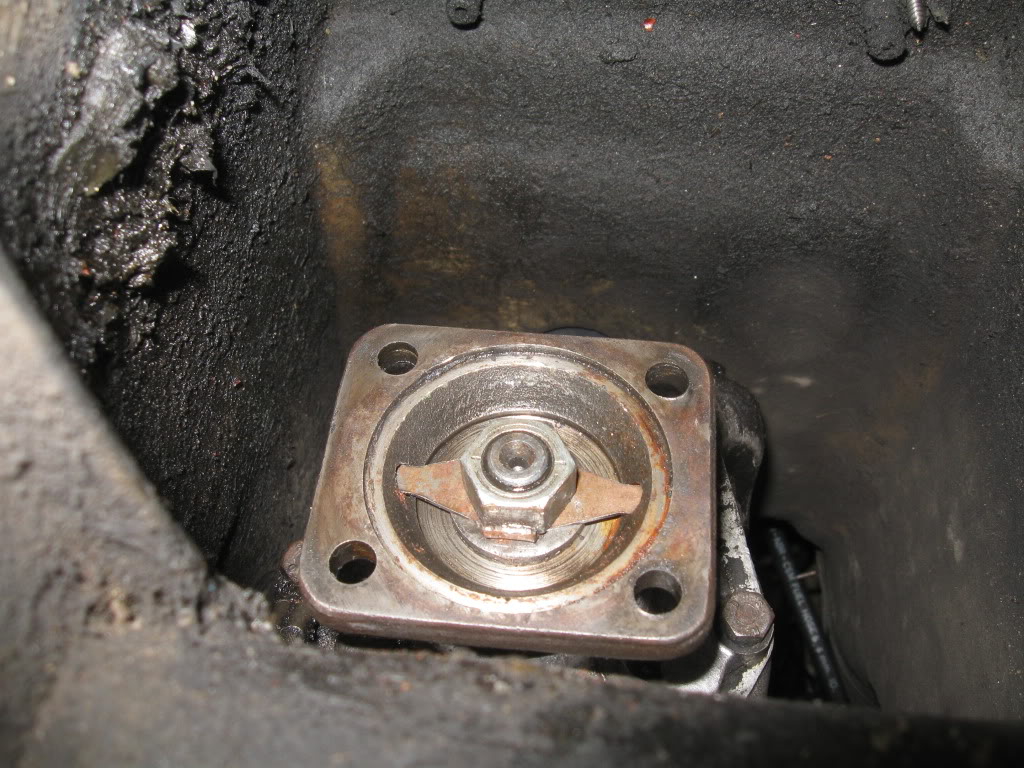 | |
|
| | |
phade
Posts : 475
Join date : 2011-08-19
Location : Kent / South East London
| | Subject: Re: 1985 Lap Rialto 2 (hopefully a more concise version of it) - this may take me time to update it. Sat Oct 27, 2012 11:39 pm | |
| 13th October 2011
Propshaft refittedRear of propshaft supported by an axle stand. This makes the front end of the propshaft easier to refit:-  Propshaft bolts being correctly tightened to 30 lbft. The front ones were very difficult to tighten properly and took me at least 2 hours to refit the front part of the propshaft:- 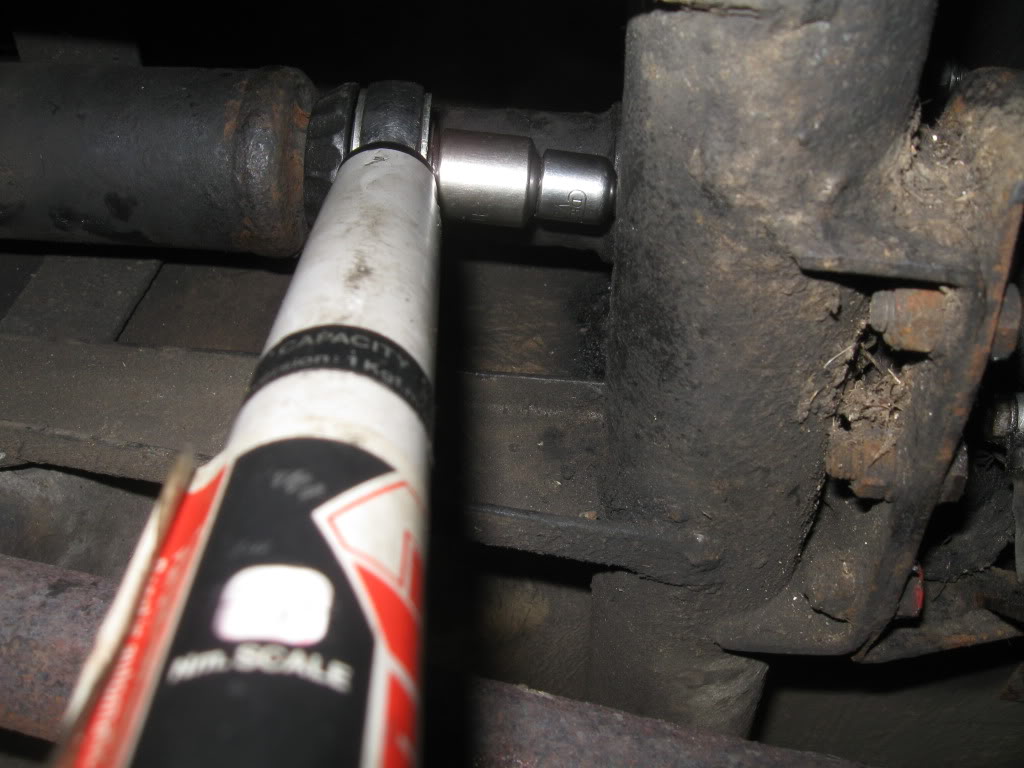 Front end of propshaft refitted with new nylock nuts and new bolts:- 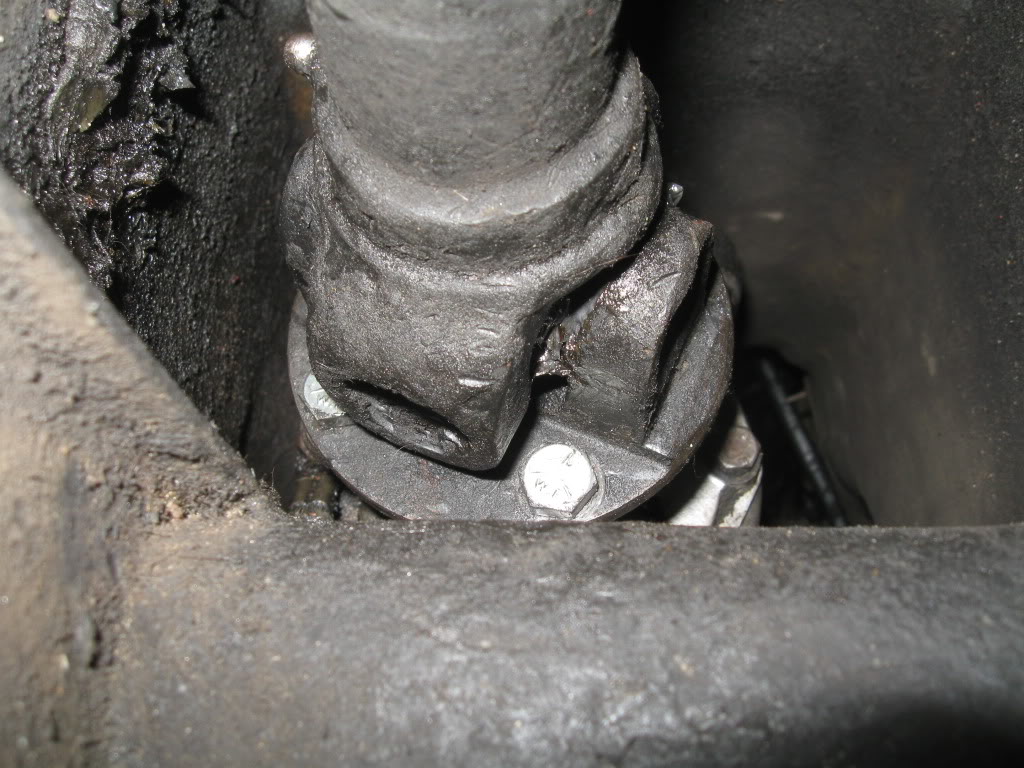 Rear end of propshaft refitted with new nylock nuts and new bolts. The rear end of the propshaft was a lot easier and a lot quicker to refit and took me about 15 minutes:-  Hopefully, I won't have to do any work on my Rialto for a while and I also hope that there won't be any other nasty surprises.  | |
|
| | |
phade
Posts : 475
Join date : 2011-08-19
Location : Kent / South East London
| | Subject: Re: 1985 Lap Rialto 2 (hopefully a more concise version of it) - this may take me time to update it. Sat Oct 27, 2012 11:48 pm | |
| 26th October 2011
Battery replacement - could be useful for future referenceHi everyone, A minor update on my Rialto 2 estate, I have replaced it's old (dying) Numax 055 battery for a new Varta 055 battery and it fits a treat. The Varta battery is 4mm taller than the Numax battery and it has also got a higher battery capacity (40Ah compared to the Numax's 36Ah). It's also a lot cheaper than the Numax 104 (28Ah) battery, also from Tayna. The only bits the 055 battery needs are the Jap to UK battery post adaptors as shown in the pic below. 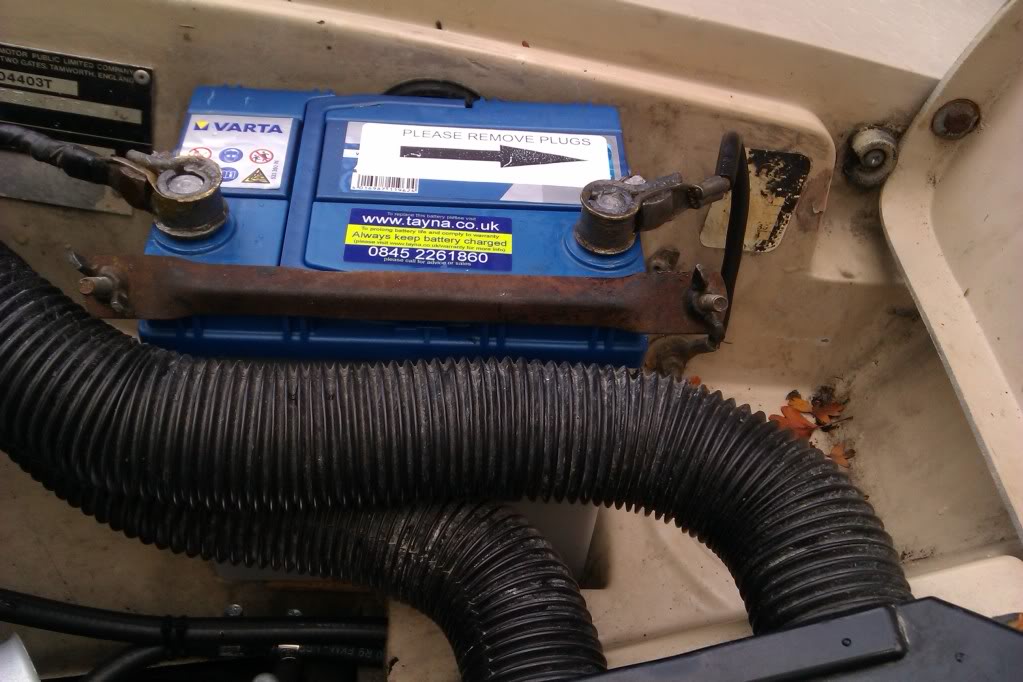 I also gave it a short test run (it's the first time I managed to give it a test run after replacing the rear gearbox oil seal and propshaft bolts) and there was no vibration from the gear lever/gearbox at all. | |
|
| | |
phade
Posts : 475
Join date : 2011-08-19
Location : Kent / South East London
| | Subject: Re: 1985 Lap Rialto 2 (hopefully a more concise version of it) - this may take me time to update it. Sat Oct 27, 2012 11:49 pm | |
| 6th November 2011
A minor update
Hi everyone,
I have replaced the fuel filter and the two fuel hoses (using two short lengths of 5.6mm Codan SAE J30 R9 fuel hose) next to it. Both of these perished fuel hoses didn't fit the fuel filter properly and the fuel filter was blocked with sediment.
I plan to leave the last length of (cheap and nasty) Gates fuel hose for now as it doesn't appear to be perished at present. Having said that, I do plan to replace that last length of fuel hose fairly soon. | |
|
| | |
phade
Posts : 475
Join date : 2011-08-19
Location : Kent / South East London
| | Subject: Re: 1985 Lap Rialto 2 (hopefully a more concise version of it) - this may take me time to update it. Sat Oct 27, 2012 11:53 pm | |
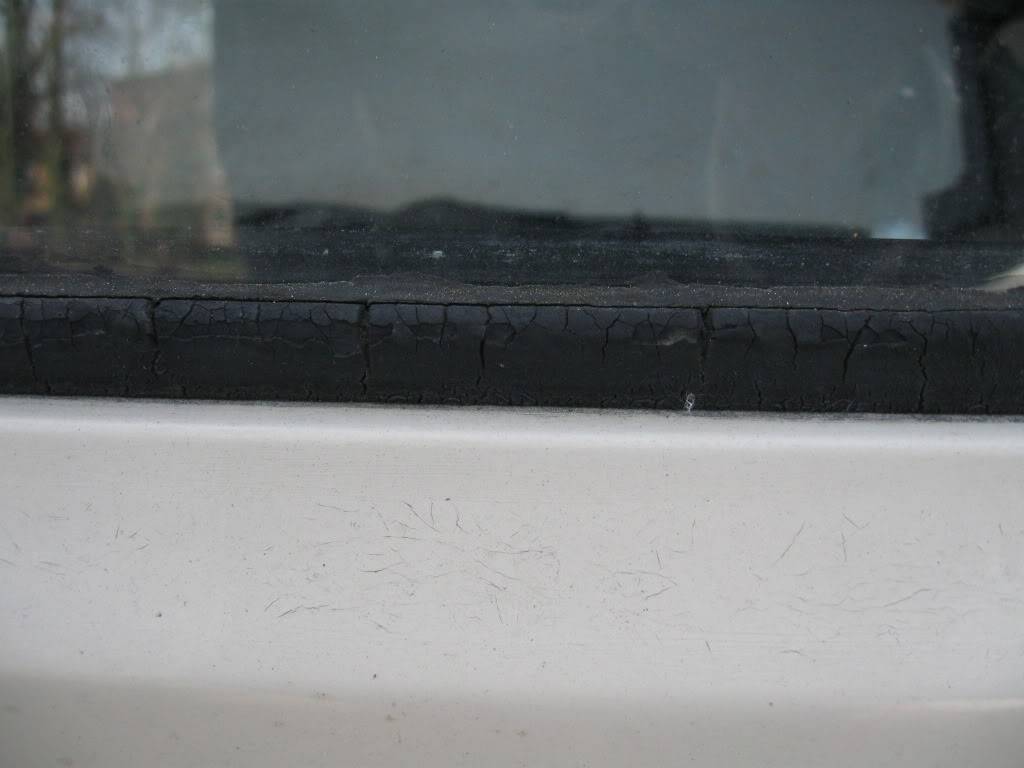
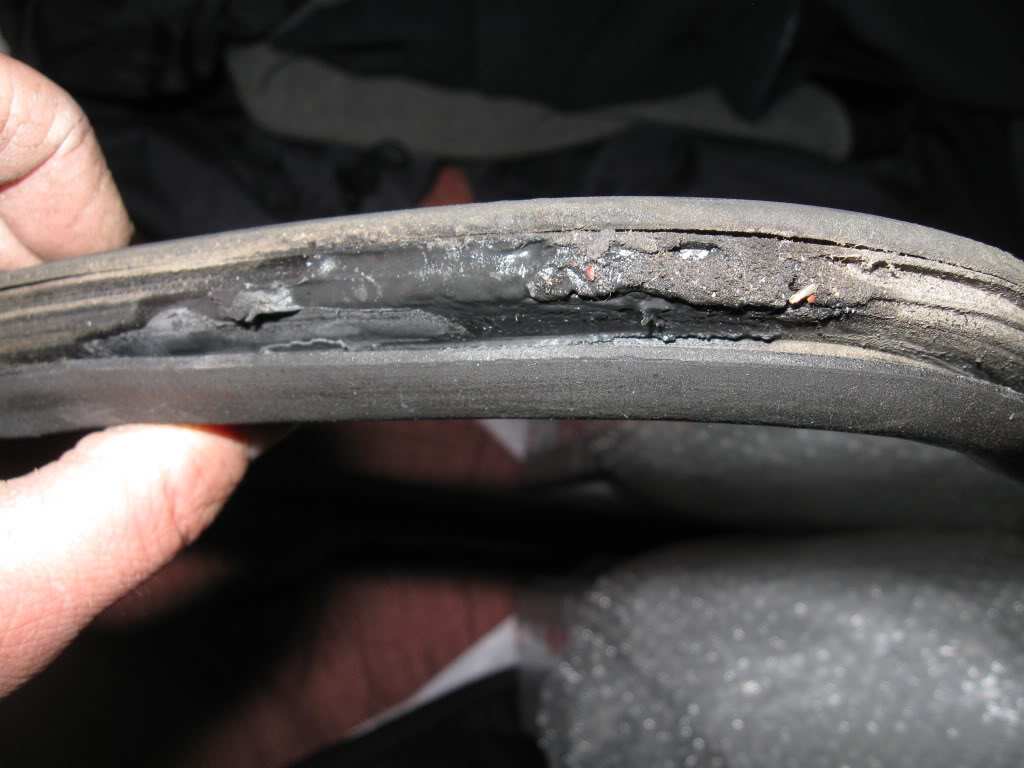
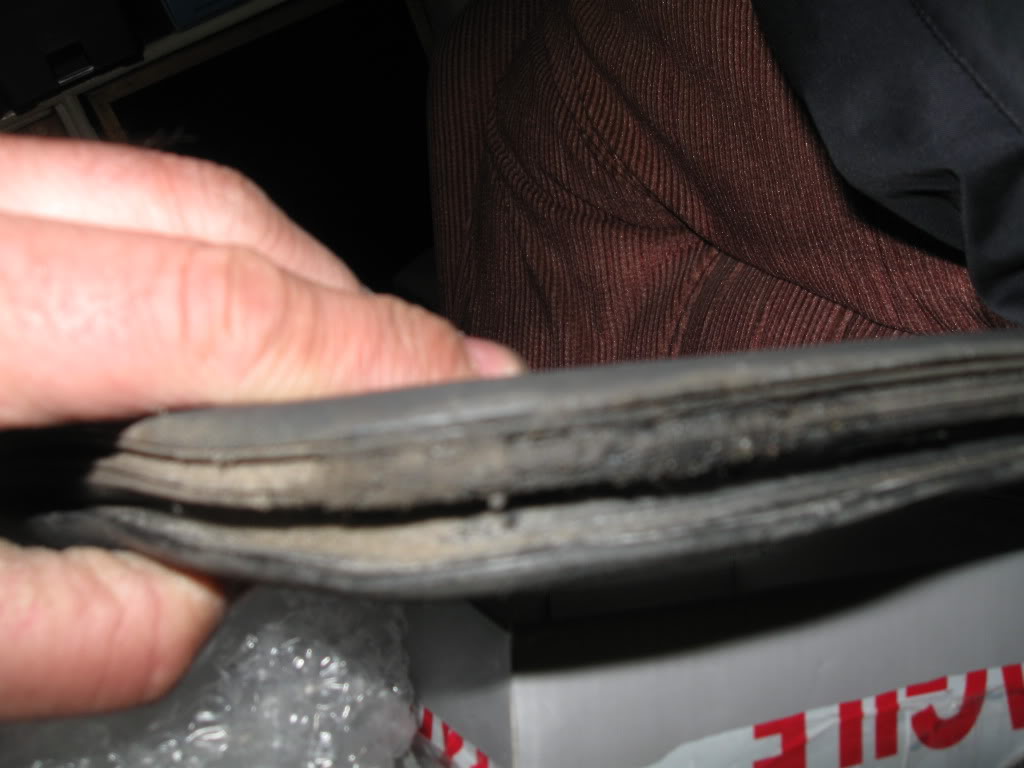
| 16th December 2011
A minor update (well it was a few weeks ago)Hi everyone, Just a minor update to my Rialto a few weeks ago and that was I have finally managed to stop it's wheel trims from falling off. It's rear N/S wheel had a very slight "flat" dent on it's outer rim, so it got changed. Wheel trims with the blue R sticker on them (from Dan and reliant-reviver):-   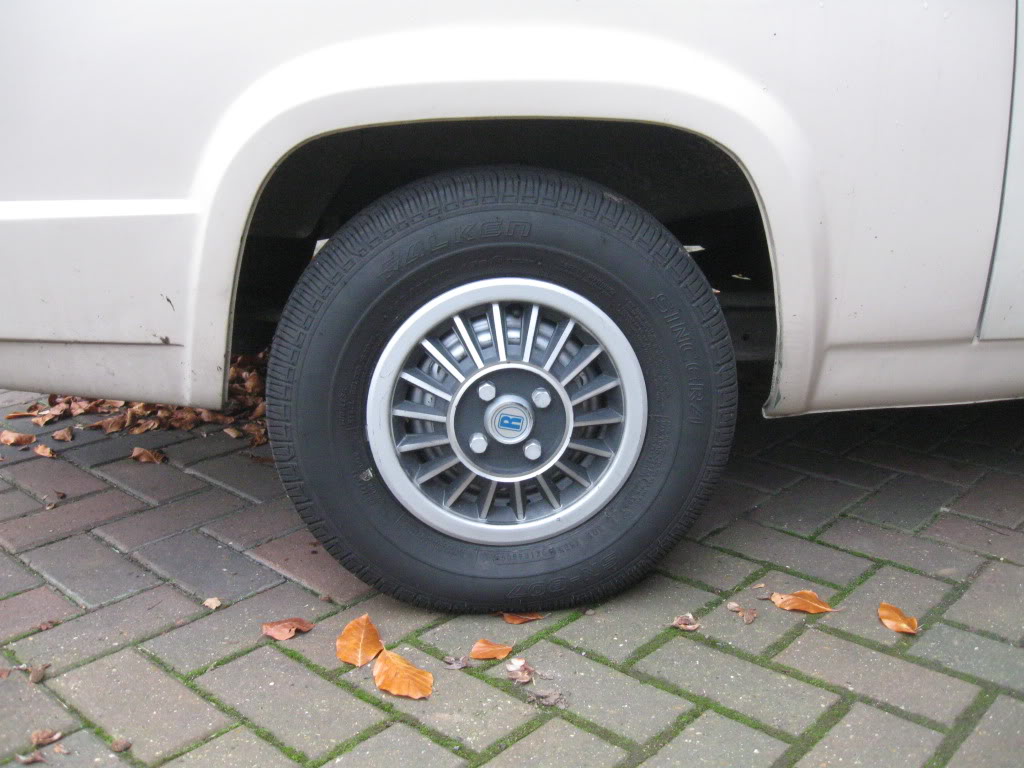 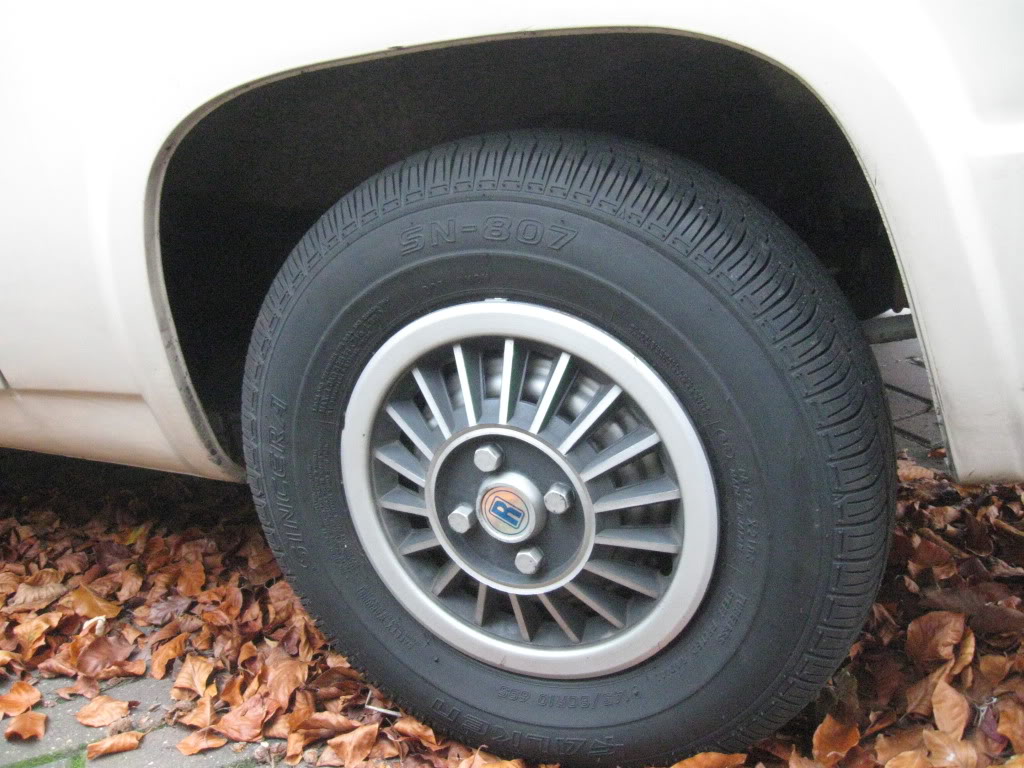 | |
|
| | |
phade
Posts : 475
Join date : 2011-08-19
Location : Kent / South East London
| | Subject: Re: 1985 Lap Rialto 2 (hopefully a more concise version of it) - this may take me time to update it. Sun Oct 28, 2012 12:02 am | |
| 29th December 2011
Finally finished tidying up it's wiring today (I have put it off for a few months...)Hi everyone, I finally decided to sort out the brake fluid level switch's wiring today (in anticipation for this year's MOT). Burnt out black ground wire: 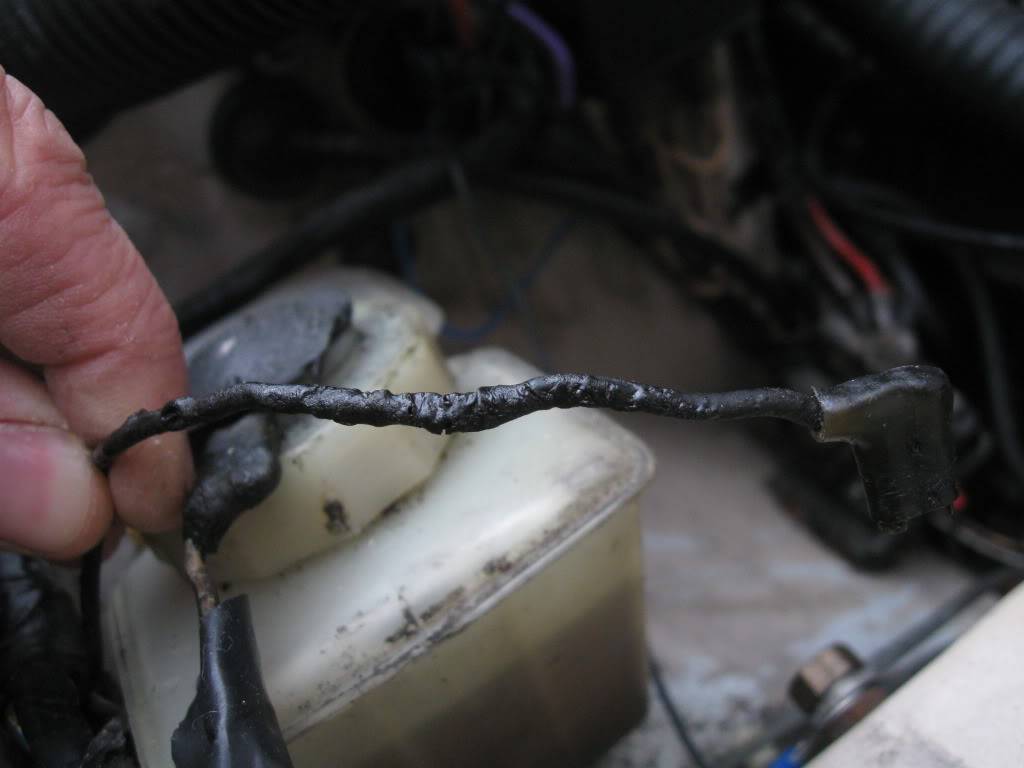 Re-insulated with black heatshrink and a new crimp connector: 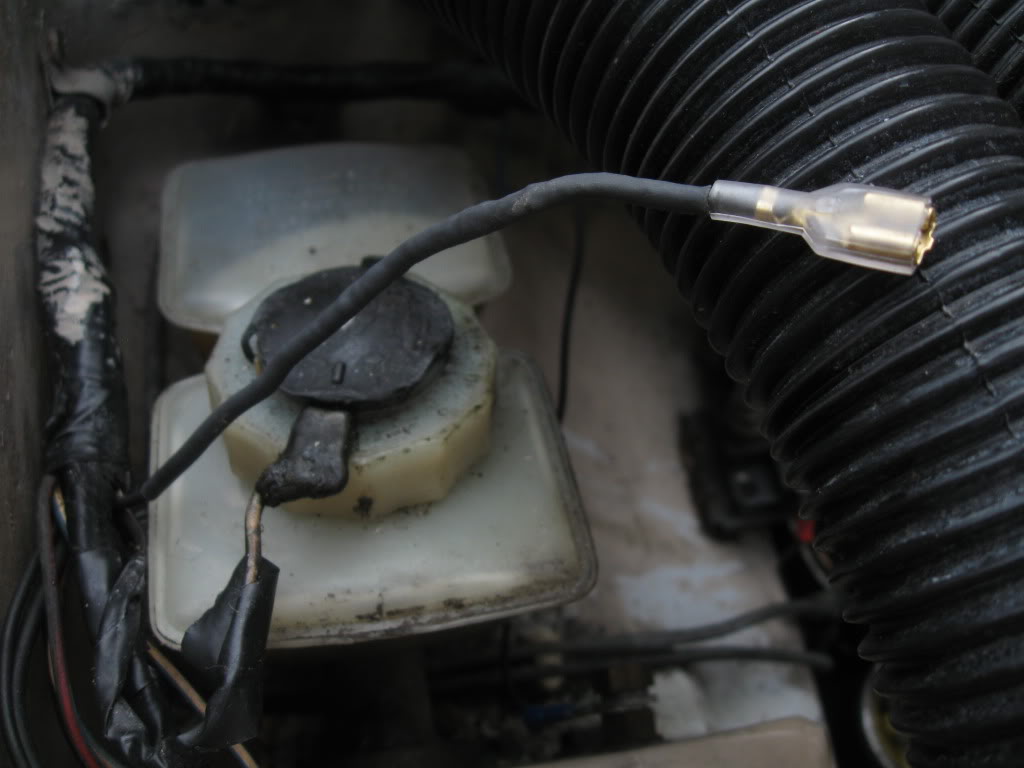 Black wire with white tracer (from brake fluid level warning light) burnt out: 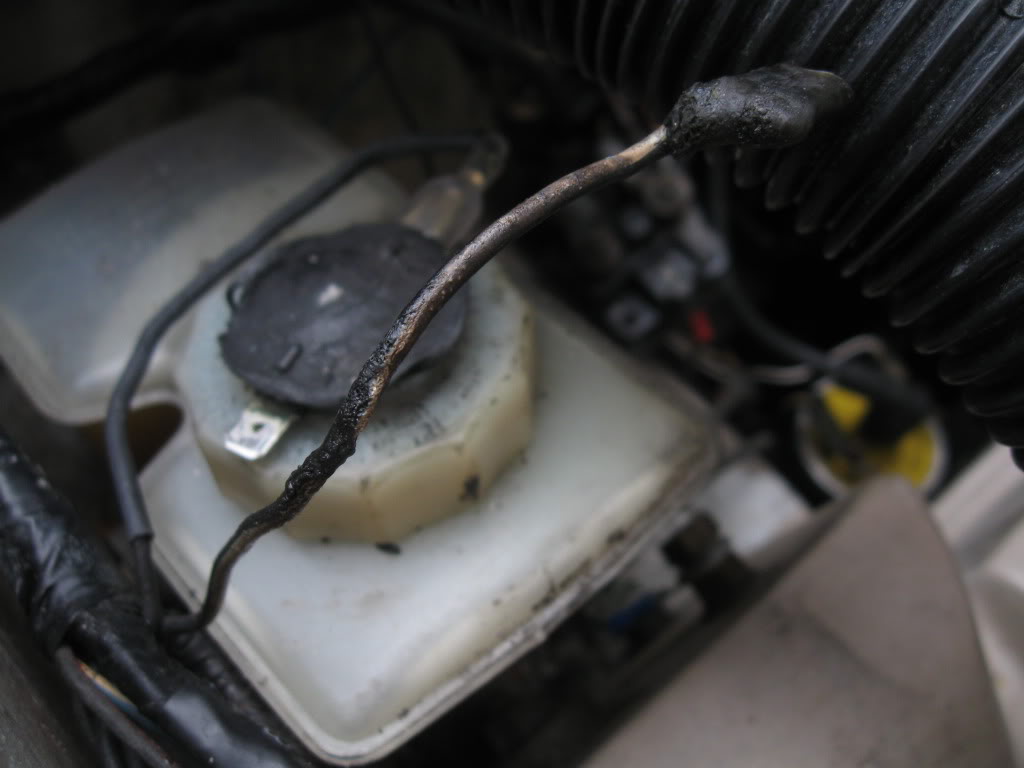 Black wire with white tracer covered with black heatshrink with short lengths of white heatshrink (I could not get black heatshrink with white tracer from anywhere):  The other wire in the pic was a test wire I used to make sure that the brake fluid level warning switch's wiring was working correctly. Both wires re-attached to the brake fluid level switch: 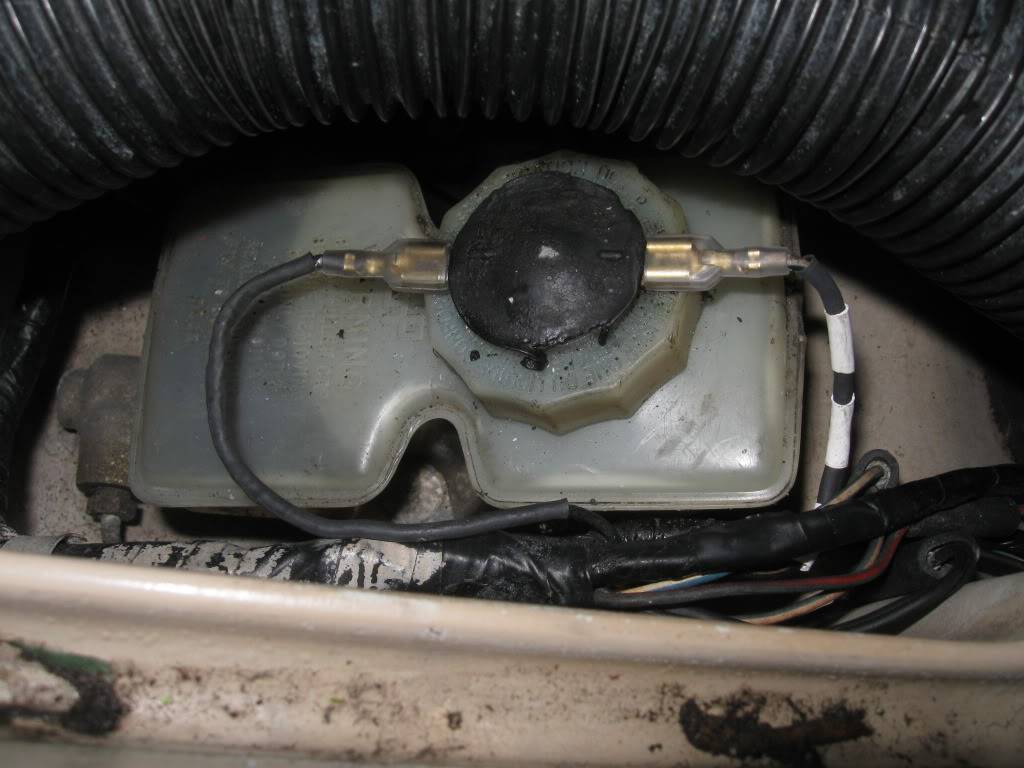 | |
|
| | |
phade
Posts : 475
Join date : 2011-08-19
Location : Kent / South East London
| | Subject: Re: 1985 Lap Rialto 2 (hopefully a more concise version of it) - this may take me time to update it. Sun Oct 28, 2012 3:13 am | |
| 29th January 2012
A bit more work I did on my Rialto 2 7th and 8th JanHi everyone, Just to update this thread a bit. I decided to replace my Rialto 2's number plates as they didn't look very good. Old rear number plate:- 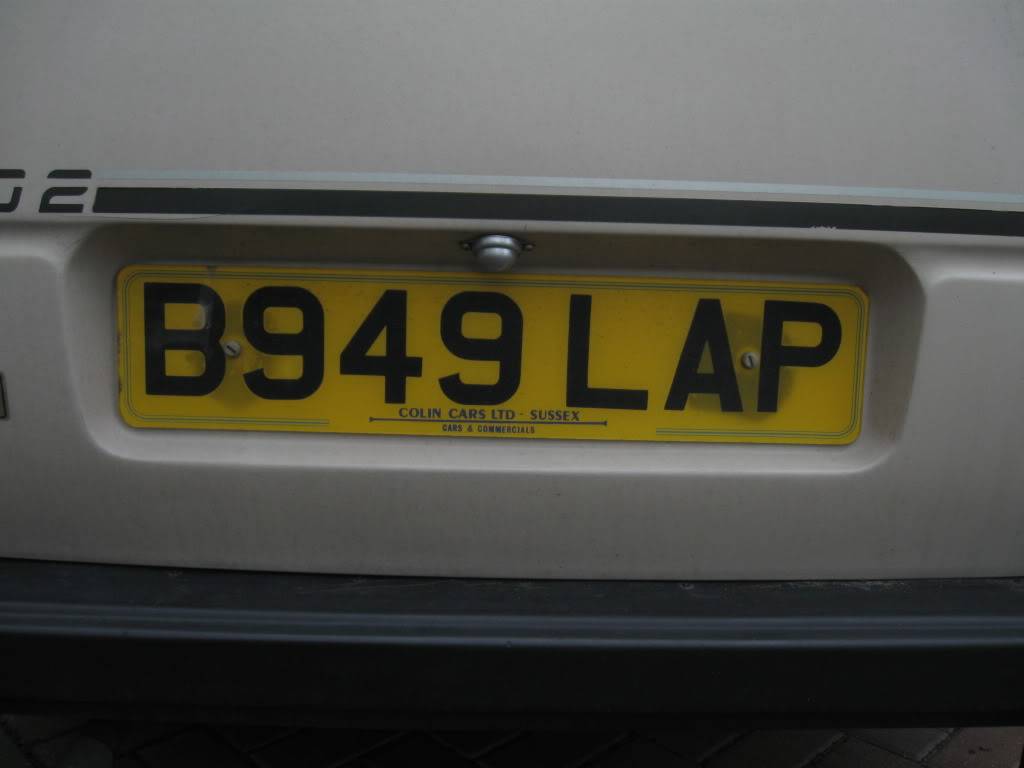 Some muck behind the old number plate, so I decided to clean that muck off:- 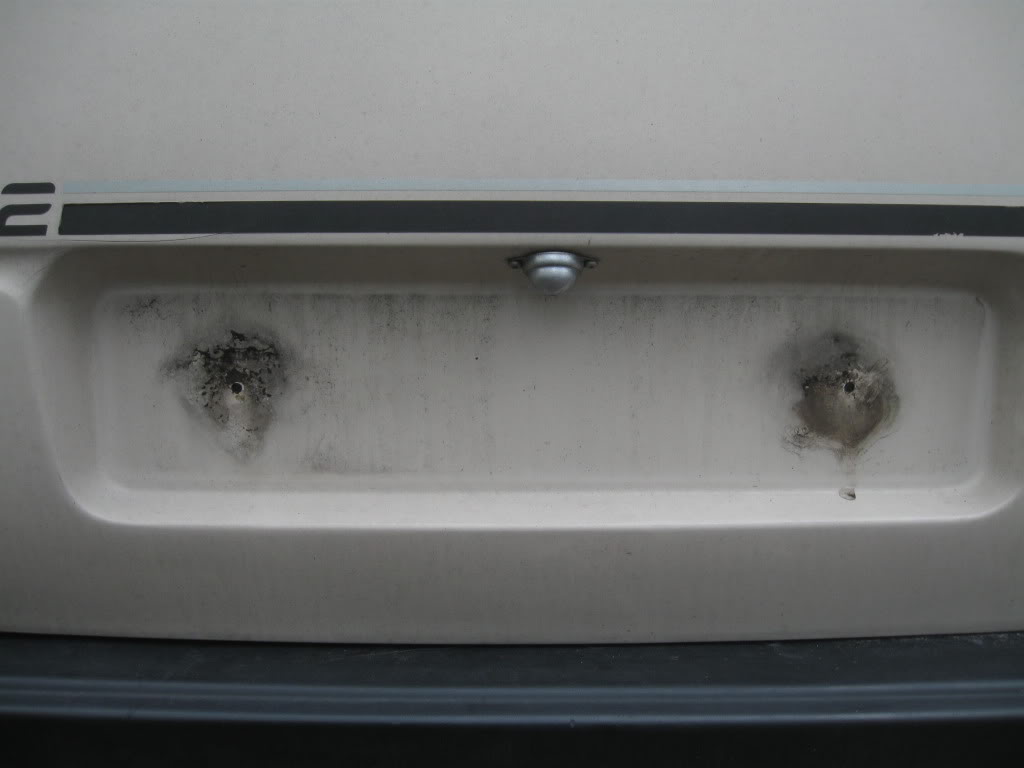 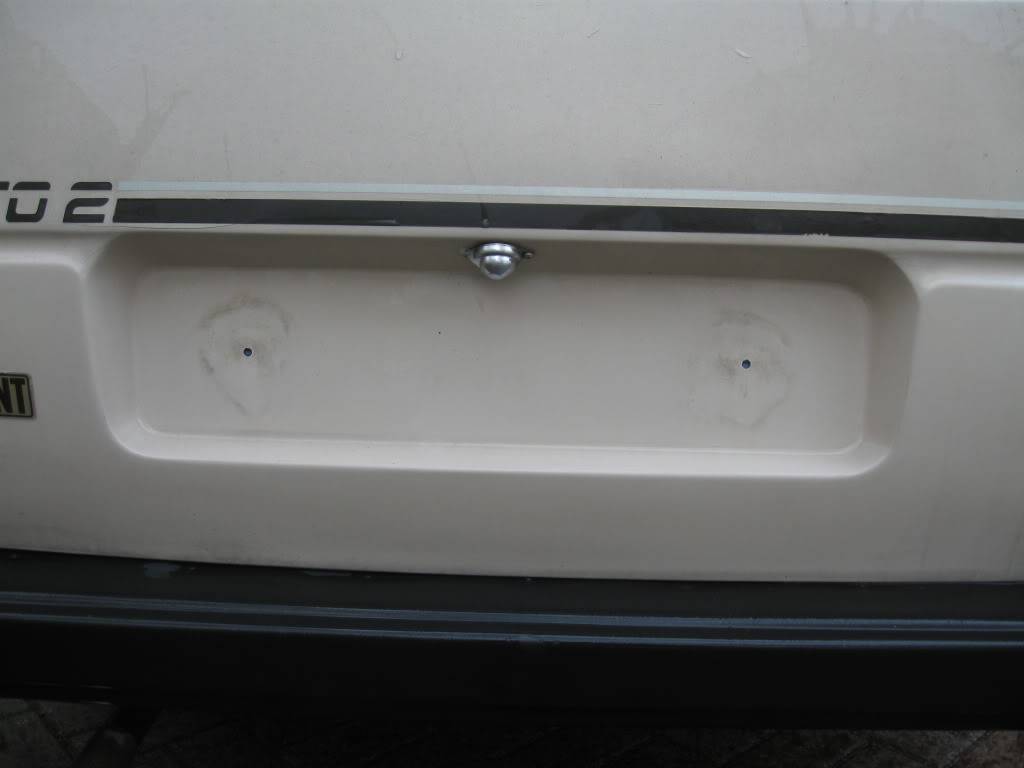 New rear number plate:- 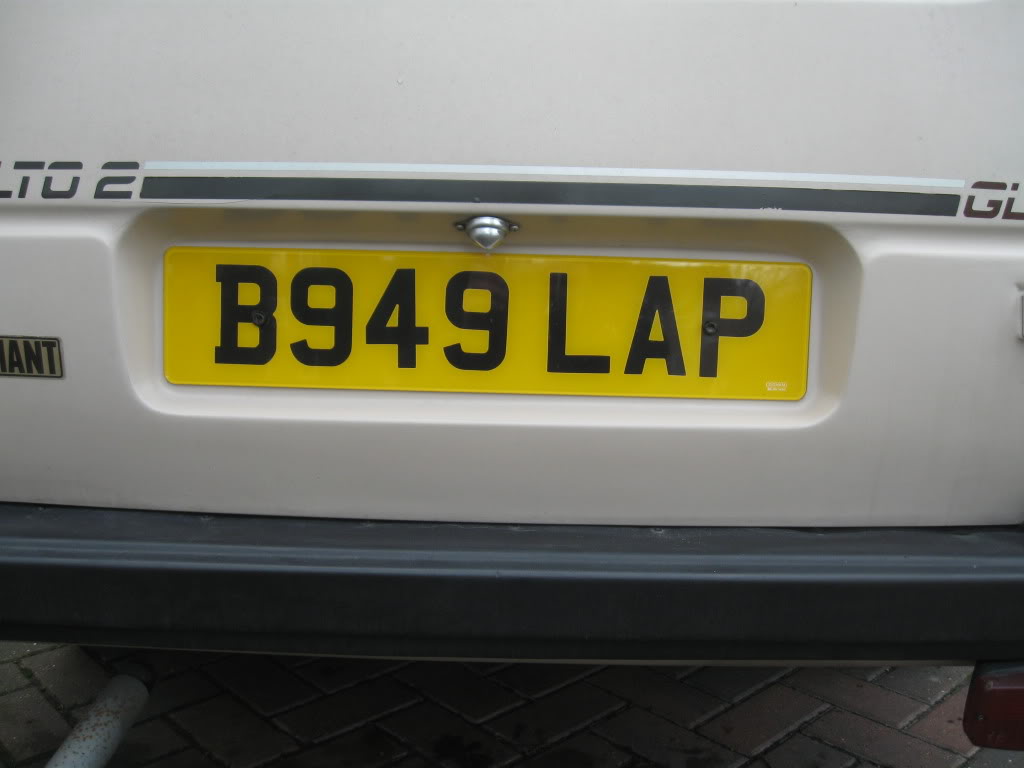 The old front number plate was broken, so that had to be replaced as well:-  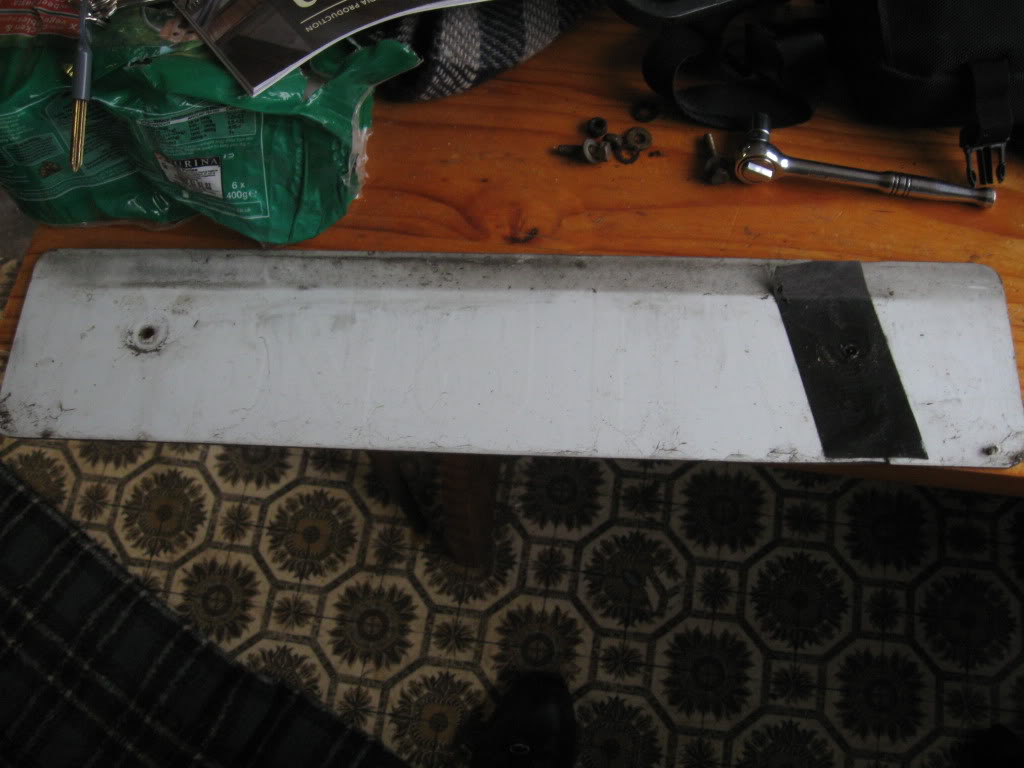 I then decided to clean the muck off from where the front number plate was:- 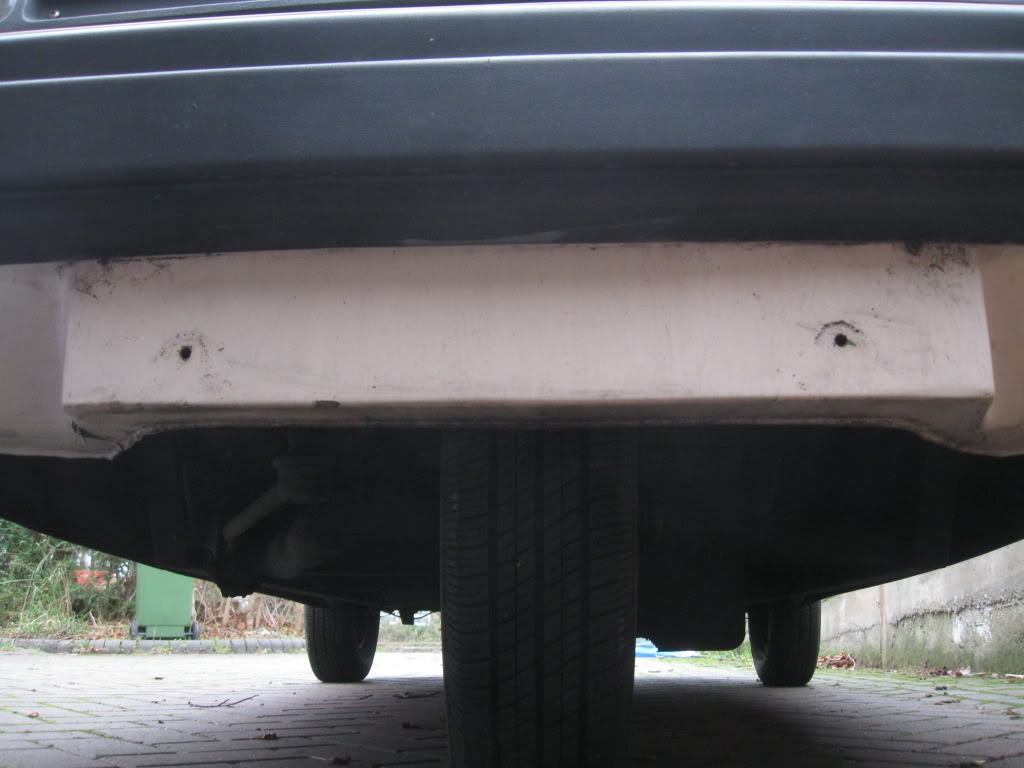  New front number plate fitted:-  | |
|
| | |
phade
Posts : 475
Join date : 2011-08-19
Location : Kent / South East London
| | Subject: Re: 1985 Lap Rialto 2 (hopefully a more concise version of it) - this may take me time to update it. Sun Oct 28, 2012 3:26 am | |
| 29th January 2012
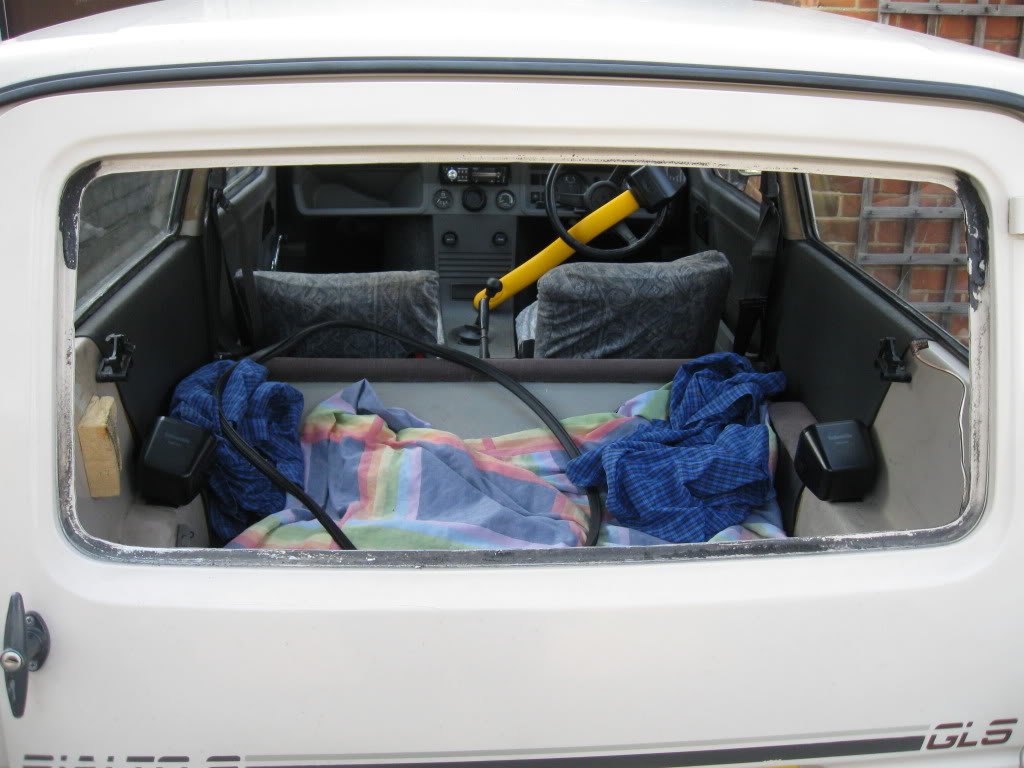
Finally got round to replacing the last section of fuel hose todayI also did some more work on my Rialto 2 today and that was to replace the last section of fuel hose next to the fuel tank. Rear boot floor as it was. The fuel tank inspection cover was pop-riveted into place:- 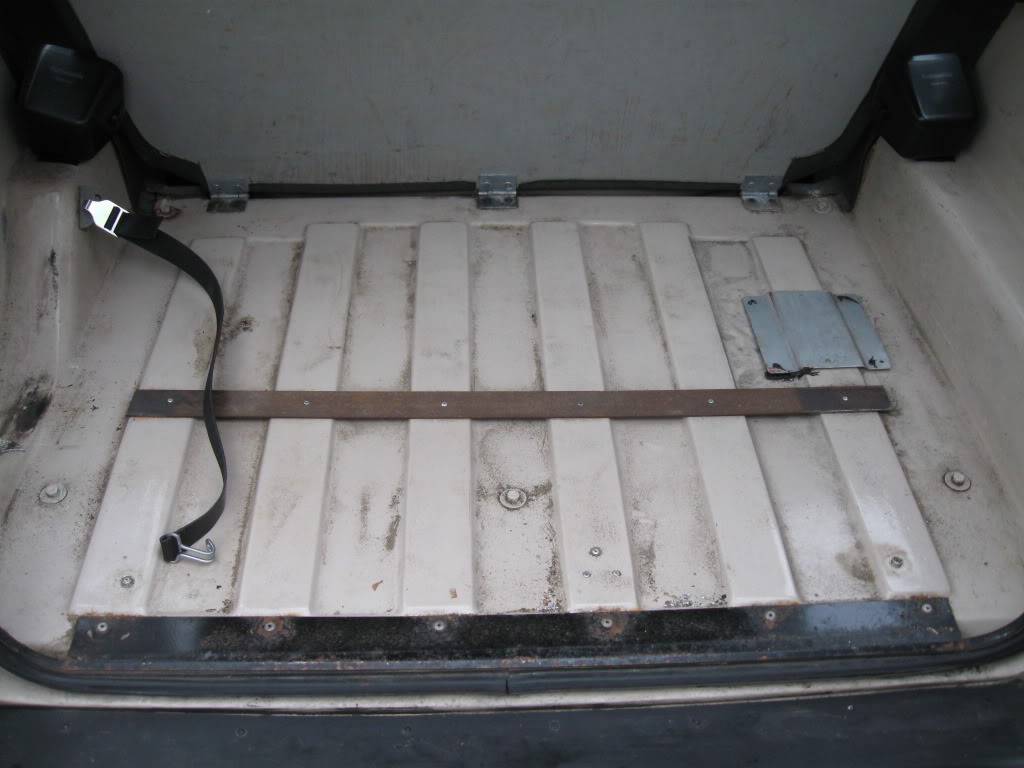 Not sure where that swarf came from, so I decided to hoover that up:- 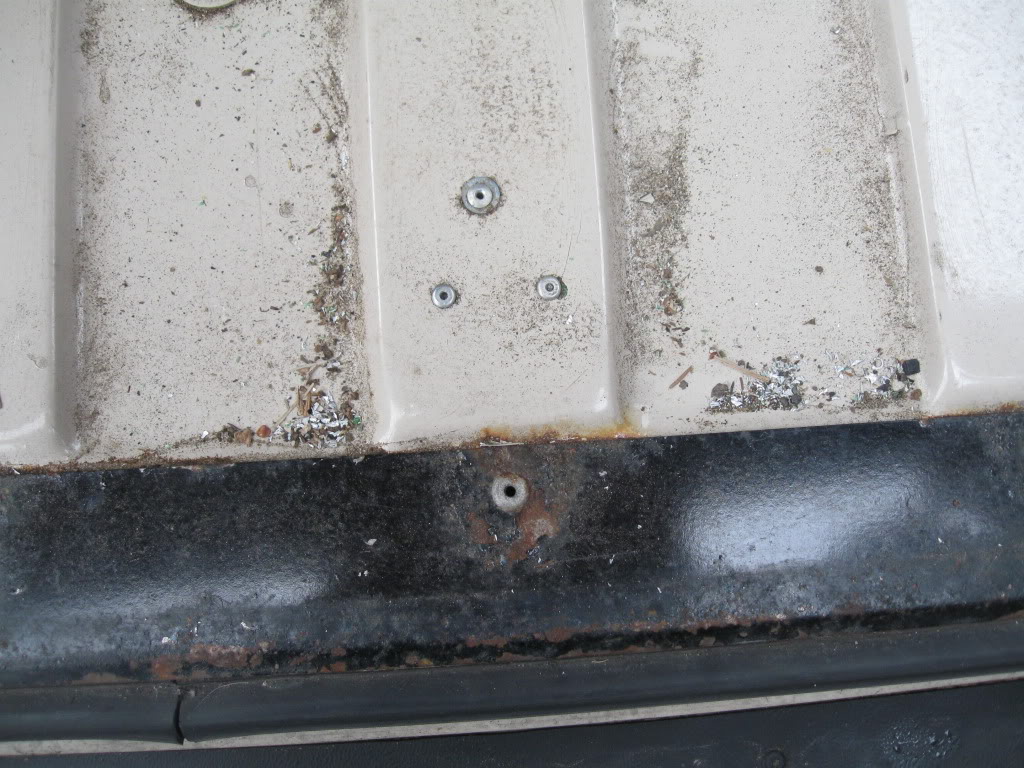 Not very nice looking inspection hole. :-  I was originally planning to replace the aluminium inspection cover with a nice circular plastic inspection cover that is normally used on a boat, but as that hole didn't cover a flat surface, I had to re-use the alluminium inspection cover. Old Gates fuel hose that was fitted to the car without any fuel hose clips !! :- 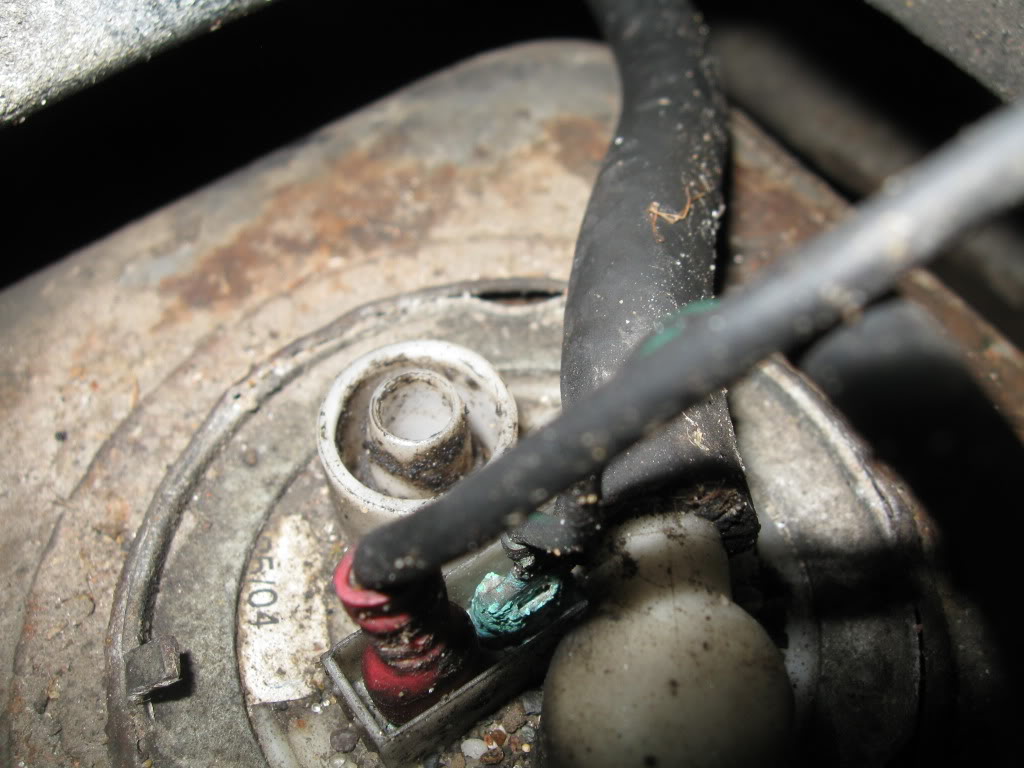 I then removed the old Gates fuel hose as it felt too soft and found that it was perished anyway:- 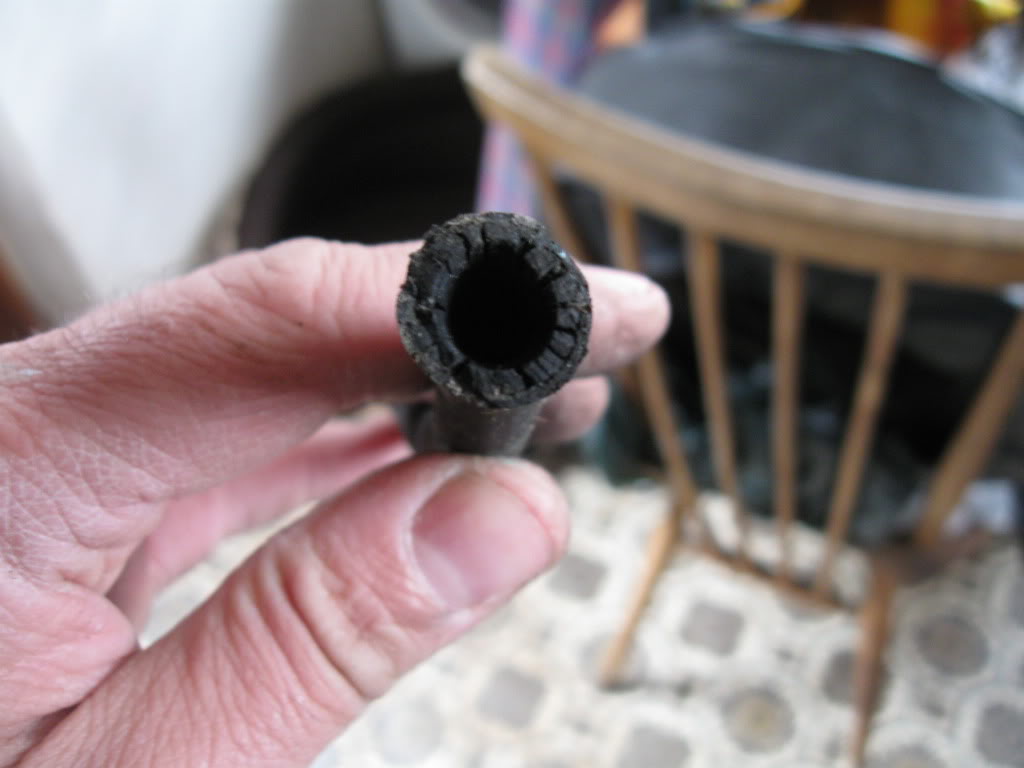 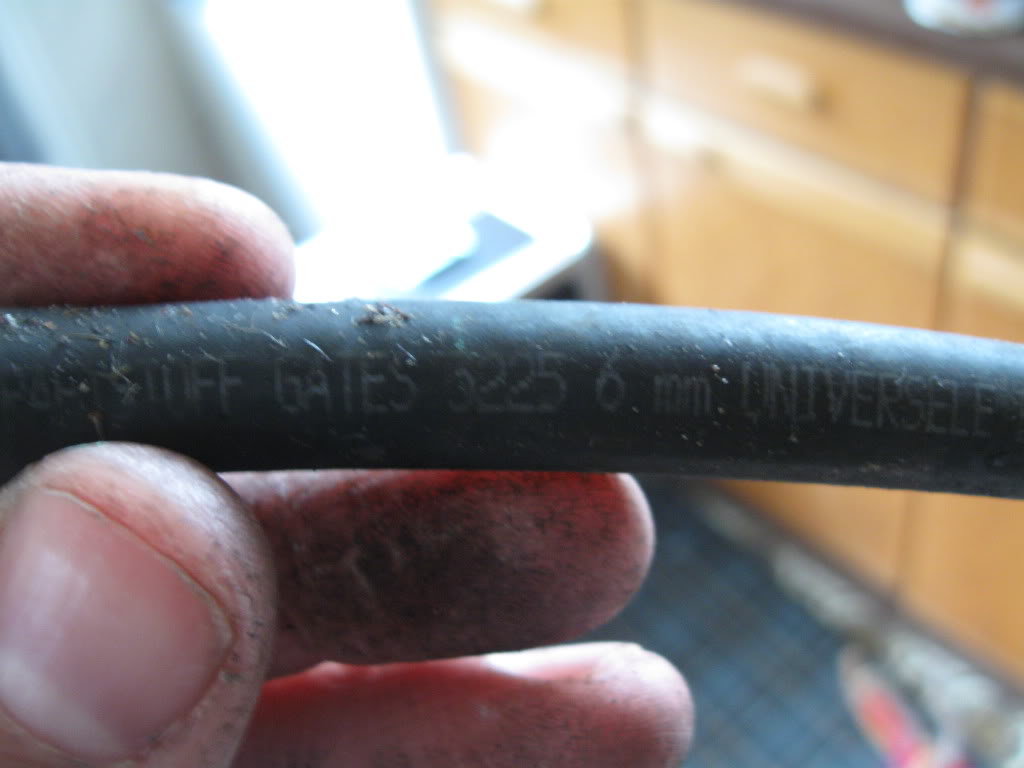 New Codan 5.6mm SAE J30 R9 fuel hose fitted. I used a small section of the old Gates fuel hose to prevent the nylon fuel pipe from being chaffed against the chassis:- 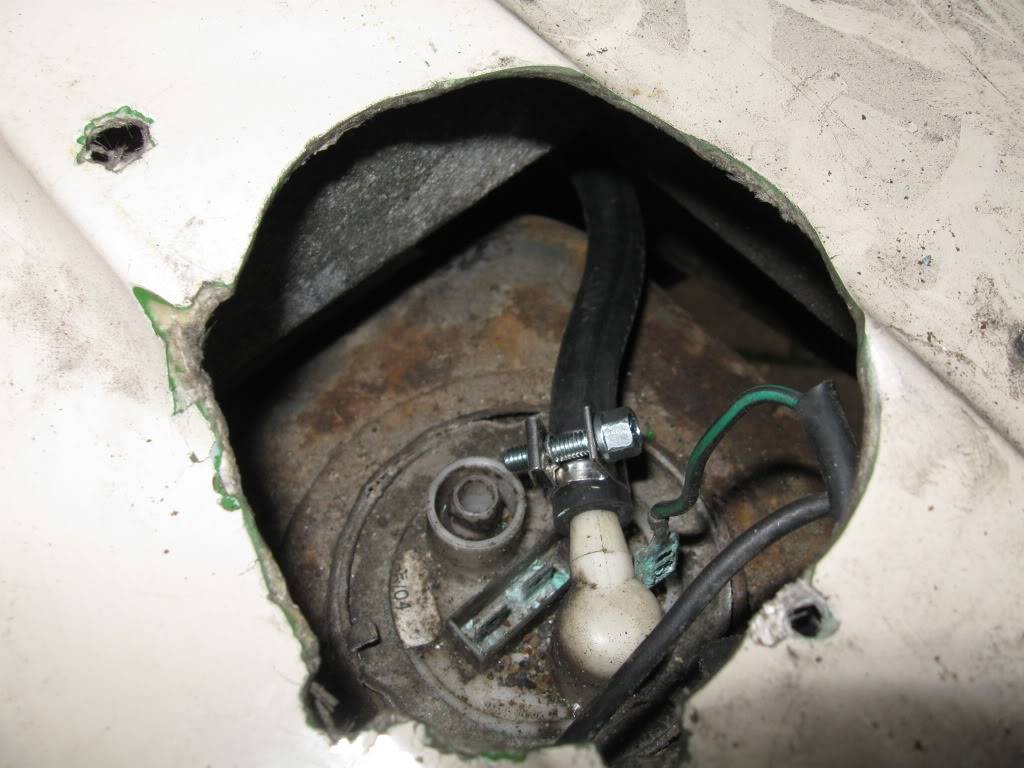  Corroded fuel gauge sender wire. The crimp connector its self looked ok, so I decided to clean it up with a fibreglass pen and WD40:- 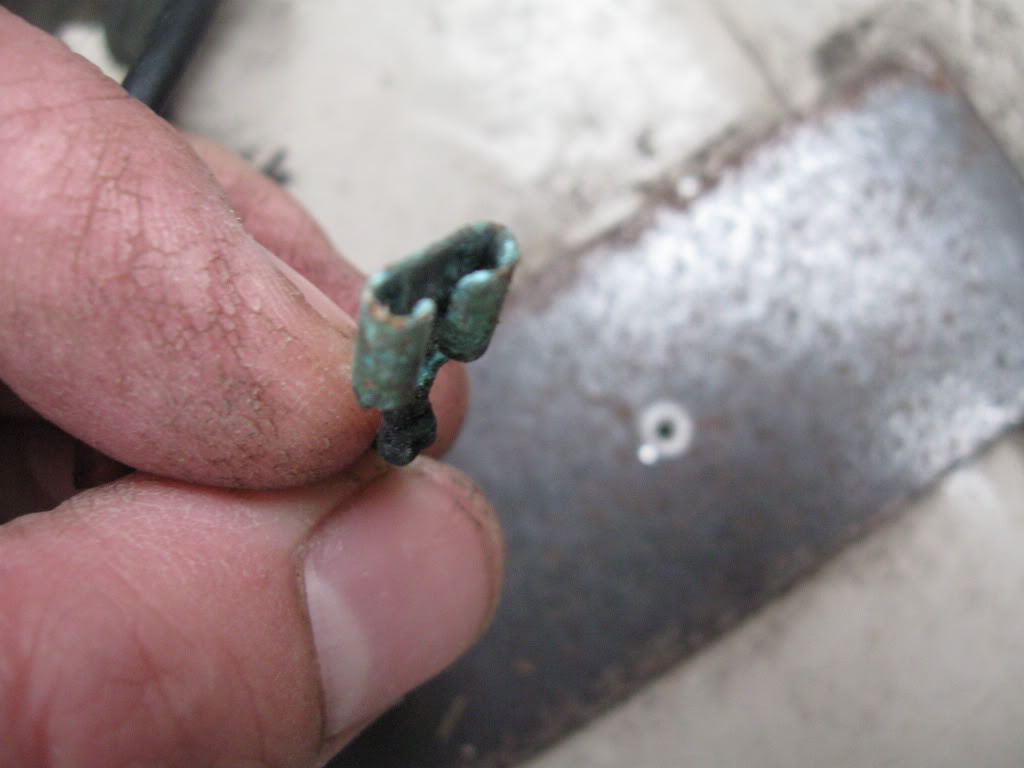 No.8 spire clips fitted to the boot floor and other holes blocked up with Epoxy Resin:- 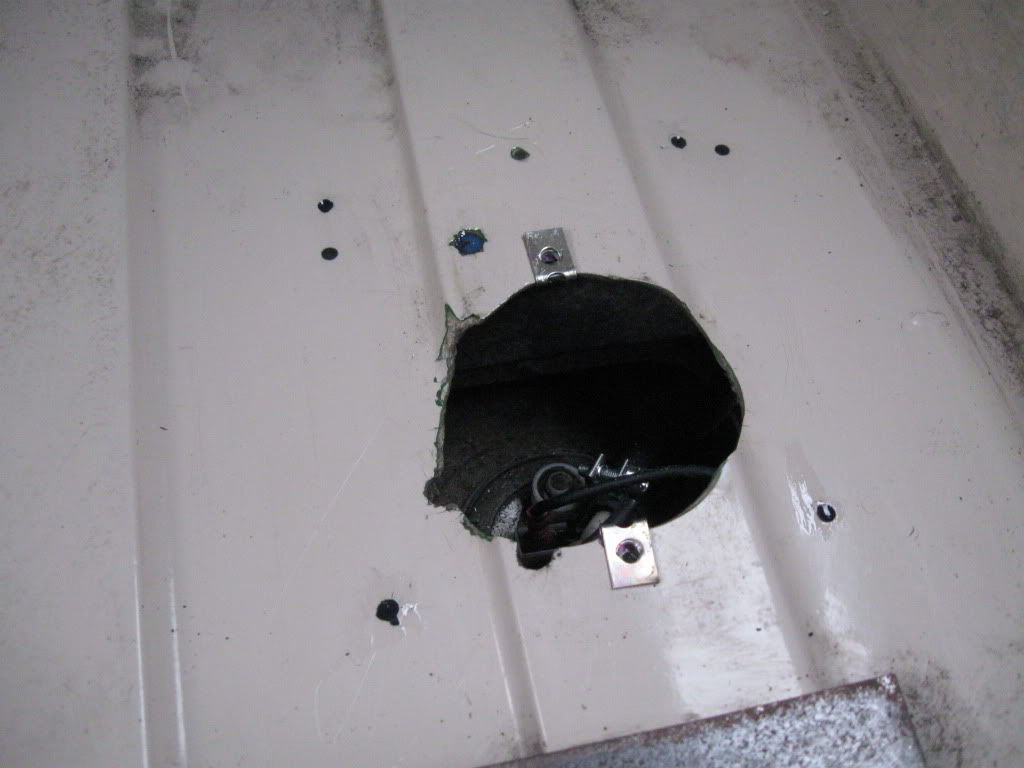 Nasty tar substance cleaned off the aluminium inspection cover and boot floor. 5mm holes drilled into the inspection cover:- 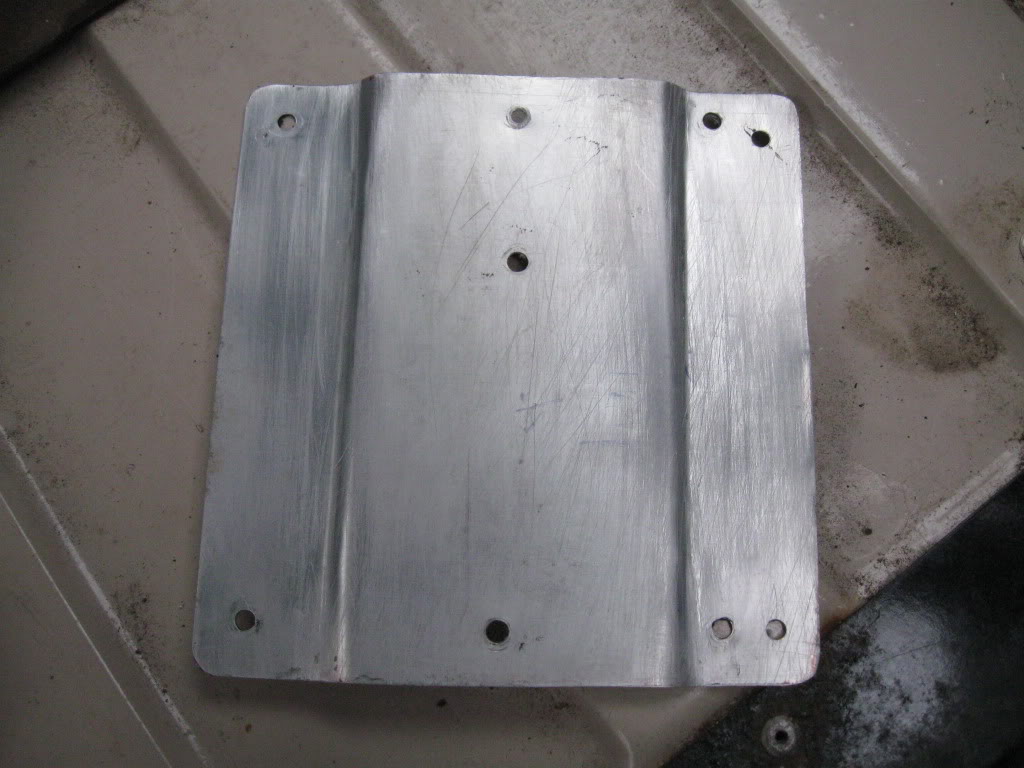  An old piece of rubber mat and strips of foam tape fitted to the inspection cover to prevent exhaust fumes from entering the car:- 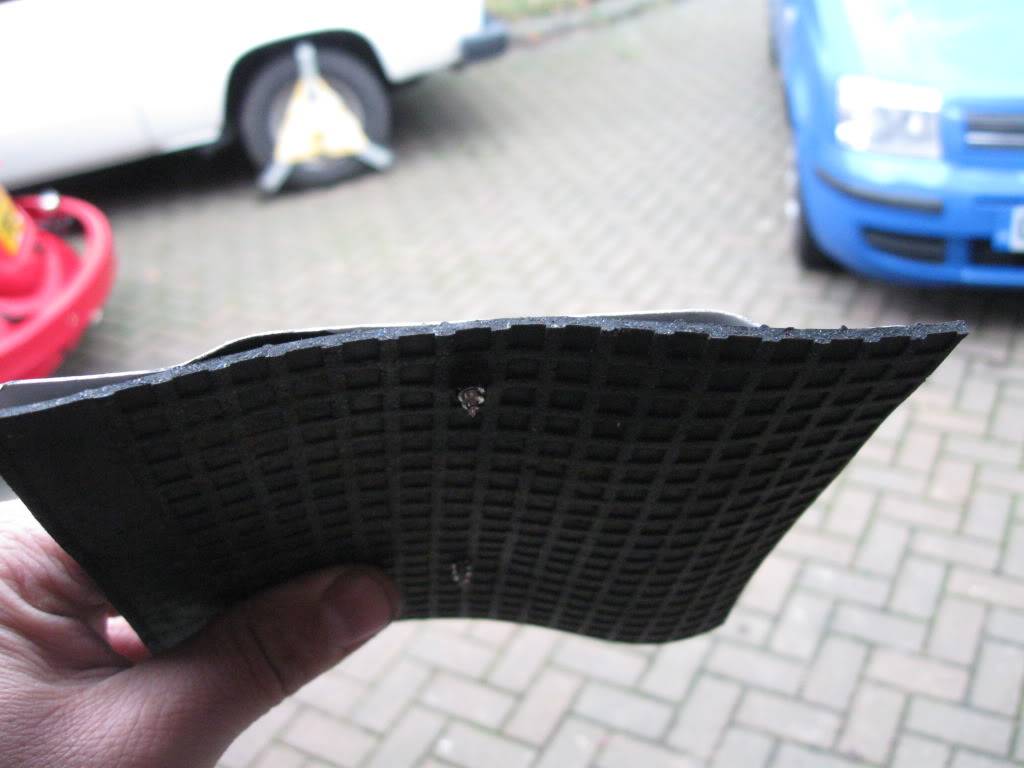 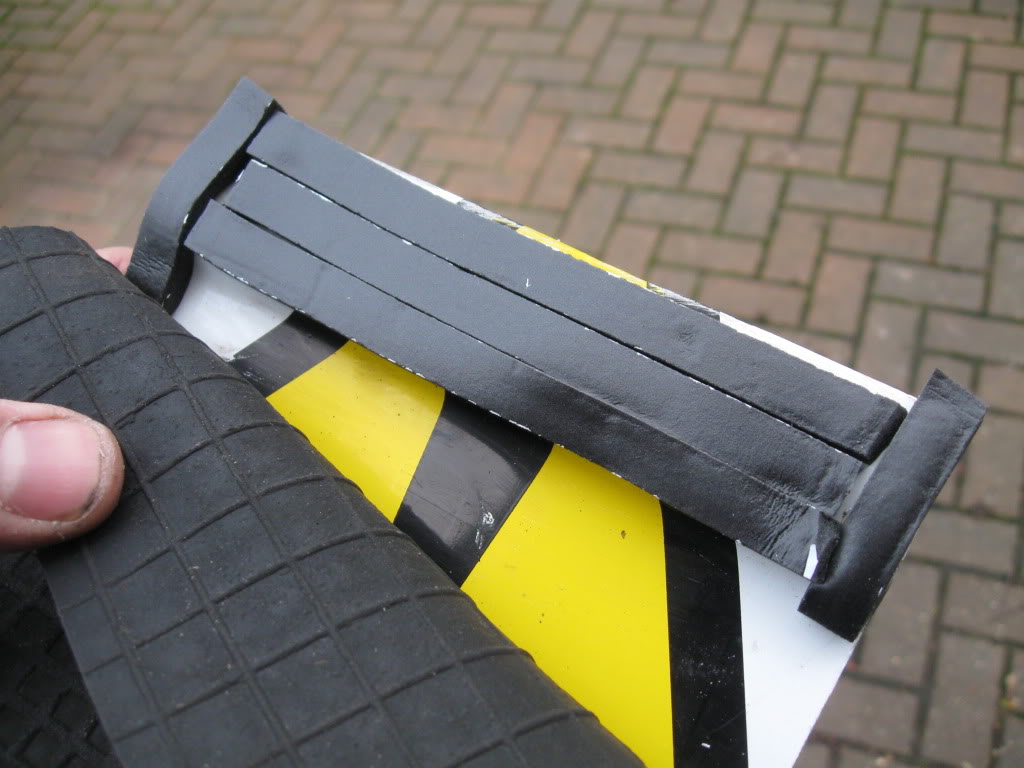 Inspection cover back into position. I used screw caps to prevent the boot carpet from being damaged by the screw heads:-  Rear boot floor quickly cleaned up:- 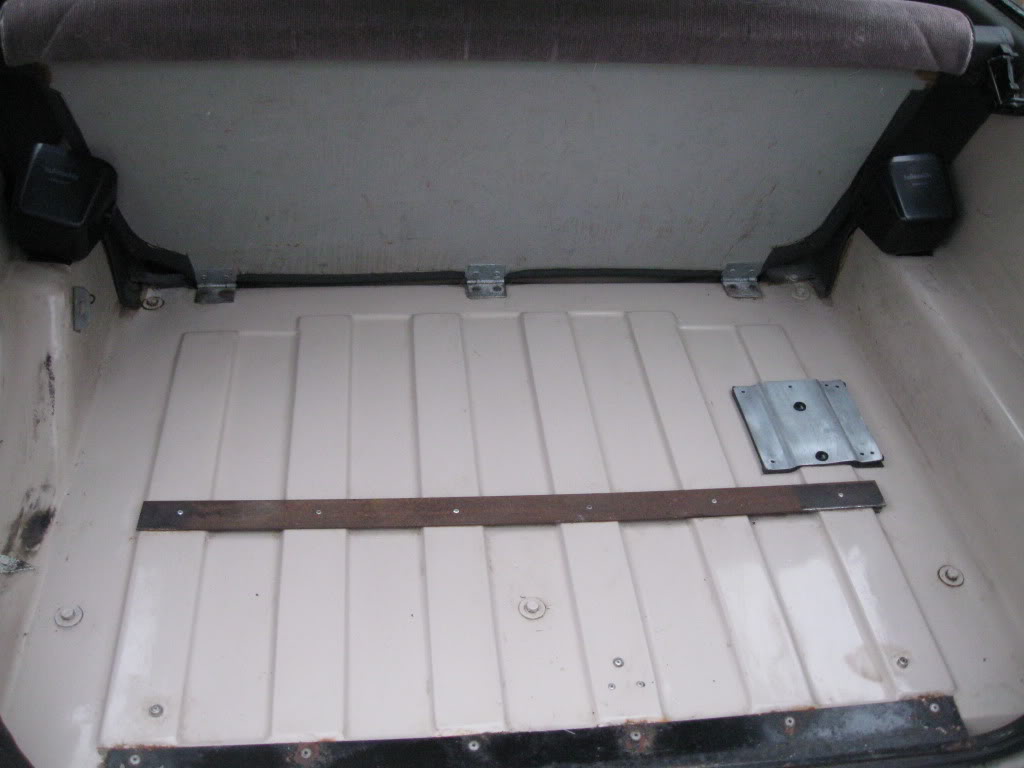 Rear boot carpet back into position:- 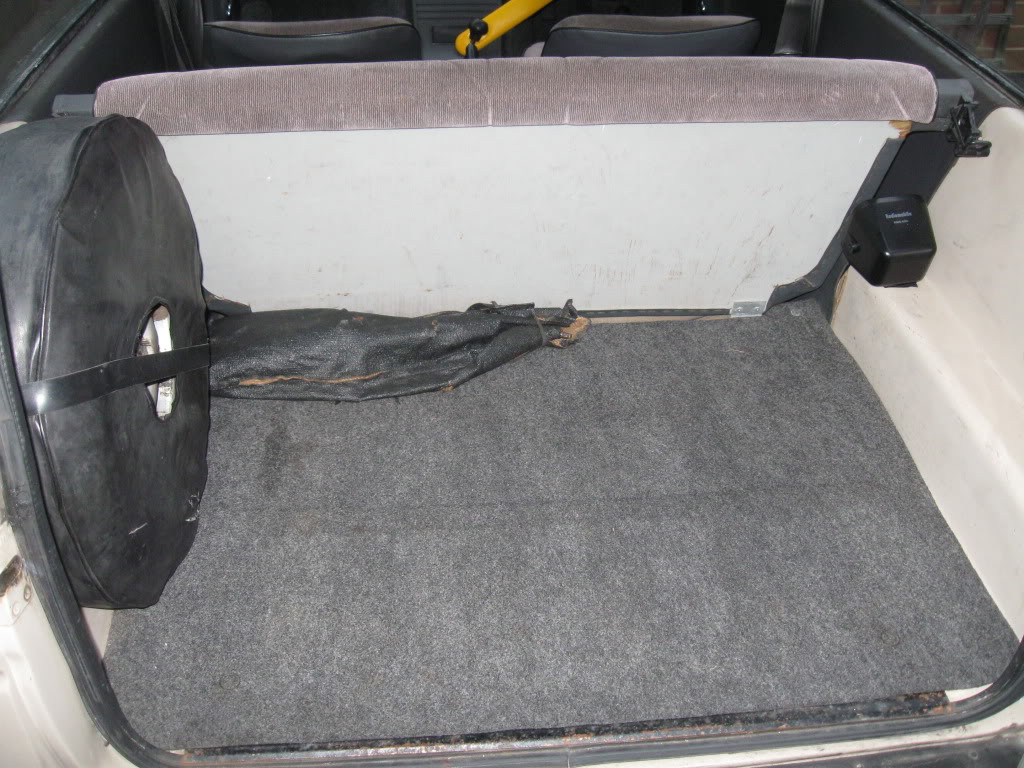 | |
|
| | |
phade
Posts : 475
Join date : 2011-08-19
Location : Kent / South East London
| | Subject: Re: 1985 Lap Rialto 2 (hopefully a more concise version of it) - this may take me time to update it. Sun Oct 28, 2012 3:28 am | |
| | |
|
| | |
phade
Posts : 475
Join date : 2011-08-19
Location : Kent / South East London
| | Subject: Re: 1985 Lap Rialto 2 (hopefully a more concise version of it) - this may take me time to update it. Sun Oct 28, 2012 3:38 am | |
| 24th February 2012
Brake Master Cylinder Replacement Time Hi everyone, Just another quick update on my Rialto 2. I had noticed that brake fluid had started to drip onto it's brake pedal and pedal box, so I suspected that it was the master cylinder. I took the car off the road on Tuesday and replaced the master cylinder today. I'll let the pics do the talking.... Brake fluid all over the brake pedal, inside the brake pedal rubber and on the steering column:- 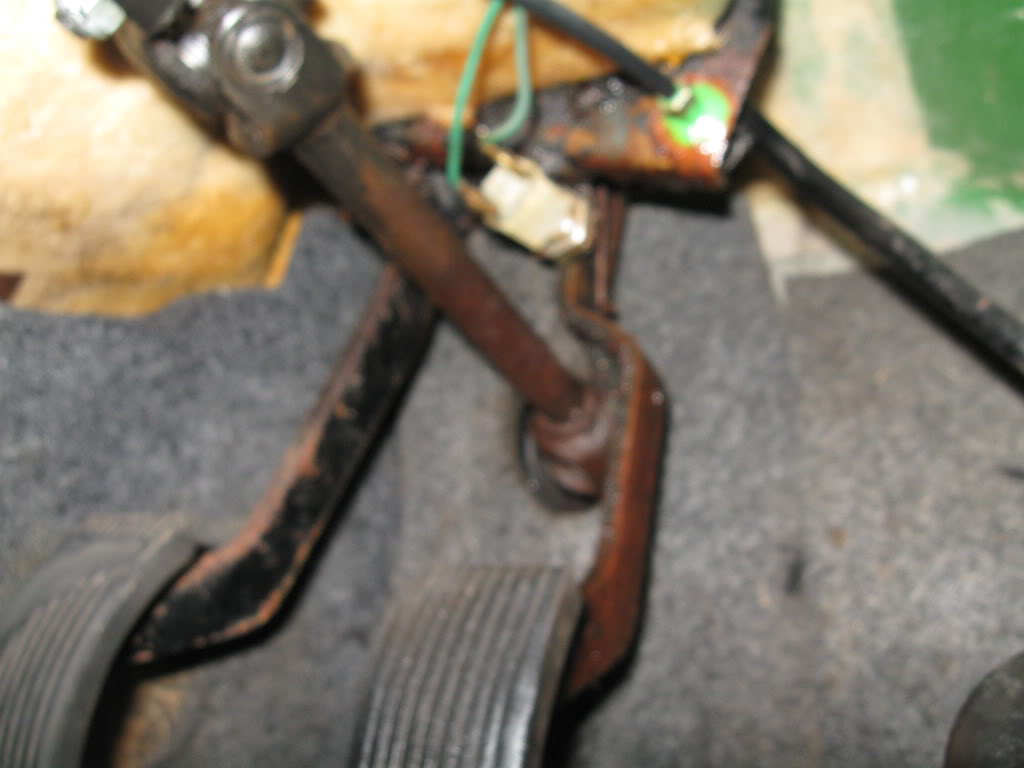 Old master cylinder as it was fitted to the car:-  Front slave cylinders' bleed nipple (this was quite easy to undo):  Rear N/S slave cylinder's bleed nipple (there is only one bleed nipple on the 10" Reliant 3 wheelers). This required a lot of phCrackIt before I could turn it and even after that it was stiffer than it should have been:-  Brake pedal to master cylinder clevis pin and split pin:-  I finally managed to remove the old master cylinder about 3 hours later (after it had put up a fight):-  Old master cylinder leaking brake fluid from it's front rubber boot:- 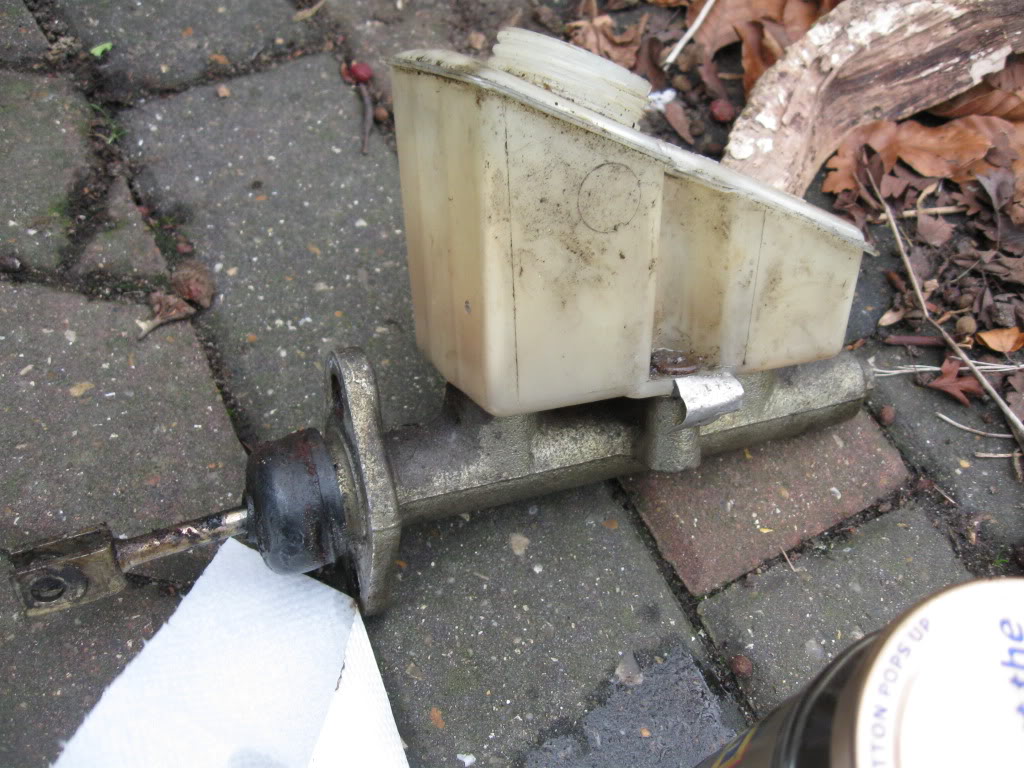 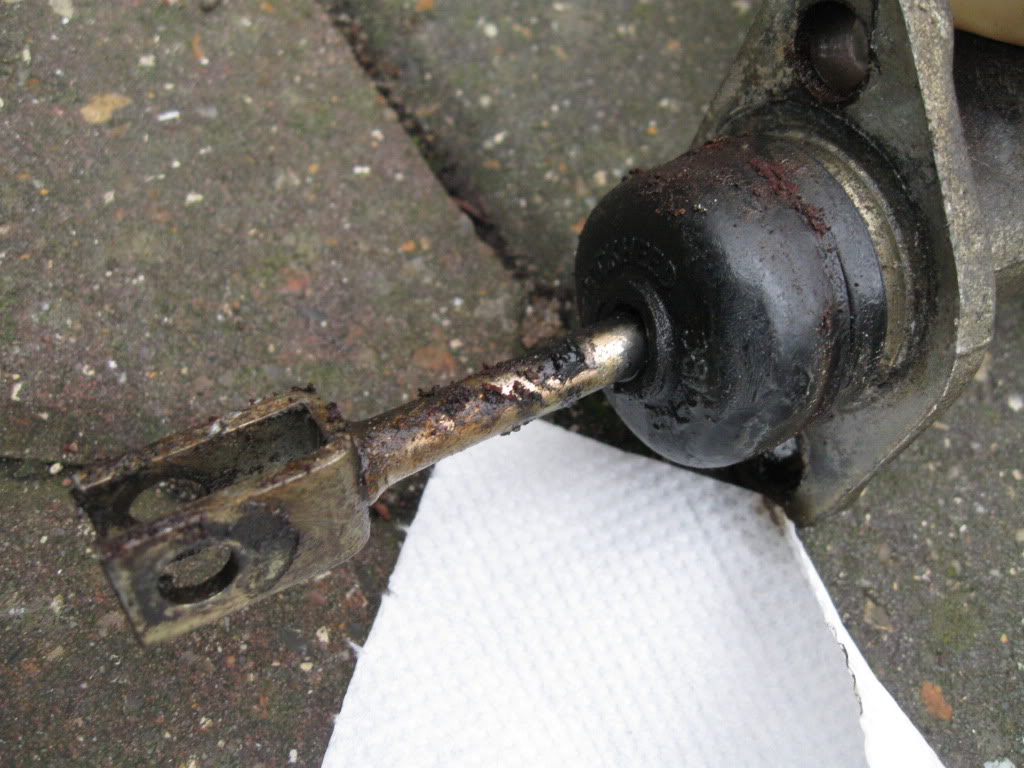 New master cylinder from Sparesman:-  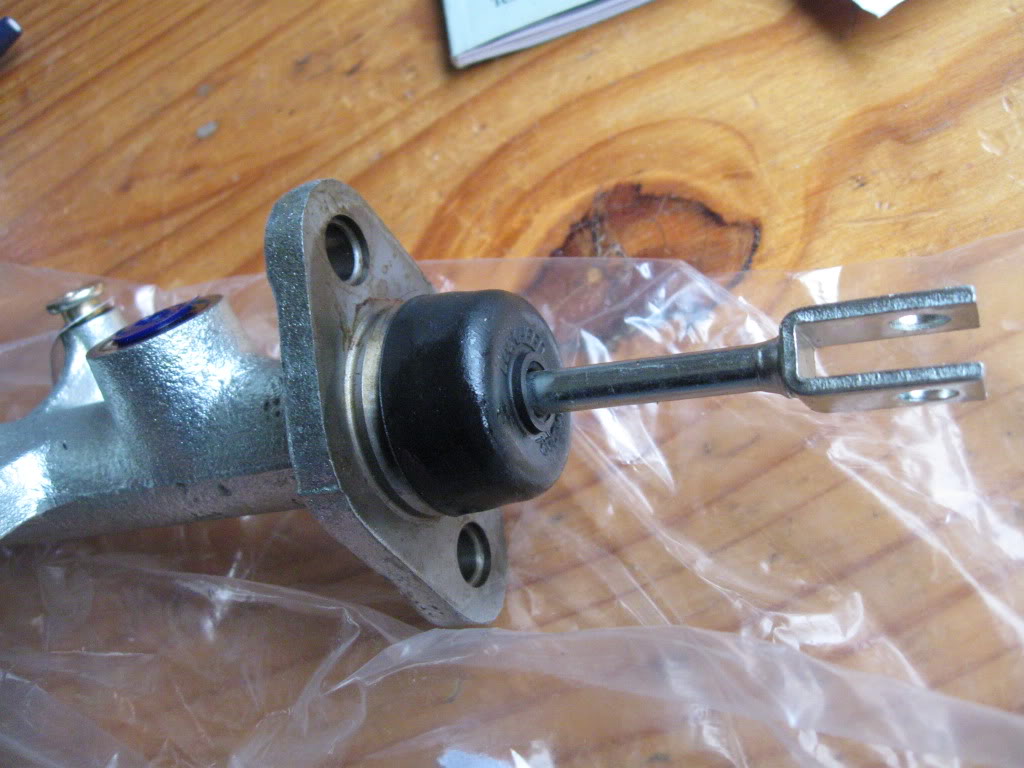 I'm glad that I changed the brake fluid. It would have rendered the car dangerous as the old brake fluid was black:-  New master cylinder and second hand brake fluid reservoir and level switch fitted:- 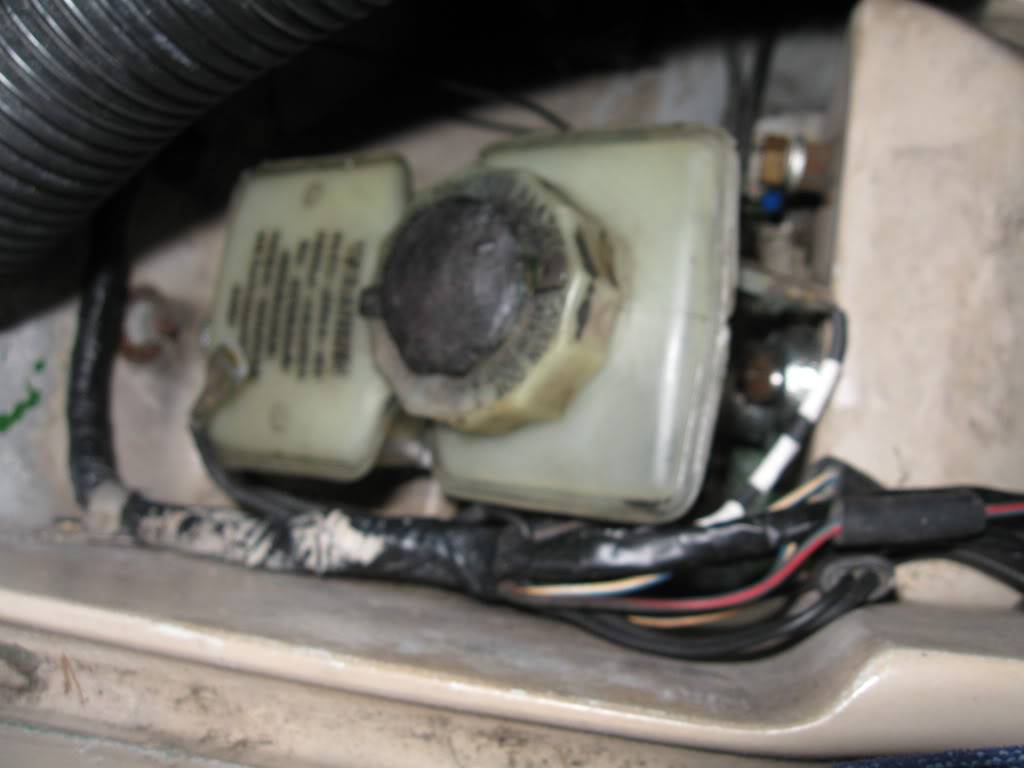 Clevis pin and old split pin refitted to the master cylinder and brake pedal. I will be replacing the split pin very soon as I do not like re-using split pins, especially on life saving devices such as brakes !! 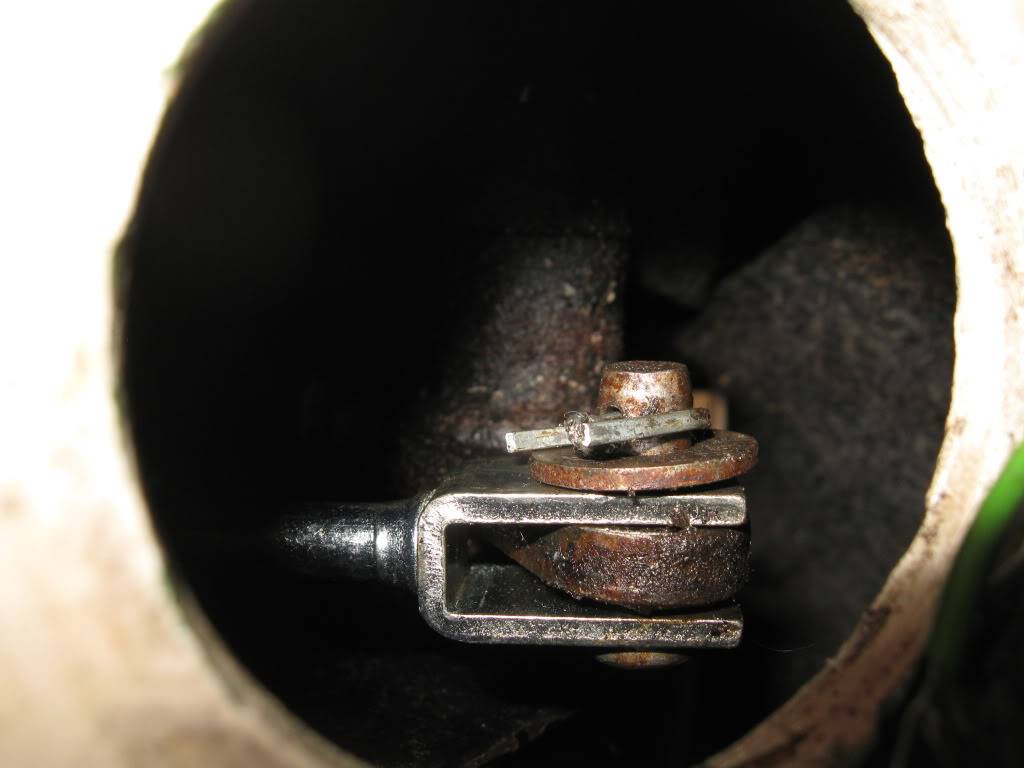 Brake pedal rubber removed to clean off the brake fluid from the brake pedal and pedal box:- 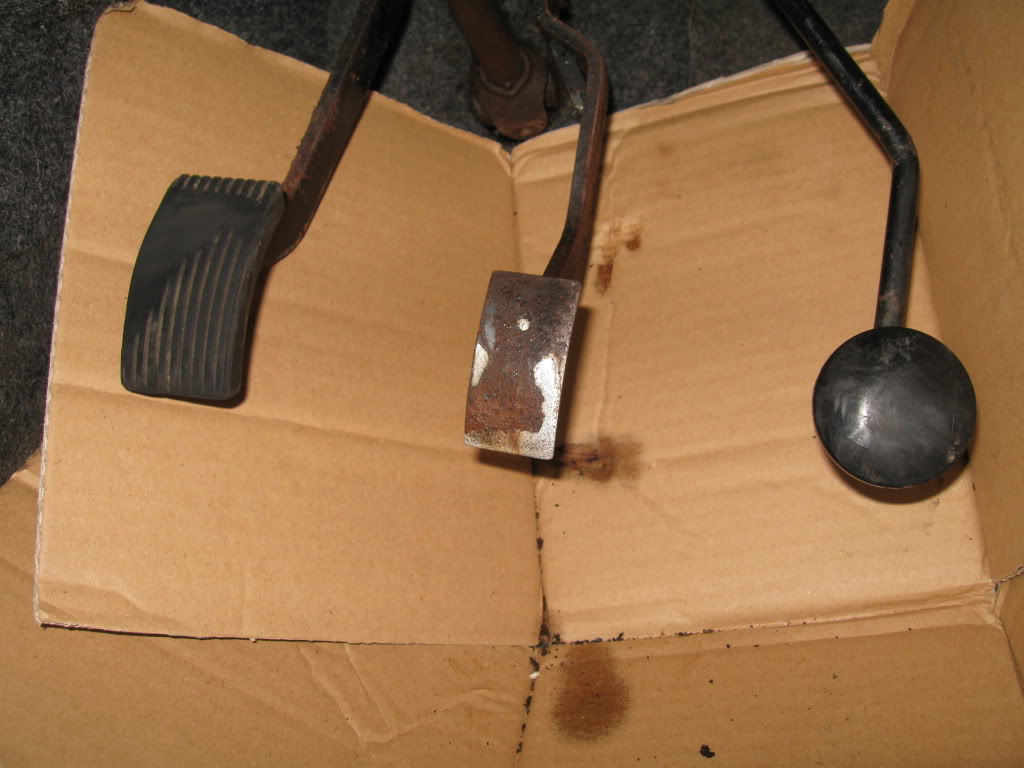 Car ready for use (apart from the re-used split pin):- 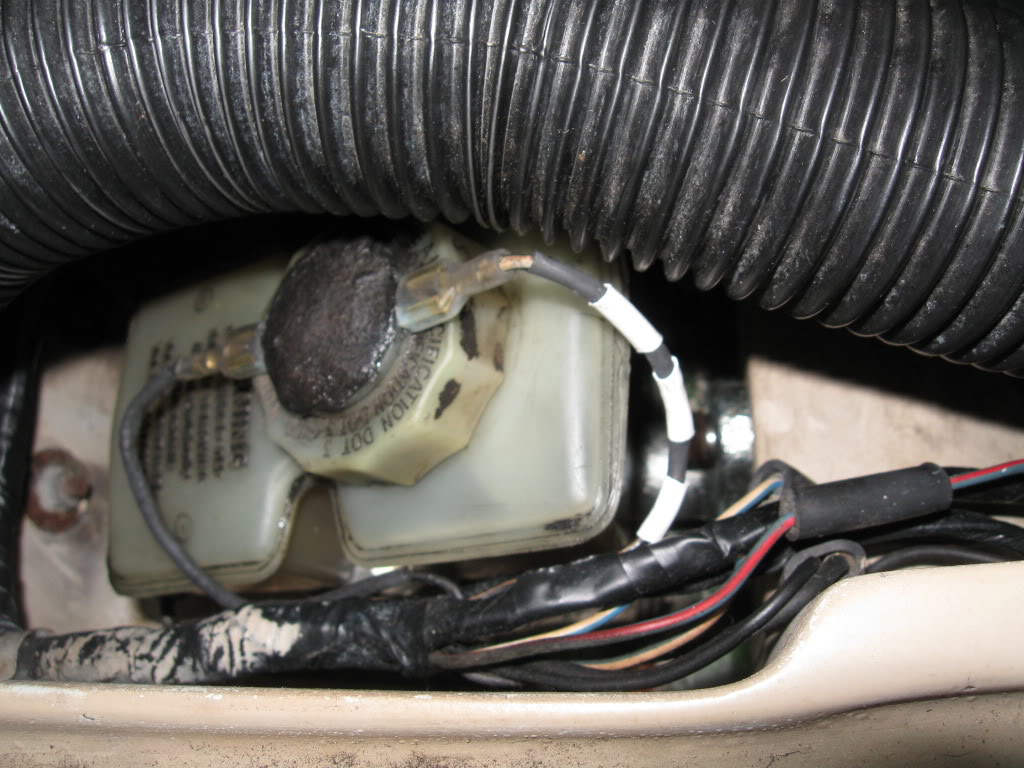 | |
|
| | |
phade
Posts : 475
Join date : 2011-08-19
Location : Kent / South East London
| | Subject: Re: 1985 Lap Rialto 2 (hopefully a more concise version of it) - this may take me time to update it. Sun Oct 28, 2012 4:01 am | |
| | |
|
| | |
phade
Posts : 475
Join date : 2011-08-19
Location : Kent / South East London
| | Subject: Re: 1985 Lap Rialto 2 (hopefully a more concise version of it) - this may take me time to update it. Sun Oct 28, 2012 4:03 am | |
| 24th March 2012
Yep, it's had a bowl full of water test and it hasn't leaked (well I used it to wash off the talcum powder I used to ease the rubber into place).
Talking of water, my Rialto 2 seems to have an odd coolant problem (air locks). I eventually found out what the odd sudden "rubbing" noise was and I found out earlier today that it occurs when coolant is being spat out of the radiator's overflow.
I tried Fifer's method of getting rid of the air lock from the heater (it works on and off) with limited success.
I managed to get rid of a fairly large air lock from the cooling system (I kept on recycling coolant until there were no more air bubbles coming from the heater matrix), refitted the heater valve's hose and started the engine. As the car warmed up, it decided to dump some coolant from the radiator's overflow. The heater initially worked, but after a while the hose from the heater valve became cold again. Could I have missed something somewhere ?
The odd thing is that my Rialto SE (the one I replaced it's head gasket and all eight valves) does not have that problem at all. | |
|
| | |
phade
Posts : 475
Join date : 2011-08-19
Location : Kent / South East London
| | Subject: Re: 1985 Lap Rialto 2 (hopefully a more concise version of it) - this may take me time to update it. Sun Oct 28, 2012 4:06 am | |
| 25th March 2012
A slight update on my Rialto 2's cooling systemHi everyone, I took my Rialto 2 out for a spin today to try and warm up the engine (it was barely warm after a 12 mile drive) and tried to force out the airlock using Fifer's method. Both heater hoses felt about the same temperature, albeit barely luke warm. When I had a look inside the radiator cap (after the car had cooled down), I found some sealer present within the cooling system. I really hope that stuff was not used to replace a head gasket !!  Thankfully, I only had to top up the radiator with approx 30 ml of coolant. | |
|
| | |
phade
Posts : 475
Join date : 2011-08-19
Location : Kent / South East London
| | Subject: Re: 1985 Lap Rialto 2 (hopefully a more concise version of it) - this may take me time to update it. Sun Oct 28, 2012 12:18 pm | |
| 30th March 2012
A quick update on my Rialto 2. I have decided to put it into the garage so that I can sort out it's cooling system this weekend. It decided to get very hot on Tuesday (during 45 minutes of stationary traffic) and it's heater has been a constant source of air locks.
Thankfully I have got an NOS heater and NOS heater valve and hopefully I will get time to fit them along with new heater hoses this weekend. | |
|
| | |
phade
Posts : 475
Join date : 2011-08-19
Location : Kent / South East London
| | Subject: Re: 1985 Lap Rialto 2 (hopefully a more concise version of it) - this may take me time to update it. Sun Oct 28, 2012 12:20 pm | |
| Posts by others on 30th March 2012
Daniel Rodd
check your thermostat to see if it has a hole in it to prevent air locks,new ones dont have it any more,the old stock reliant ones i have did,so soon as i fitted one to my van the air lock/cold heater,but hot engine problems went away.
AzzY
Dad fitted a new heater valve on it when the previous owner owned it. | |
|
| | |
phade
Posts : 475
Join date : 2011-08-19
Location : Kent / South East London
| | Subject: Re: 1985 Lap Rialto 2 (hopefully a more concise version of it) - this may take me time to update it. Sun Oct 28, 2012 12:21 pm | |
| 30th March 2012
The thermostat I fitted was a brand new 82˚C one and as far as I remember there was no hole in it.
I also fitted a new 88˚C thermostat (also without the hole) and I have had no problems with it at all. | |
|
| | |
phade
Posts : 475
Join date : 2011-08-19
Location : Kent / South East London
| | Subject: Re: 1985 Lap Rialto 2 (hopefully a more concise version of it) - this may take me time to update it. Sun Oct 28, 2012 12:23 pm | |
| Post by jessejazza on 30th March 2012
You may get away with it but i gather that without a hole you could well find that an airlock will cause the thermostat to open with a whoosh! A 2-3mm hole drilled in the flange will avoid this. | |
|
| | |
phade
Posts : 475
Join date : 2011-08-19
Location : Kent / South East London
| | Subject: Re: 1985 Lap Rialto 2 (hopefully a more concise version of it) - this may take me time to update it. Sun Oct 28, 2012 12:30 pm | |
| 31st March 2012Hi everyone, I have finally found the cause of my Rialto 2's cooling system fault and that was a faulty heater valve. Anyway, here are the pics of the work I managed to do today so far.... Old heater as it was fitted to the car:- 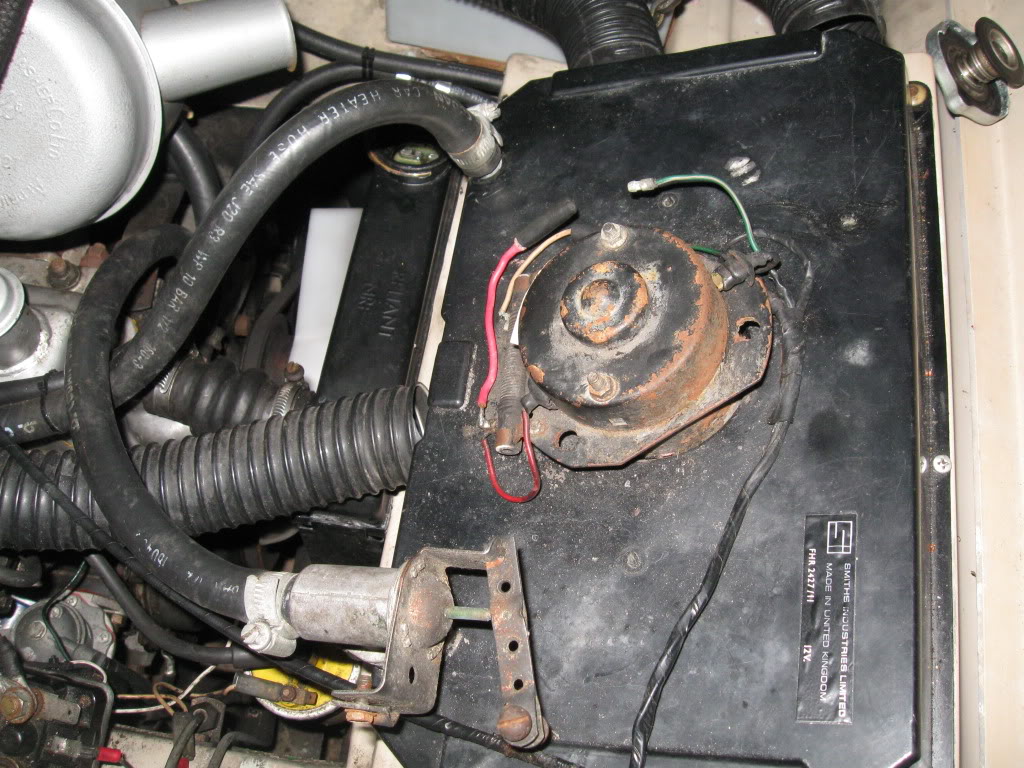 Old heater valve:-  Gasket goo!! - yuck  Broken part of the old heater:- 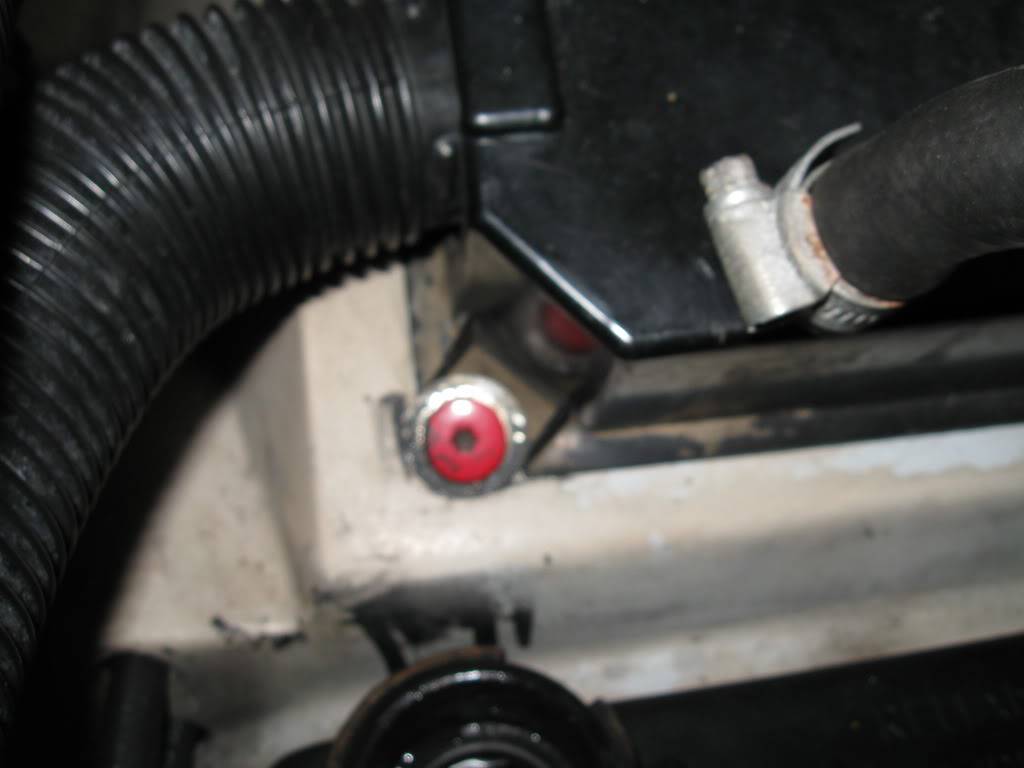 I then decided to drain the coolant (and poke around the coolant drain hole) and thankfully there was no sediment within the coolant. Wires labelled before the old heater was removed:- 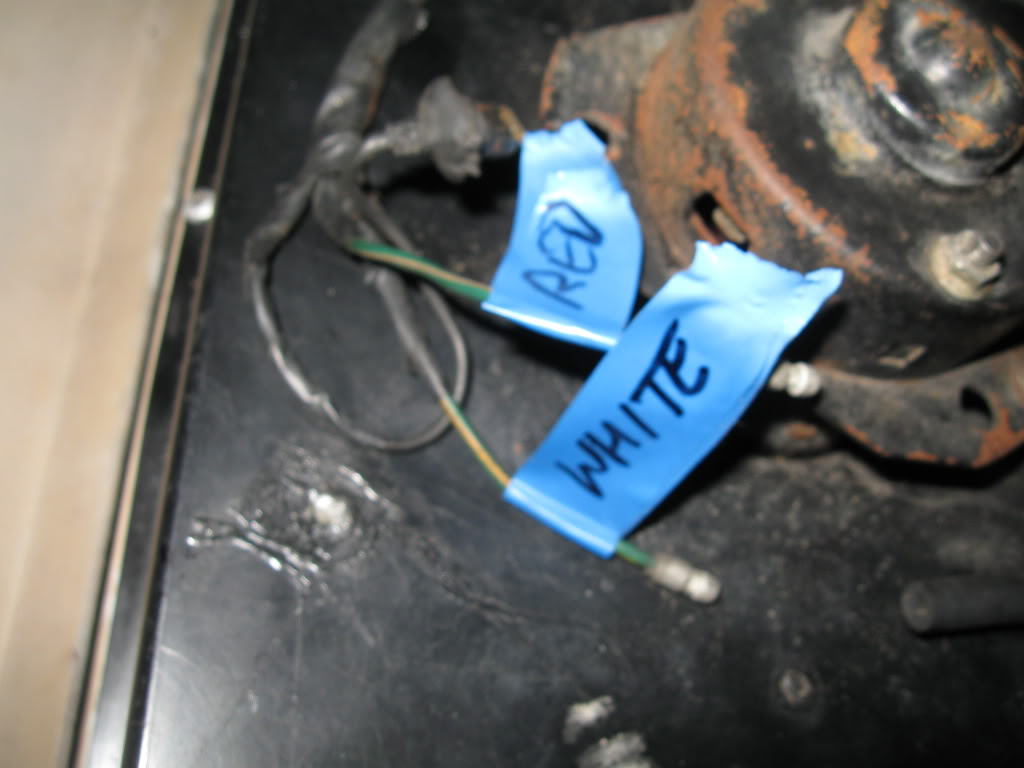 My dad and I then struggled to remove one of the hoses from the old heater and then found out the reason - it was stuck on with more sealer/gasket goo !! We had to cut off part of the hose to get it off. Gasket goo/sealer deposits on the old heater's outlet:- 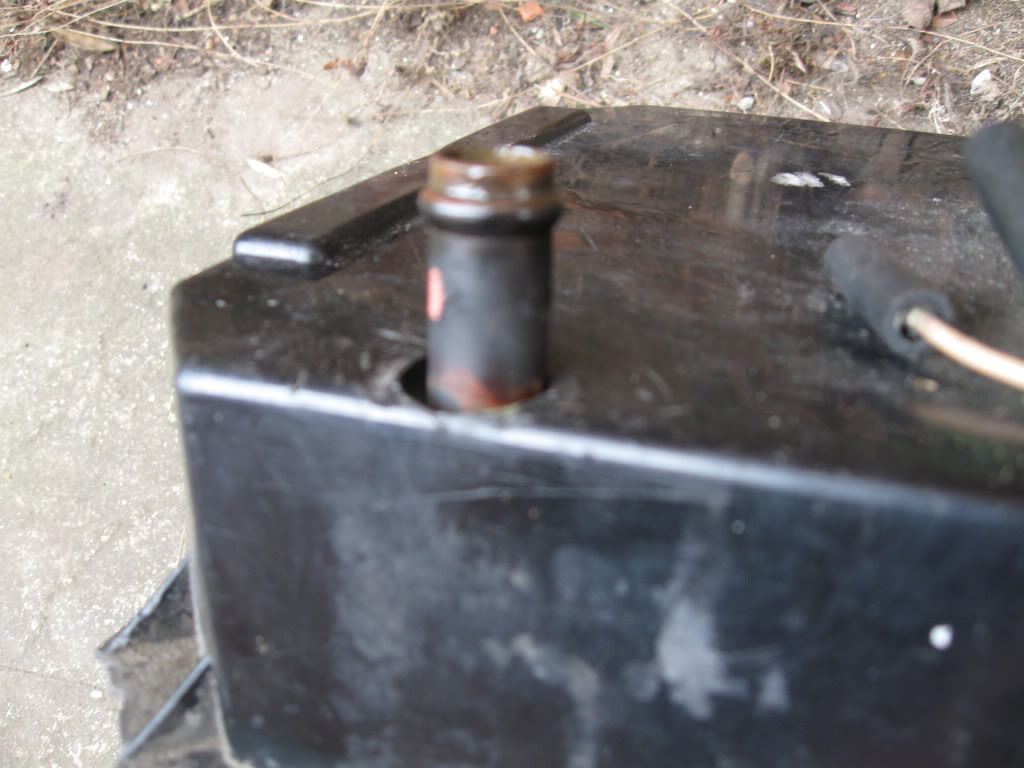 Old heater valve:- 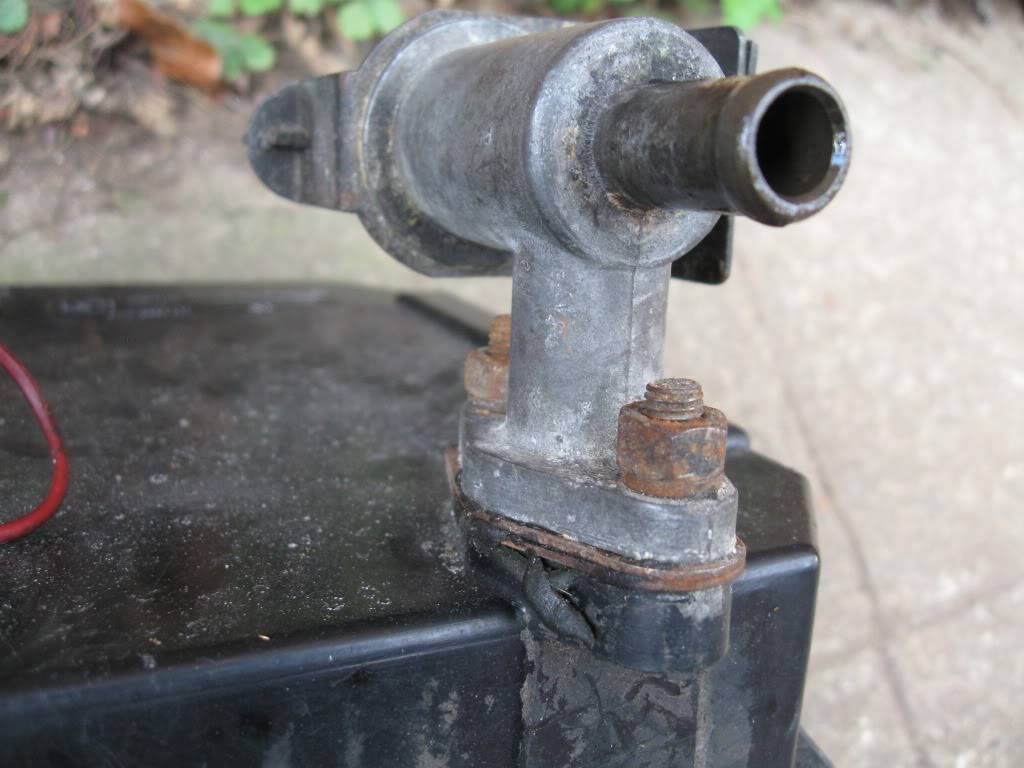 The old heater valve was not operating properly and the disc part of it isn't properly attached to the heater valve's shaft. It also explained why coolant was being ejected from the radiator's overflow outlet after I understood how the coolant is supposed to flow within the cooling system. Old heater (twin speed fan motor):-  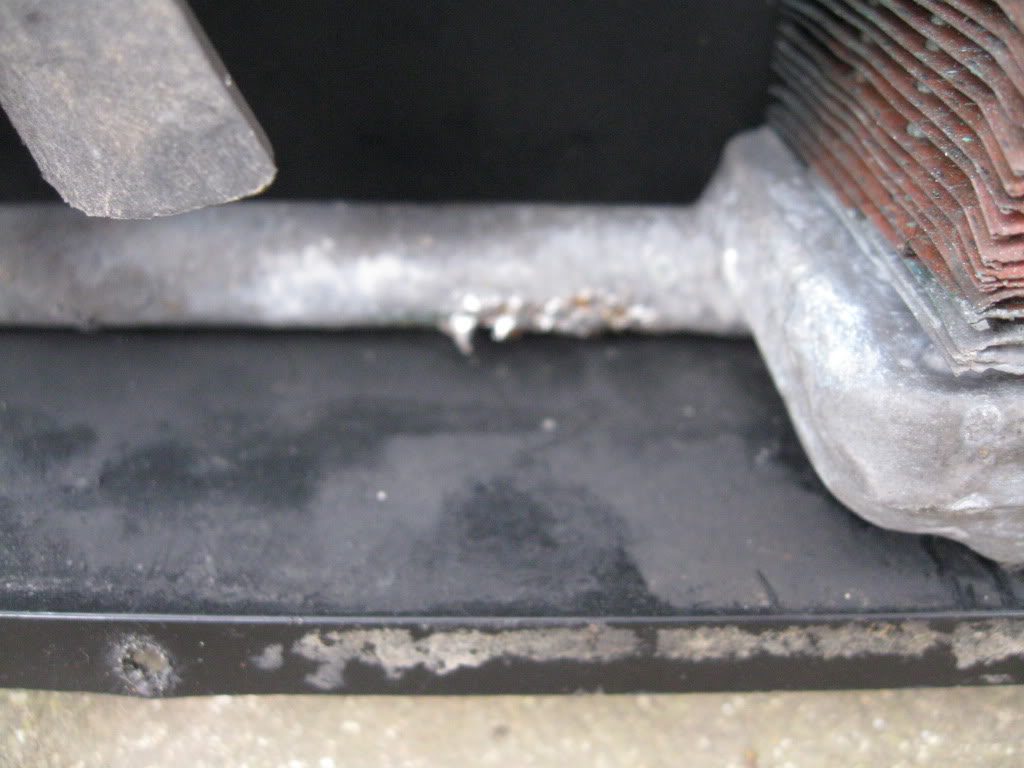 NOS (mk1 Robin ???) single speed motor heater. I have stuck on two strips of foam tape (after this pic was taken) on the bottom of the heat exchangers to prevent them from rubbing against the body. 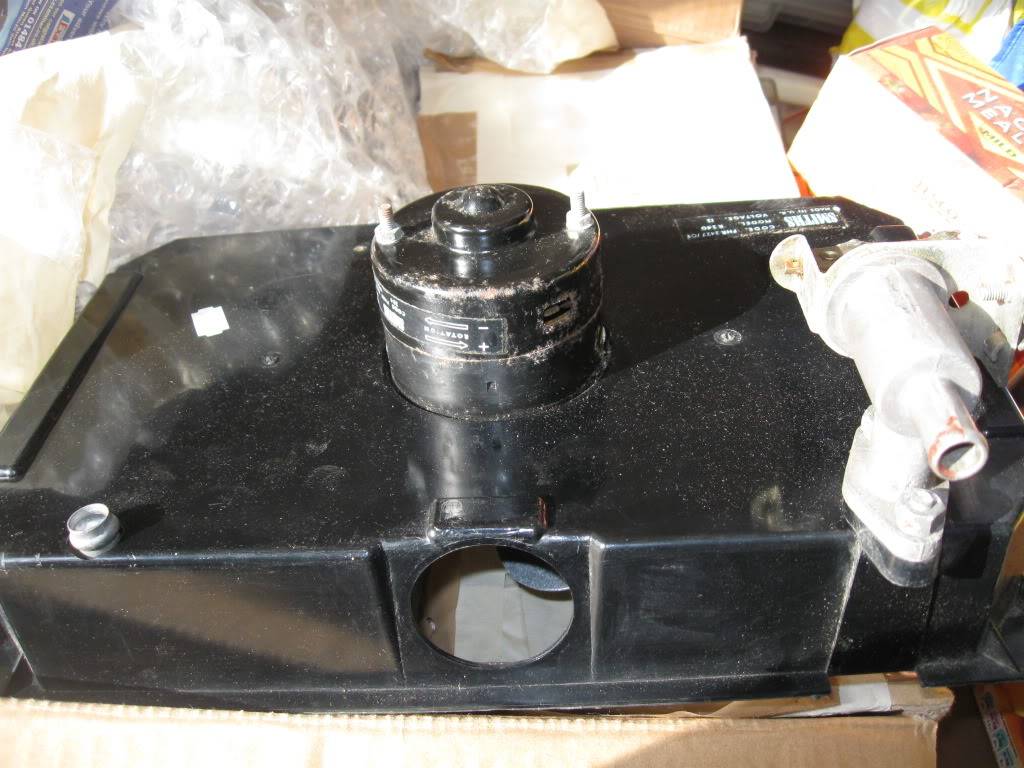 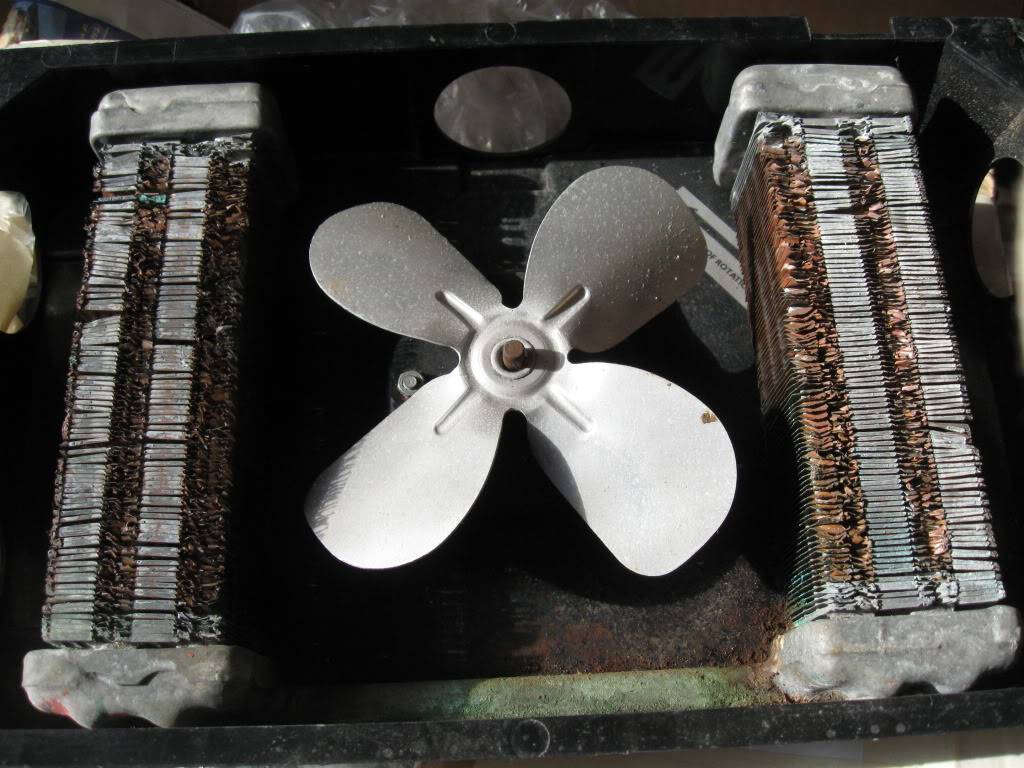 I plan to swap the fan motors and fans over so that the twin speed motor (and it's fan) will be installed on the NOS heater. I have currently left both of the fan motors' shaft soaking in phCrackIt and hope that I will be able to remove the plastic fan tomorrow. The metal fan should be a lot easier to remove as it is only held onto the shaft with an allen bolt. | |
|
| | |
phade
Posts : 475
Join date : 2011-08-19
Location : Kent / South East London
| | Subject: Re: 1985 Lap Rialto 2 (hopefully a more concise version of it) - this may take me time to update it. Sun Oct 28, 2012 12:35 pm | |
| Posts by others on 31st March 2012 (I've edited out the invalid IMG tags as the files are not on cyberspace)
AzzY
My dad must have not have changed that heater valve then if its the fault as it would still be working fine. Previous owner might have played about with it.
Just remembered it was the green Rialto that he done the valve on which we had at the same time, didn't think he done this one
kevhallett
Why not use the NOS motor and fan? just because it is a single speed it won't make a lot of difference, the new motor will have a much longer life than the old one. | |
|
| | |
phade
Posts : 475
Join date : 2011-08-19
Location : Kent / South East London
| | Subject: Re: 1985 Lap Rialto 2 (hopefully a more concise version of it) - this may take me time to update it. Sun Oct 28, 2012 12:35 pm | |
| 31st March 2012
I think the fan blade design doesn't look brilliant compared to the later plastic fan's design and the metal fan looks like that it will not blow a lot of air through the heater outlets. The old heater's fan works really well. | |
|
| | |
phade
Posts : 475
Join date : 2011-08-19
Location : Kent / South East London
| | Subject: Re: 1985 Lap Rialto 2 (hopefully a more concise version of it) - this may take me time to update it. Sun Oct 28, 2012 12:38 pm | |
| Posts by others 31st March 2012 (invalid IMG tags edited out)
jessejazza
Forget the heater valve. If you leave it off you'll find there is about 8 mm of pipe which is just long enough to put the water hose straight on to.
AzzY
Or cut the section off that the valve fits to then you got a little more, was one of the reasons why I made my own box so the pipes come up to connect to without the stupid valve that shouldn't be used.
Afterall the valve only gets knocked then cracks the heater casing when fitted, you get the annoying cable in the way aswell.. Better to just open a window..
jessejazza
I thought i was the only Rialto driver that had the window open all the time - so i don't bother with a heater (but i have a header tank instead of an expansion tank which makes a world of difference i think) and the window is open so that i can close the door [pulling on the door card just ruins the securing plastic screws]. No one else has ever said what they do to avoid that. | |
|
| | |
Sponsored content
| | Subject: Re: 1985 Lap Rialto 2 (hopefully a more concise version of it) - this may take me time to update it. | |
| |
|
| | |
| | 1985 Lap Rialto 2 (hopefully a more concise version of it) - this may take me time to update it. | |
|