Posts : 475 Join date : 2011-08-19 Location : Kent / South East London
Subject: Re: 1985 Lap Rialto 2 (hopefully a more concise version of it) - this may take me time to update it. Wed Oct 31, 2012 11:34 pm
9th October 2012
Hi everyone,
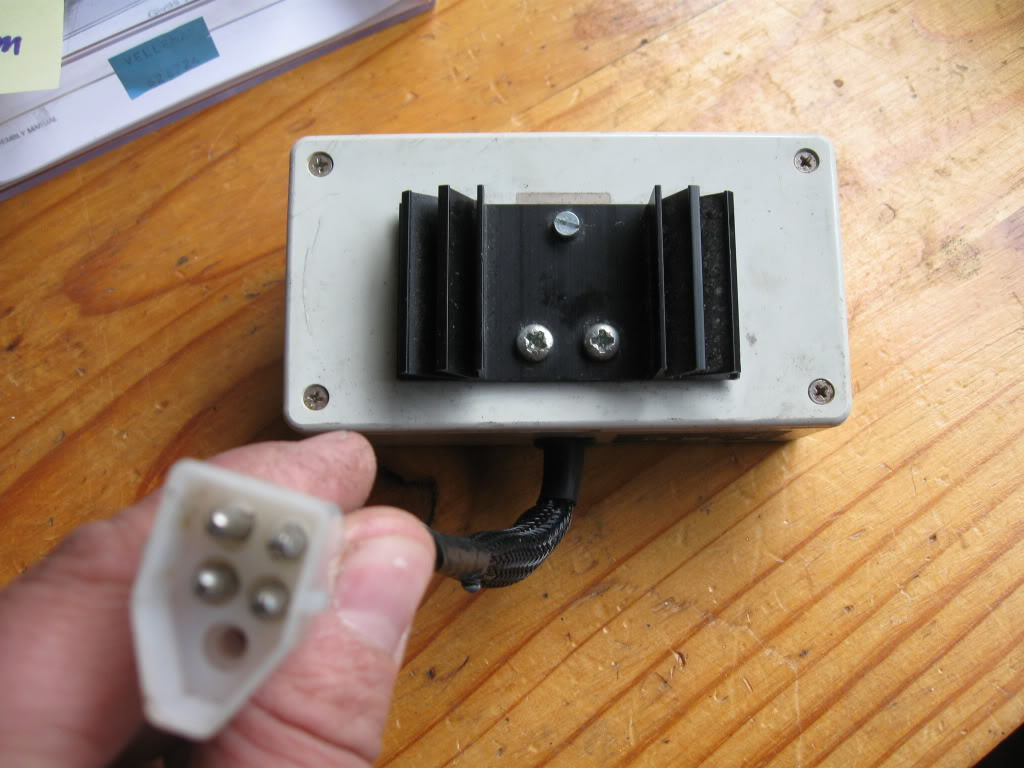
I decided to protect my Rialto 2's existing Velleman ignition amplifier with Aquastop. Anyway, I'll let the pictures do the talking:-
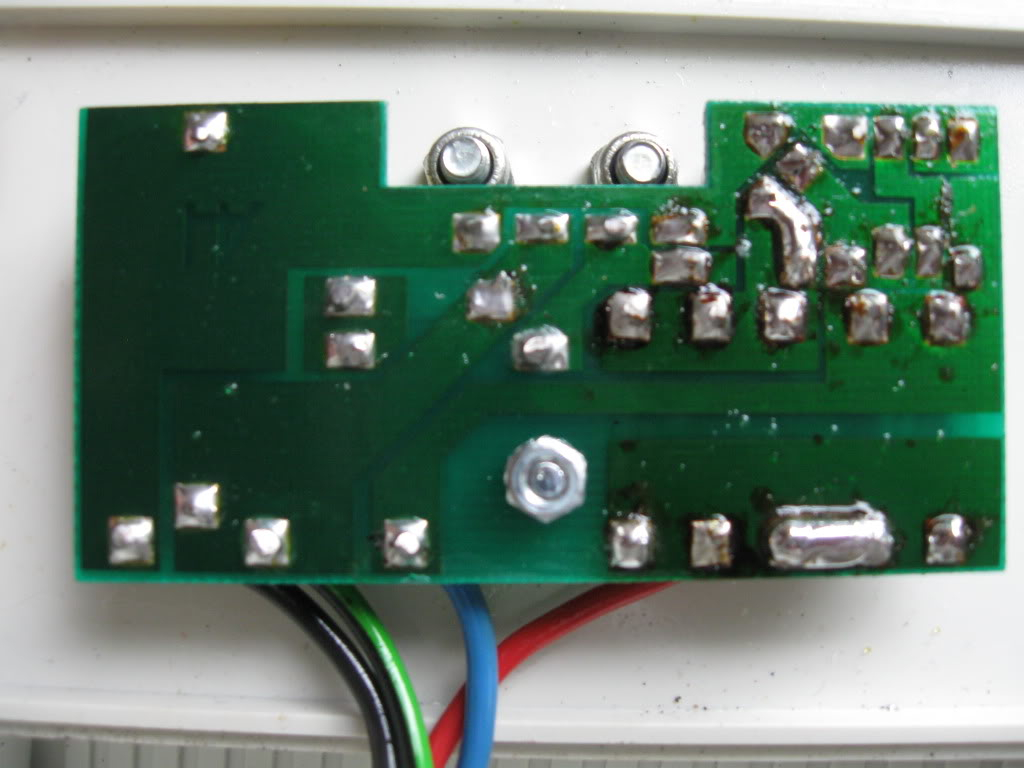
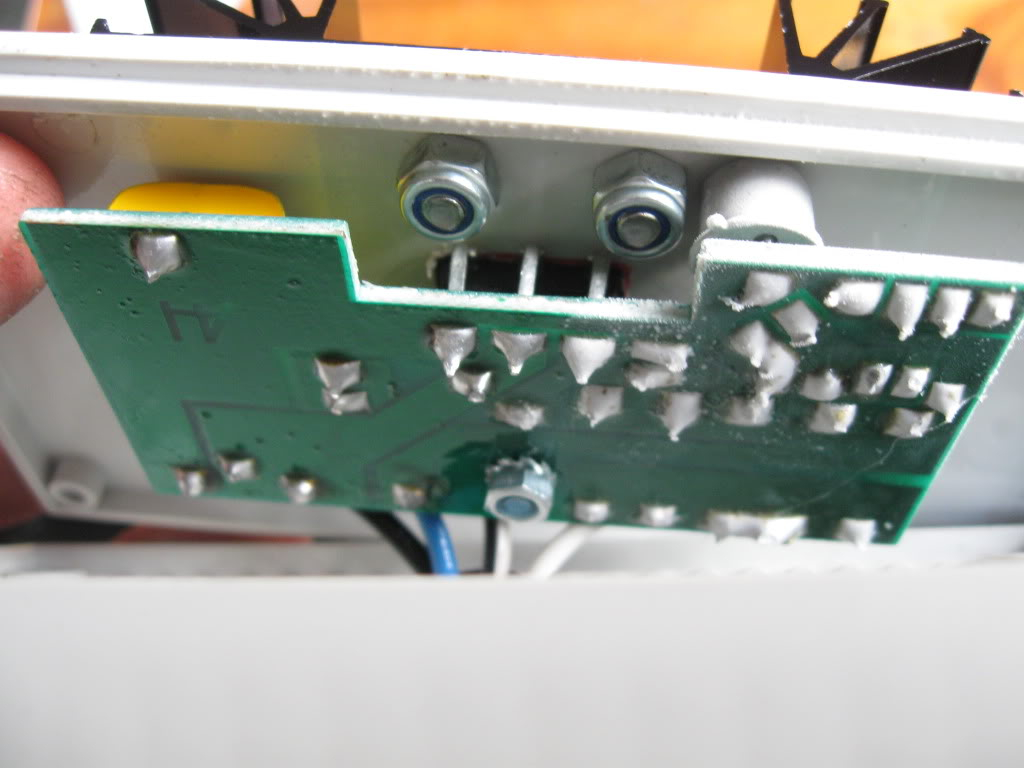
Ignition amplifier (that I bought from Madblokey) out of my Rialto 2. I held up the connector to remind me which terminals to use for the spare ignition amplifier:-
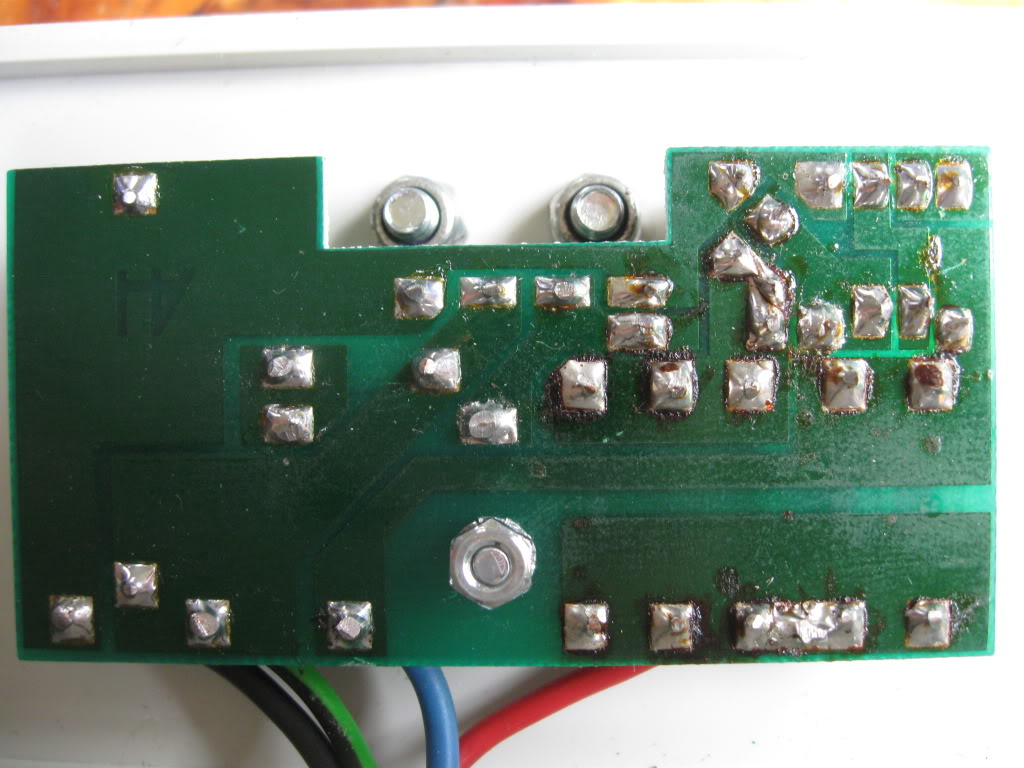
I also decided to check the solder joints and found a few dried joints:-
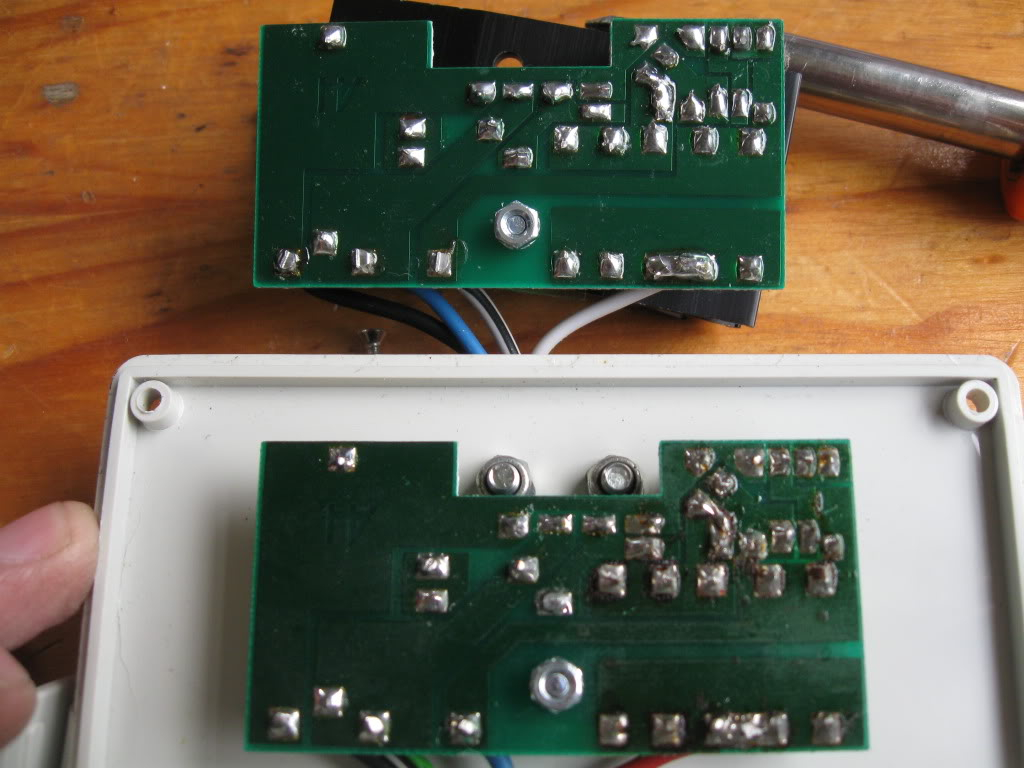
The two ignition amplifier PCBs together:-
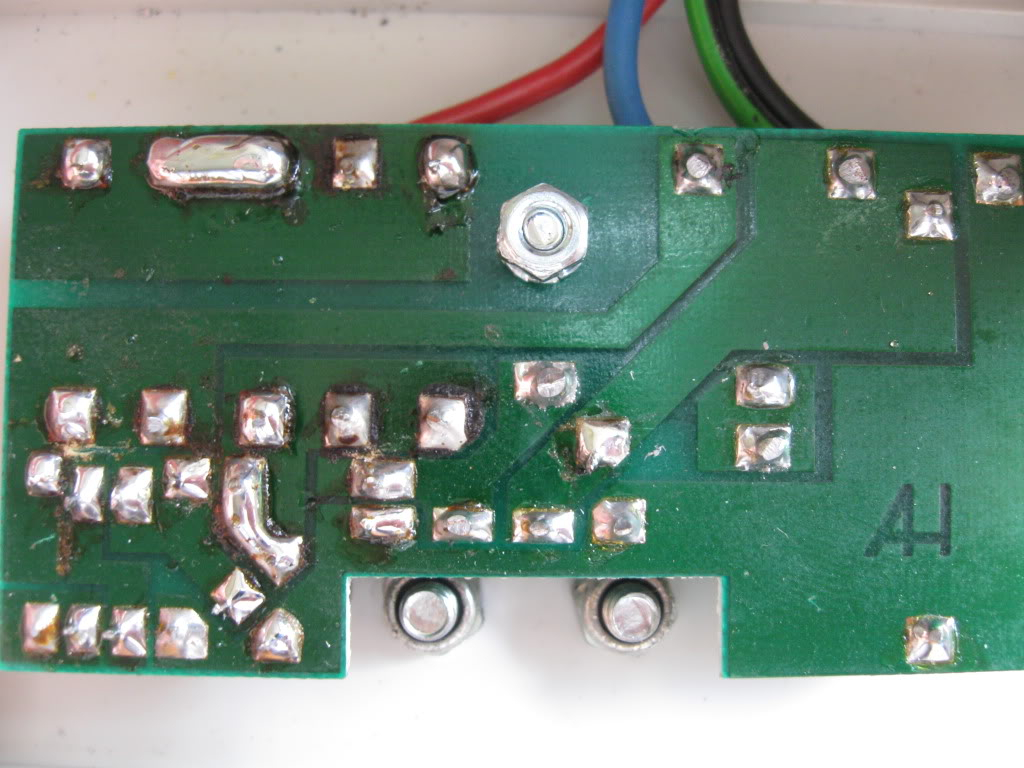
Solder joints looking a lot better about 5 minutes later:-
Aquastop applied to the PCB:-
Ignition amplifier refitted to my Rialto 2 after I had removed the blue paint with Maplin's Label Remover:-
When I had a look at the prebuilt ignition amplifier, I noticed that a hole was cut for the transistors heatsink with the mica insulator installed (a far better idea). I plan to do the same to the spare ignition amplifier's enclosure when it arrives.
phade
Posts : 475 Join date : 2011-08-19 Location : Kent / South East London
Subject: Re: 1985 Lap Rialto 2 (hopefully a more concise version of it) - this may take me time to update it. Wed Oct 31, 2012 11:35 pm
I then decided to fit both fuel hose brackets to my Rialto 2 and fabricate stainless ones for my Rialto SE after I got a few brackets from wheaters.....
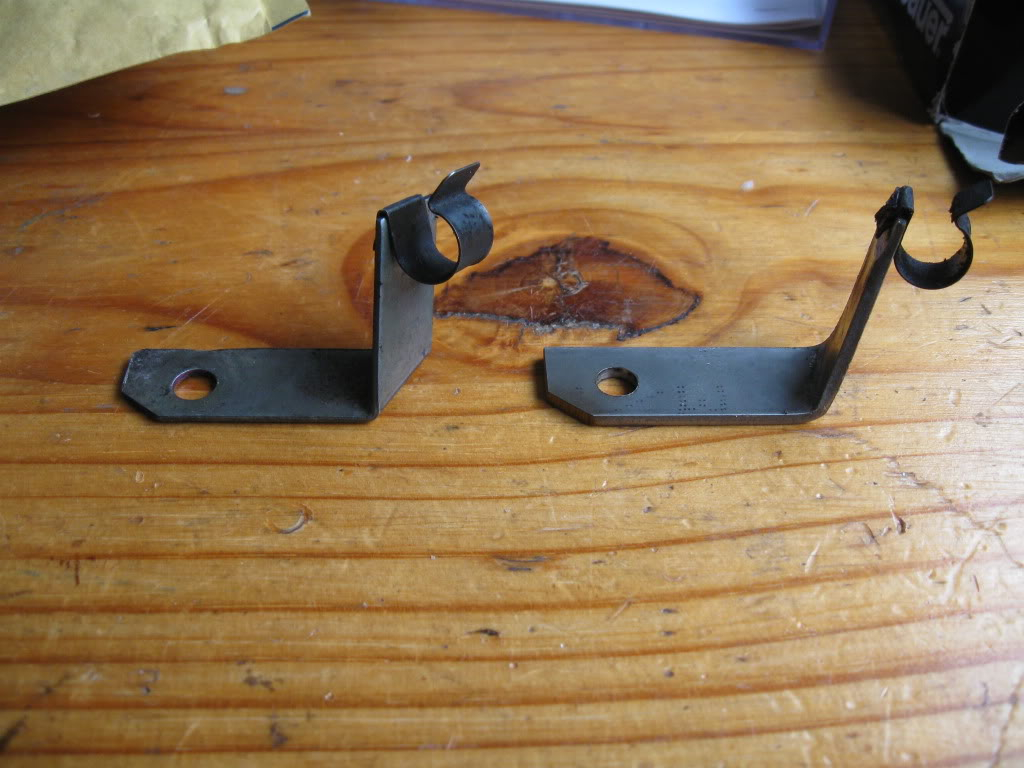
Original bracket is on the left of the two pics below and the bracket I have made out of 3mm x 20mm stainless strip is on the right:-
I plan to fit the original one to my Rialto 2 and fit the stainless one I have made to my Rialto SE (I still need to either source a second hand or to make up the rocker box's fuel hose/vacuum pipe bracket).
phade
Posts : 475 Join date : 2011-08-19 Location : Kent / South East London
Subject: Re: 1985 Lap Rialto 2 (hopefully a more concise version of it) - this may take me time to update it. Wed Oct 31, 2012 11:37 pm
11th October 2012
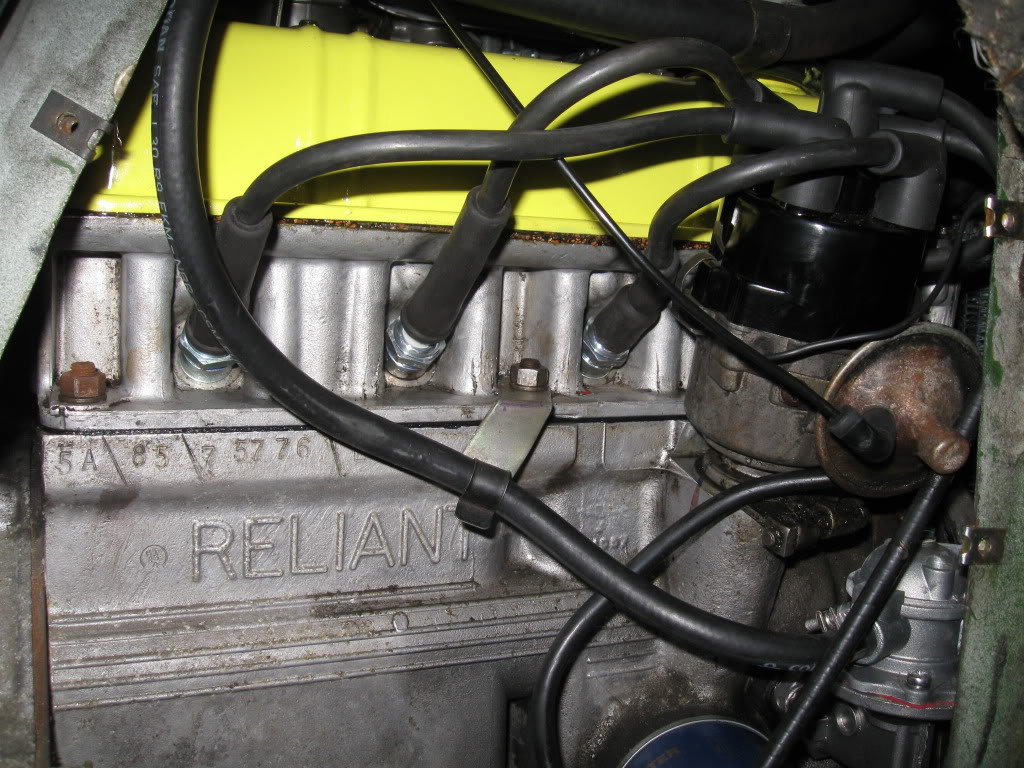
Fuel hose brackets (for their clips) installed:-
Rocker cover fuel hose bracket moved slightly to prevent the hose from chaffing against the clip:-
Cylinder head fuel hose bracket installed and fuel hose shortened by about 1 1/2" to ensure that there are no tight radii within the fuel hose-
phade
Posts : 475 Join date : 2011-08-19 Location : Kent / South East London
Subject: Re: 1985 Lap Rialto 2 (hopefully a more concise version of it) - this may take me time to update it. Wed Oct 31, 2012 11:43 pm
I then decided to finish building my Rialto 2's spare Velleman ignition amplifier after it's enclosure had arrived from Maplin.....
12th October 2012
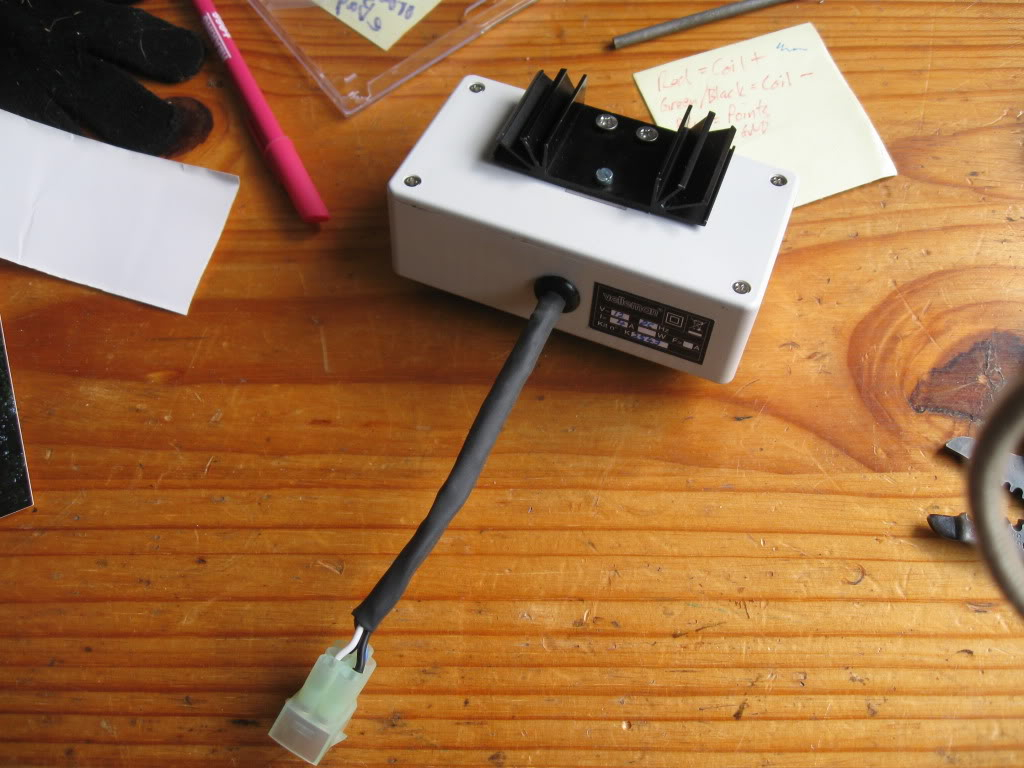
Spare Velleman ignition amplifier built:-
Hi everyone,
I decided to finish building my Rialto 2's spare ignition amplifier as the enclosure I've ordered from Maplin arrived this morning. Anyway, I'll let the pics do the talking:-
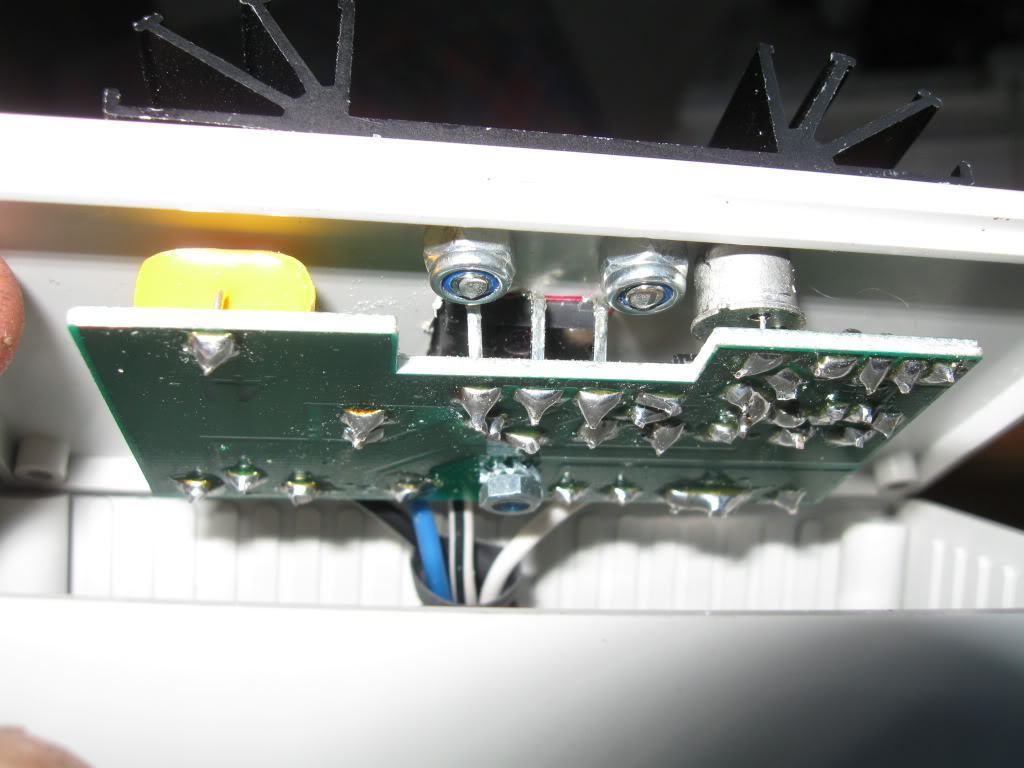
Rectangular hole cut out of the lid for the transistor, heatsink (along with the mica insulator) secured to the lid:-
Prebuilt ignition amplifier and (new) spare ignition amplifier side by side with it's loom cut to length:-
New 7 pin version of the 5 pin windscreen wiper stalk connector fitted to the spare ignition amplifier:-
Spare ignition amplifier temporarily fitted for testing purposes (before spraying it's PCB and receptacle with Aquastop):-
The 7 pin receptacle fits into the 5 pin plug perfectly, albeit their latches are approx 1 mm out :-
Spare ignition amplifier PCB, components and 7 pin receptacle sprayed with Aquastop:-
Spare ignition amplifier assembled:-
phade
Posts : 475 Join date : 2011-08-19 Location : Kent / South East London
Subject: Re: 1985 Lap Rialto 2 (hopefully a more concise version of it) - this may take me time to update it. Mon Nov 05, 2012 2:47 am
Correct vacuum pipe with rubber boots (from Minispares) fitted
Hi everyone,
I decided to try a length of vacuum pipe with rubber boots from Minispares (item number 37H4229M http://www.minispares.com/search/classic/37H4229M.aspx ) and it fits correctly. I have routed that vacuum pipe through the fuel hose brackets' clips:-
Bill Bailey
Posts : 112 Join date : 2011-08-19 Location : Outside your window.
Subject: Re: 1985 Lap Rialto 2 (hopefully a more concise version of it) - this may take me time to update it. Mon Nov 05, 2012 2:52 am
The clips that hold the fuel hose and a vacuum line have an extra part on it so the fuel hose sits in central, the ones in your pics are just fuel hose clips.
phade
Posts : 475 Join date : 2011-08-19 Location : Kent / South East London
Subject: Re: 1985 Lap Rialto 2 (hopefully a more concise version of it) - this may take me time to update it. Mon Nov 05, 2012 3:01 am
Bill Bailey wrote:
The clips that hold the fuel hose and a vacuum line have an extra part on it so the fuel hose sits in central, the ones in your pics are just fuel hose clips.
Something new I learn every day. Do you have a pic of what that part looks like or how the fuel and vacuum hoses are supposed to be supported ?
Bill Bailey
Posts : 112 Join date : 2011-08-19 Location : Outside your window.
Subject: Re: 1985 Lap Rialto 2 (hopefully a more concise version of it) - this may take me time to update it. Mon Nov 05, 2012 8:15 am
phade wrote:
Bill Bailey wrote:
The clips that hold the fuel hose and a vacuum line have an extra part on it so the fuel hose sits in central, the ones in your pics are just fuel hose clips.
Something new I learn every day. Do you have a pic of what that part looks like or how the fuel and vacuum hoses are supposed to be supported ?
Will get a pic of one tomorrow
Bill Bailey
Posts : 112 Join date : 2011-08-19 Location : Outside your window.
Subject: Re: 1985 Lap Rialto 2 (hopefully a more concise version of it) - this may take me time to update it. Thu Nov 08, 2012 3:33 am
Reverend Bowen
Posts : 10 Join date : 2011-08-19 Location : Robbing your house
Subject: Re: 1985 Lap Rialto 2 (hopefully a more concise version of it) - this may take me time to update it. Thu Nov 08, 2012 9:47 am
I have some of those clips Mr Phade. If you want a couple let me know and I'll sort them out for you. I also have the brackets if you need them.
phade
Posts : 475 Join date : 2011-08-19 Location : Kent / South East London
Subject: Replaced stater solonoid's ignition coil wiring Sun Dec 09, 2012 2:38 am
Hi everyone,
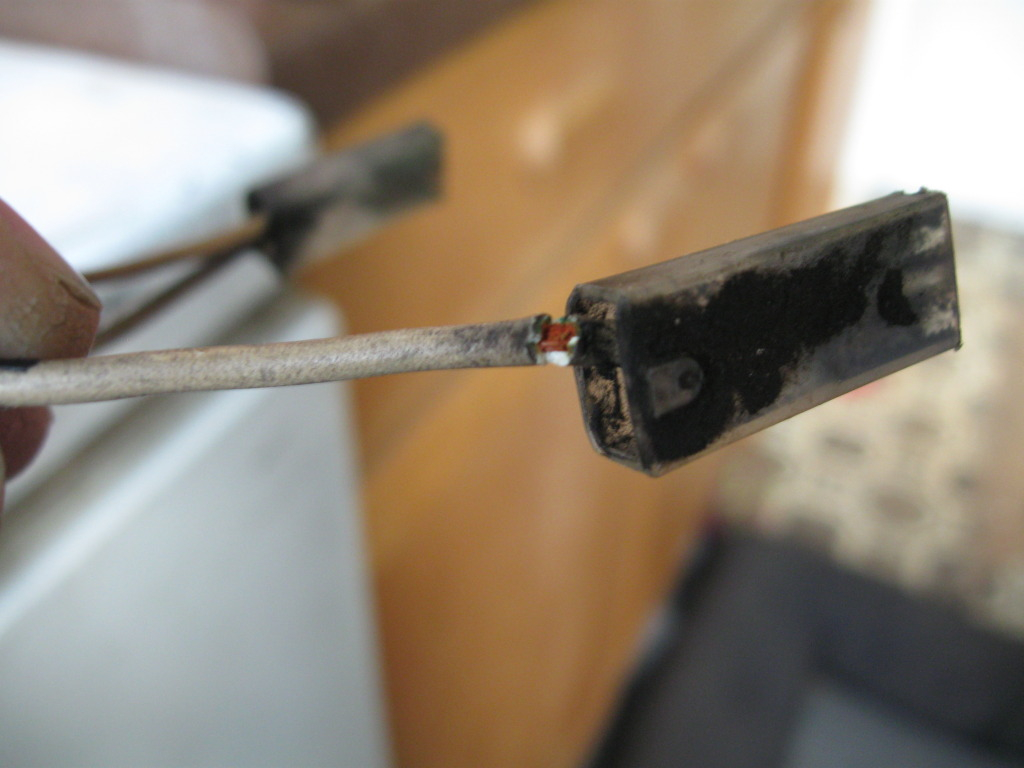
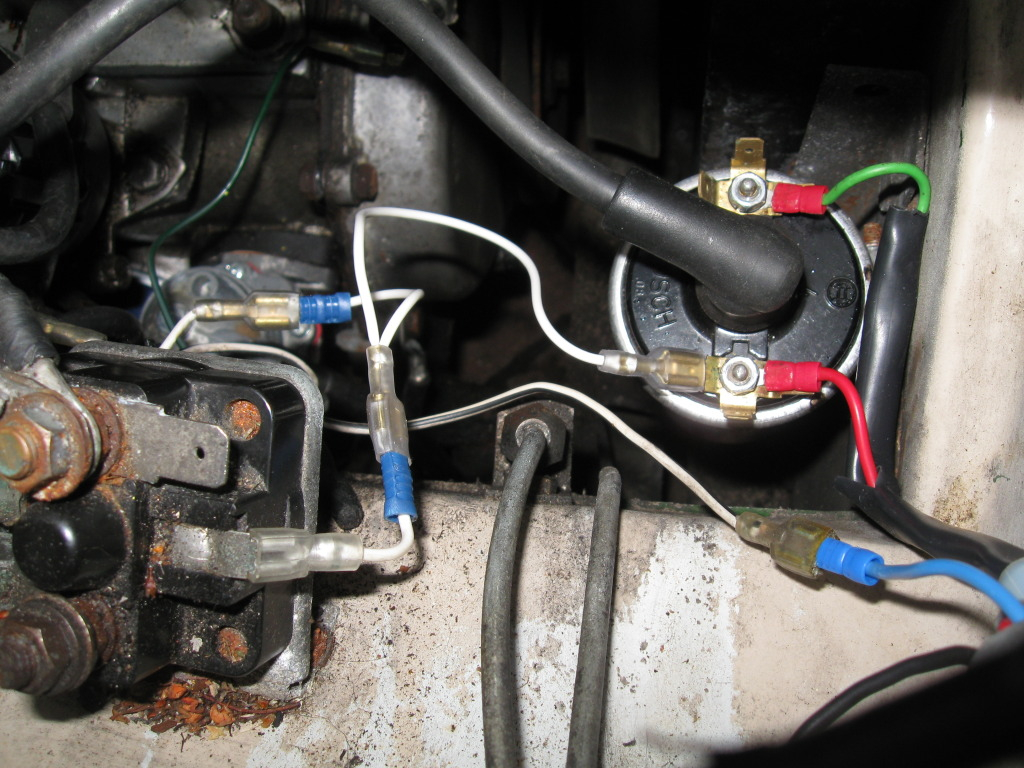
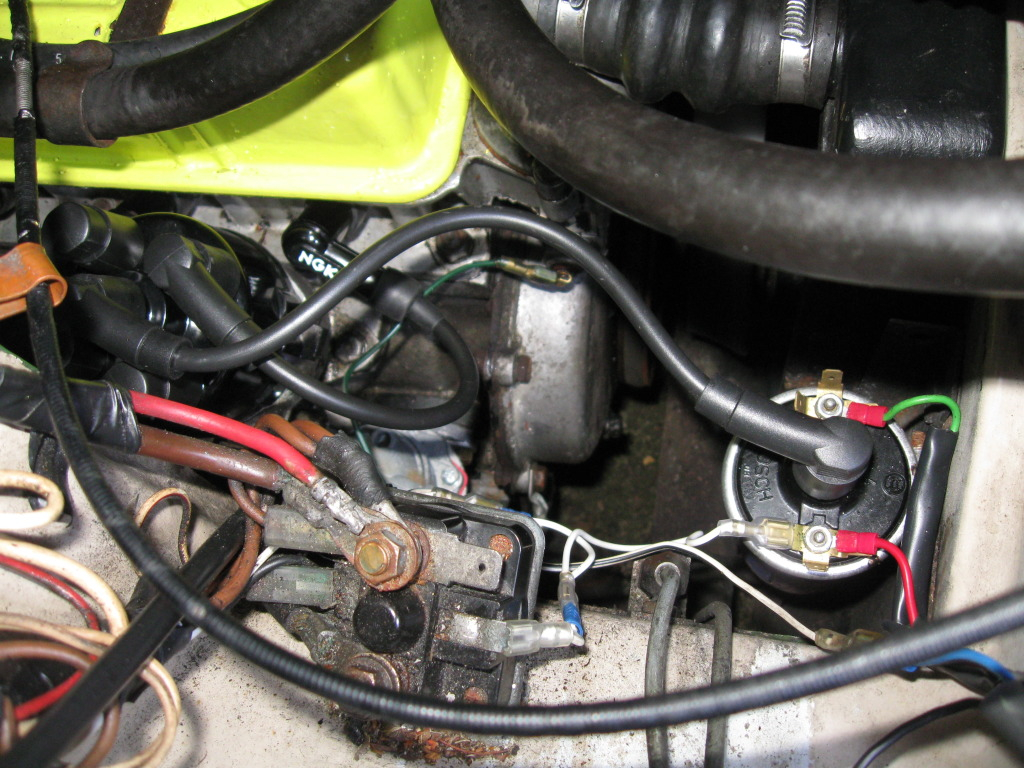
I think I have finally managed to get my Rialto 2 to run properly at long last and it was down to the starter solonoid/ignition coil's white wire ! The wire it's self was stiff and corroded. The wire's strands were starting to break at the ignition coil's +ve terminal end.
Old cable removed from the car:-
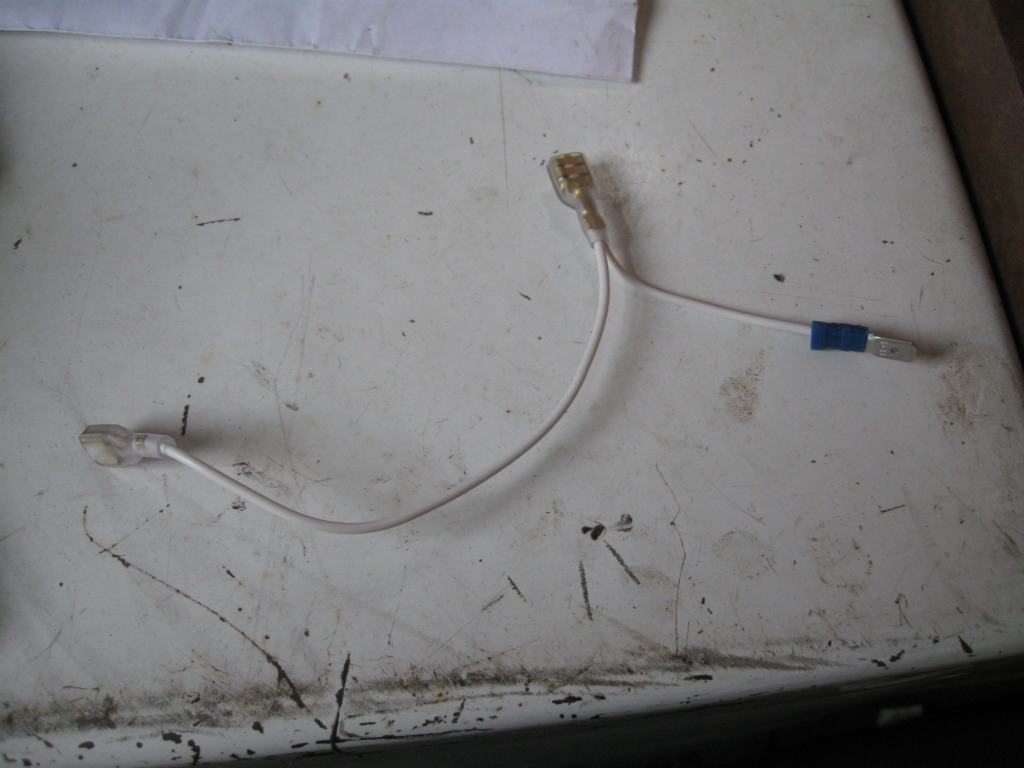
New cable that I made earlier and had installed into the car:-
I then too my Rialto 2 for a short(ish) blast on a fast-ish road and the M25 and I managed to get some decent speed uphill. The occasional misfiring has also stopped.
This is how my Rialto 2's engine runs at idle after I took it for an approx 1/2 hour blast:-
phade
Posts : 475 Join date : 2011-08-19 Location : Kent / South East London
Subject: Cylinder head retorque and white wires (ignition live) at the fuse box Tue Dec 18, 2012 6:53 am
Hi everyone,
I have retorqued the cylinder head yesterday and it barely needed to be tightened up at all (I think a couple of the nuts turned about 1/64 of a turn at most - a couple of the inlet/exhaust manifold nuts required about 1/4 turn) and reset the tappets today. Anyway, I'm glad to see that there's no evidence of any oil/coolant mix within the engine oil.
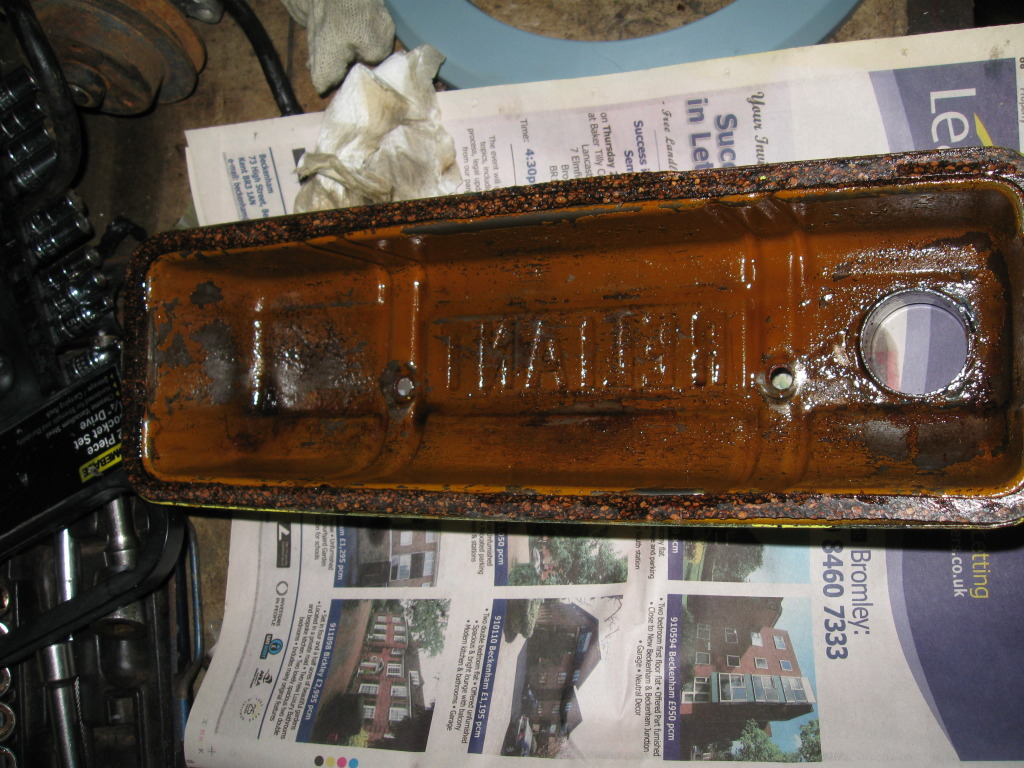
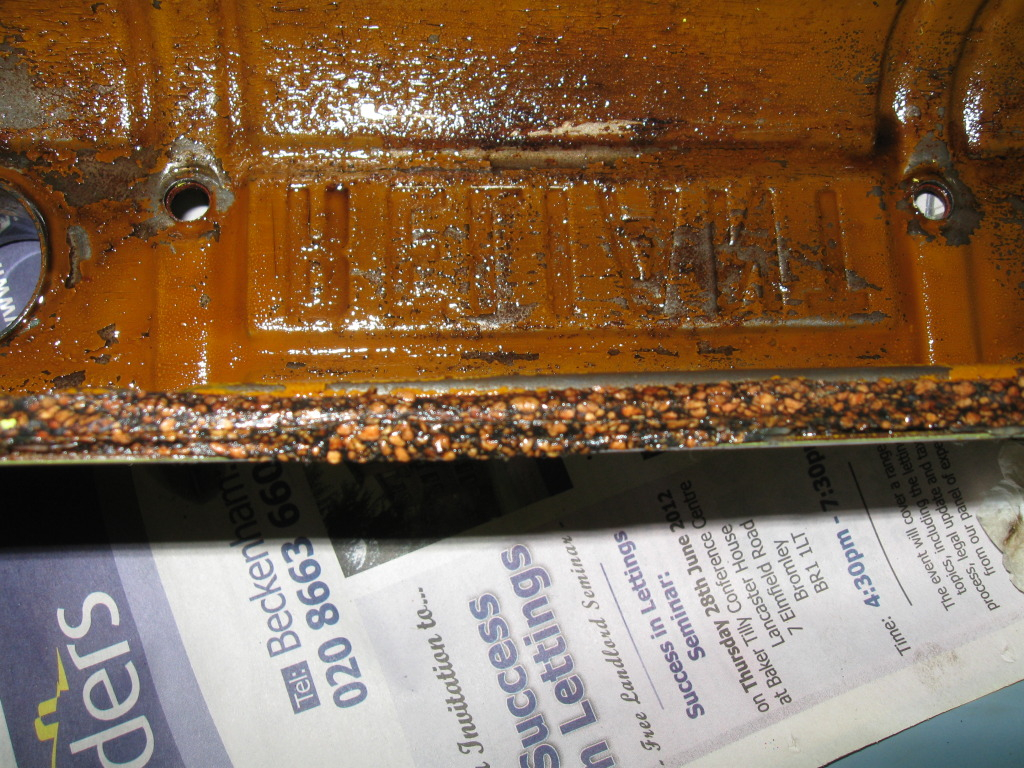
I also decided to replace the rocker cover gasket (I forgot to take photos of the new gasket) is I somehow manage to twist it slightly (and the rocker cover has been refitted too often as I tried to get the engine to run properly some time ago). Nice clean oil within the rocker cover too.
I used RTV silicone sealer (as it's easier to remove than glue) to hold the new rocker gasket in place.
I then decided to have a look at the spade connectors on the white wires from the fuse box whilst the silicone sealer was setting. The spade connectors appeared to be badly corroded at first, but as soon as I tried to extract one of them out of the plastic terminal covers I had found out that they are brass terminals.
I decided to squeeze the spade terminals with a pair of pliers instead of replacing then and have protected them with Aquastop. Those connectors now fit the fuse box properly rather than a very loose fit.
I started up the car and the engine's still nice and quiet and it appears to run properly.
phade
Posts : 475 Join date : 2011-08-19 Location : Kent / South East London
Subject: Re: 1985 Lap Rialto 2 (hopefully a more concise version of it) - this may take me time to update it. Mon Jan 14, 2013 6:25 am
Making up my own HT leads for both of my Rialtos
Hi everyone,
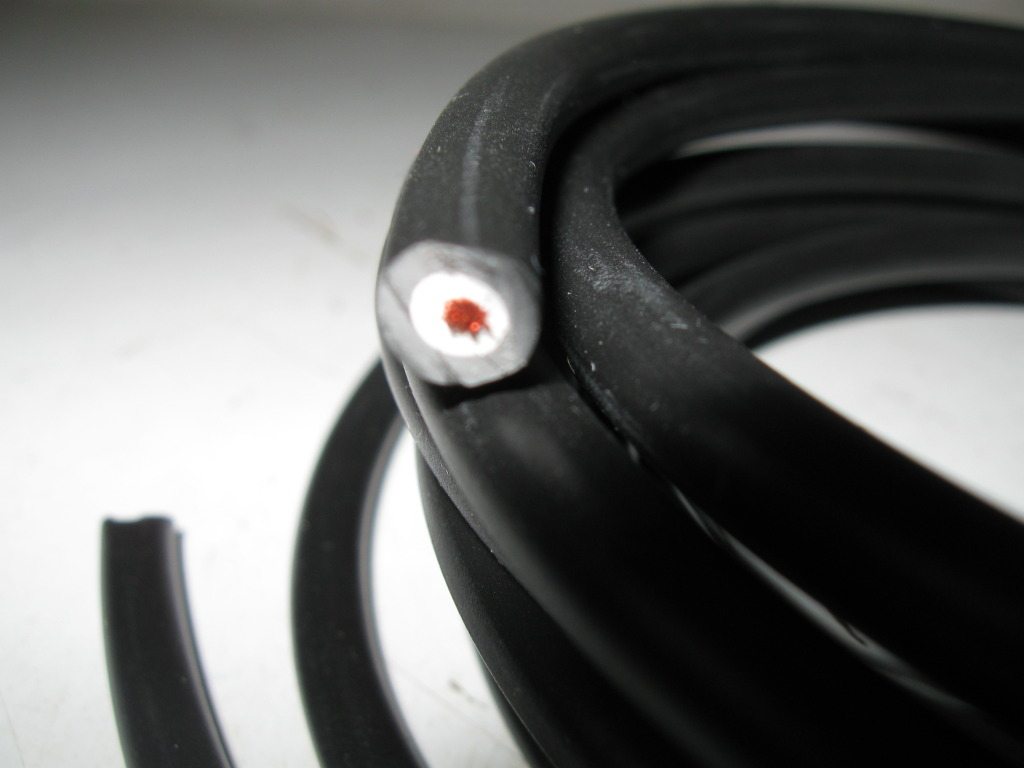
I've decided to start to make my own copper core HT leads for both of my Rialtos. When I made up both ignition coil leads, they immediately feel a lot more secure than the silicone ones currently fitted to both of my Rialtos. Anyway, I'll let the pics so far do the talking.....
Most of the HT leads bits I got from various places (including eBay):-
4 metres of 7mm copper core HT lead (for both of my Rialtos) from Historic Car Parts' eBay shop http://www.ebay.co.uk/itm/330624582544?ssPageName=STRK:MEWNX:IT&_trksid=p3984.m1439.l2649 .
Unfortunately, these straight screw-in distributor cap/ignition coil ends do not fit the ignition coil nor the distributor cap. They are also badly made as the screw thread ends tend to fall through the rest of the connector.
Fortunately, I managed to find some right angled crimp distributor cap/ignition coil ends and right angled (14mm) boots from Auto Electric Supplies. I also had to buy the crimp tool (and that lot came to just under £70 excluding the first batch of parts) to make them:-
Ignition coil end made (for the first time) using my HT lead crimp tool:-
I measured up the length of HT lead required for the king lead and found out that the silicone ones I bought in the past were about 2" too long. I made sure that there was enough slack in that lead (in other words a curve in the lead when fitted). I plan to do the same when I get round to making up the rest of the HT leads. Anyway, this is what the first king lead I made looks like (I've made both king leads for both of my Rialtos):-
phade
Posts : 475 Join date : 2011-08-19 Location : Kent / South East London
Subject: Fitted my new (home made) HT leads to my Rialto 2 today Sun Jan 27, 2013 6:54 am
Hi everyone,
I decided to fit my home made HT leads to my Rialto 2 today and I'll let the pics do the talking....
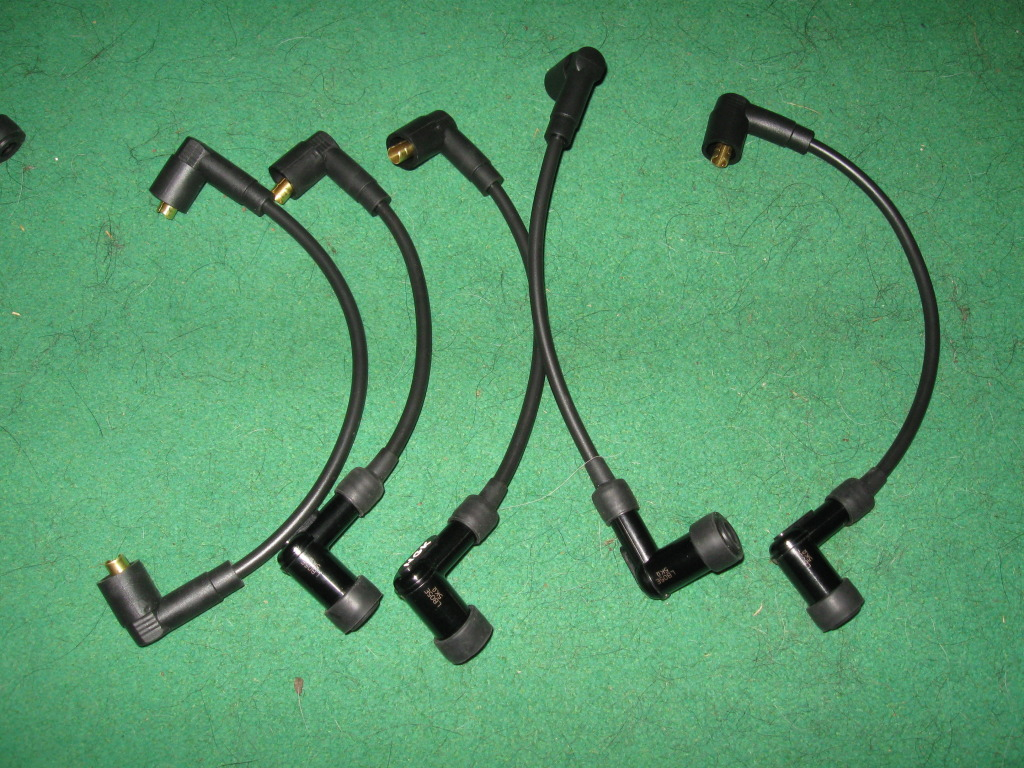
Both sets of HT leads made up (for both of my Rialtos):-
Closer up pics of both sets of HT leads:-
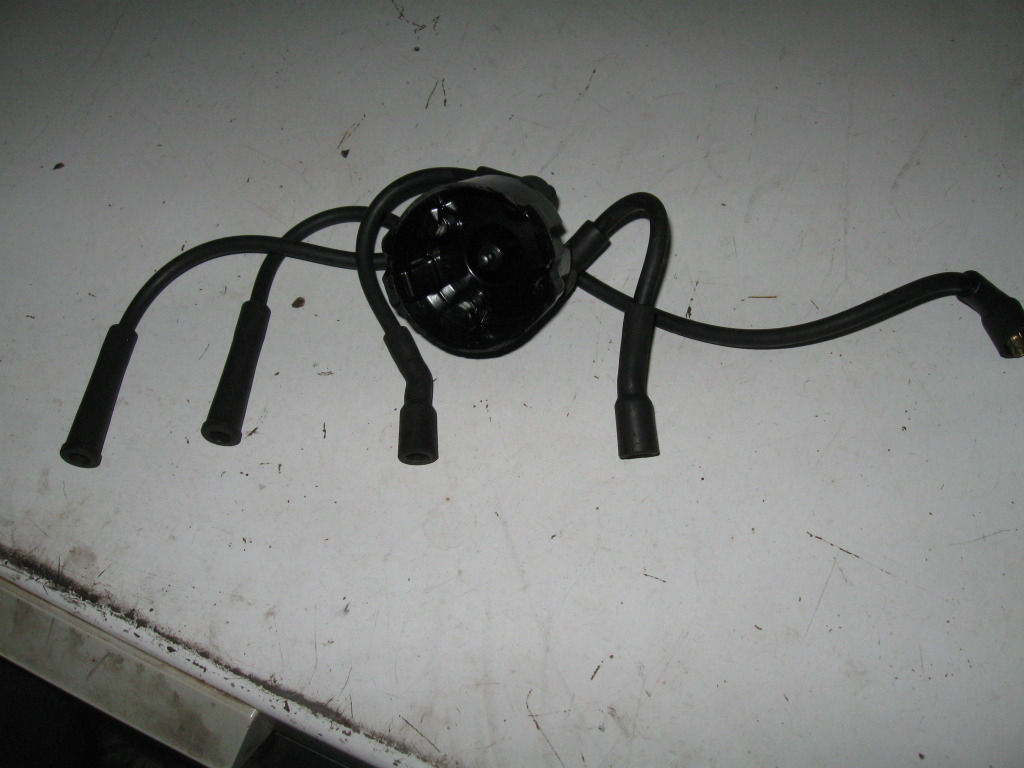
Old Intermotor distributor cap and silicone HT leads removed from my Rialto 2:-
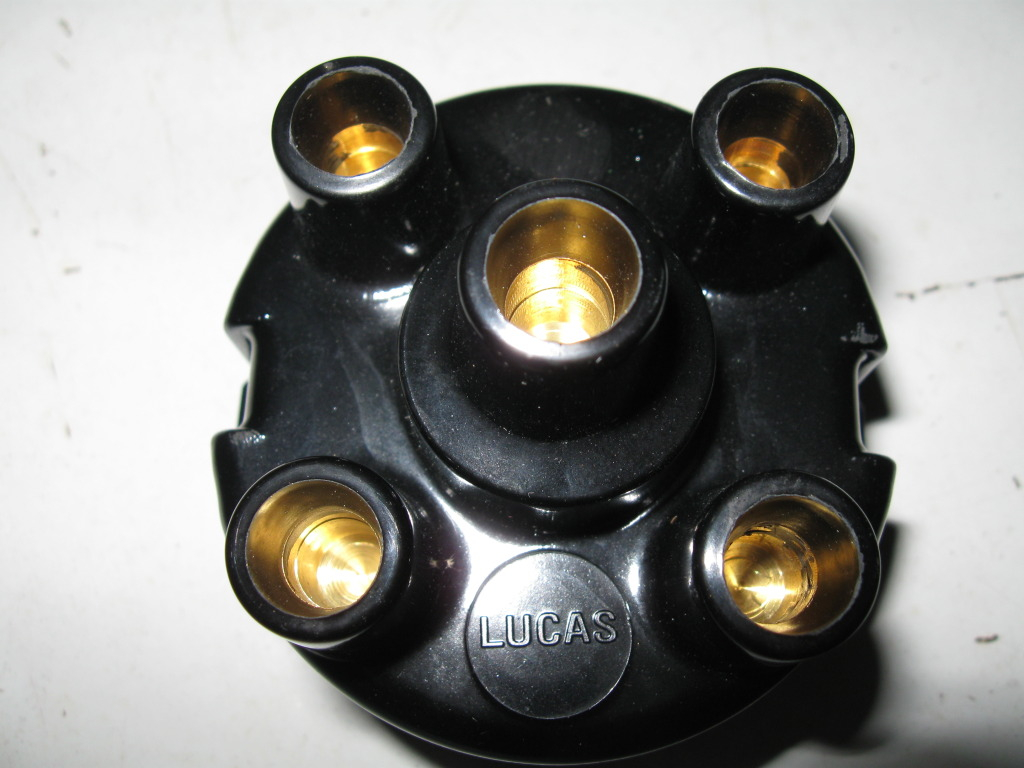
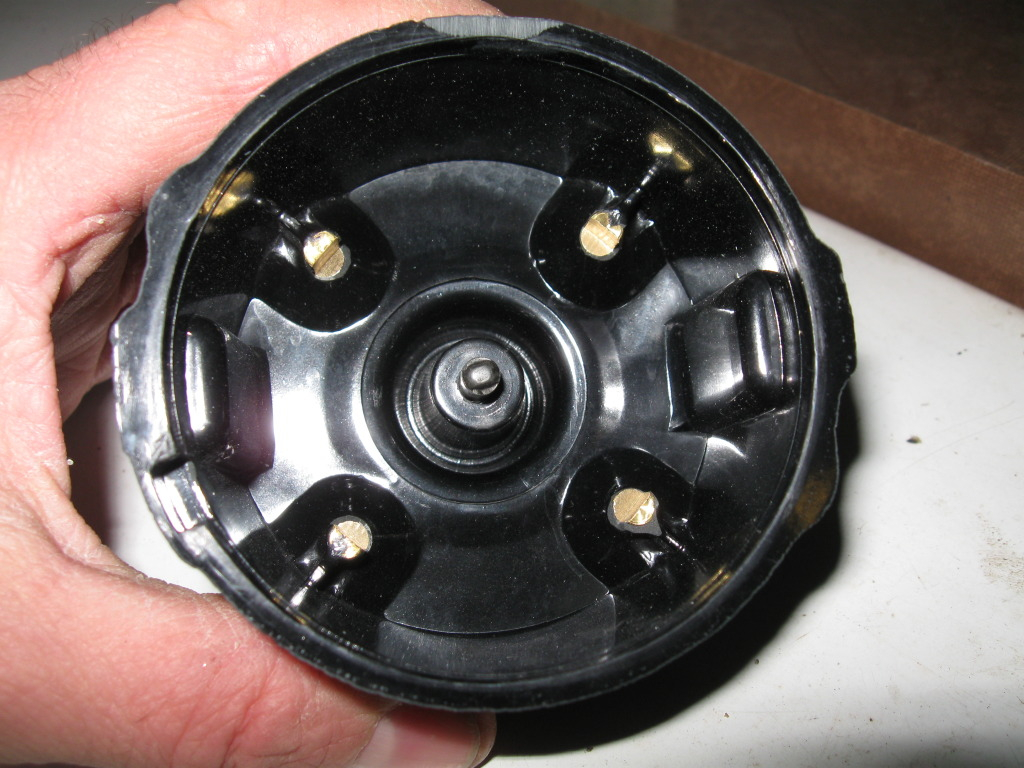
New Lucas DDB108B (brass contacts) distributor cap:-
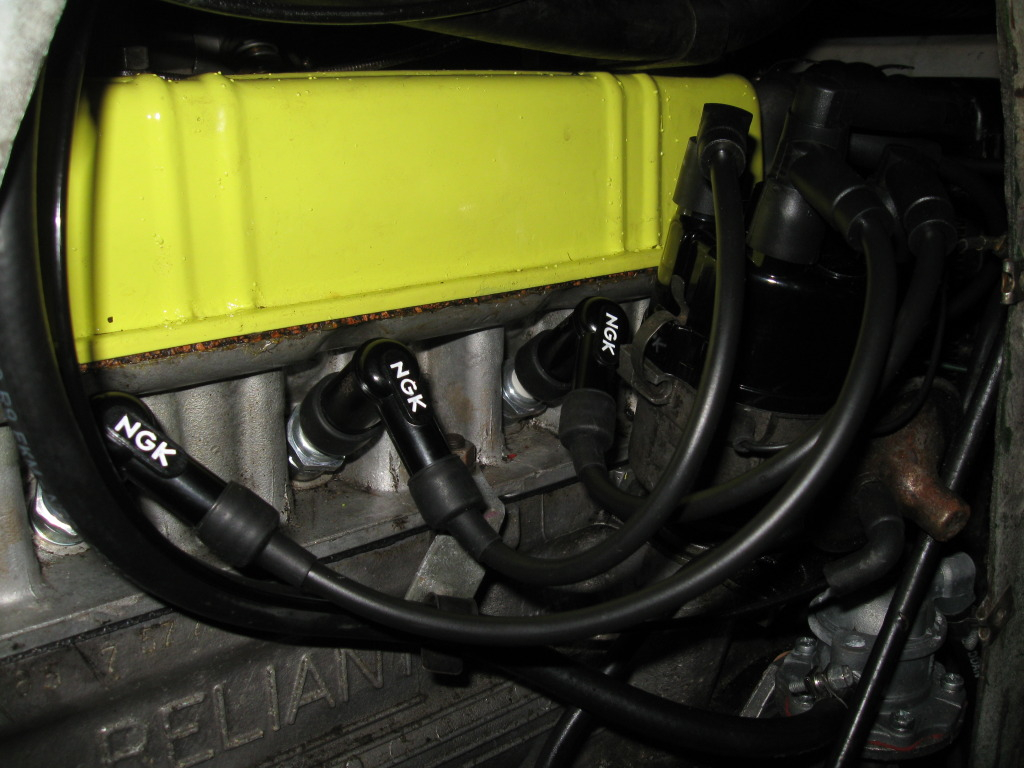
New HT leads fitted to my Rialto 2:-
Unfortunately, I had to shorten the number 4 HT lead by about 30mm as it was fouling the engine cover. This is how the HT leads look like on my Rialto 2 after I had shortened the number 4 HT lead:-
I then decided to start up my Rialto 2 (as well as my Rialto SE) and both of them run fine without any problems. All I will need to do is a road test to make sure that there are no problems.
phade
Posts : 475 Join date : 2011-08-19 Location : Kent / South East London
Subject: Road test :) Sun Jan 27, 2013 11:03 pm
I have just driven my Rialto 2 on a mixture of smooth and fairly rough roads (mostly at about 50, 60 mph) and have found that there were no ignition related problems at all.
phade
Posts : 475 Join date : 2011-08-19 Location : Kent / South East London
Subject: Exhaust replacement time (well I could only replace the down pipe) Sun Feb 10, 2013 5:28 am
Hi everyone,
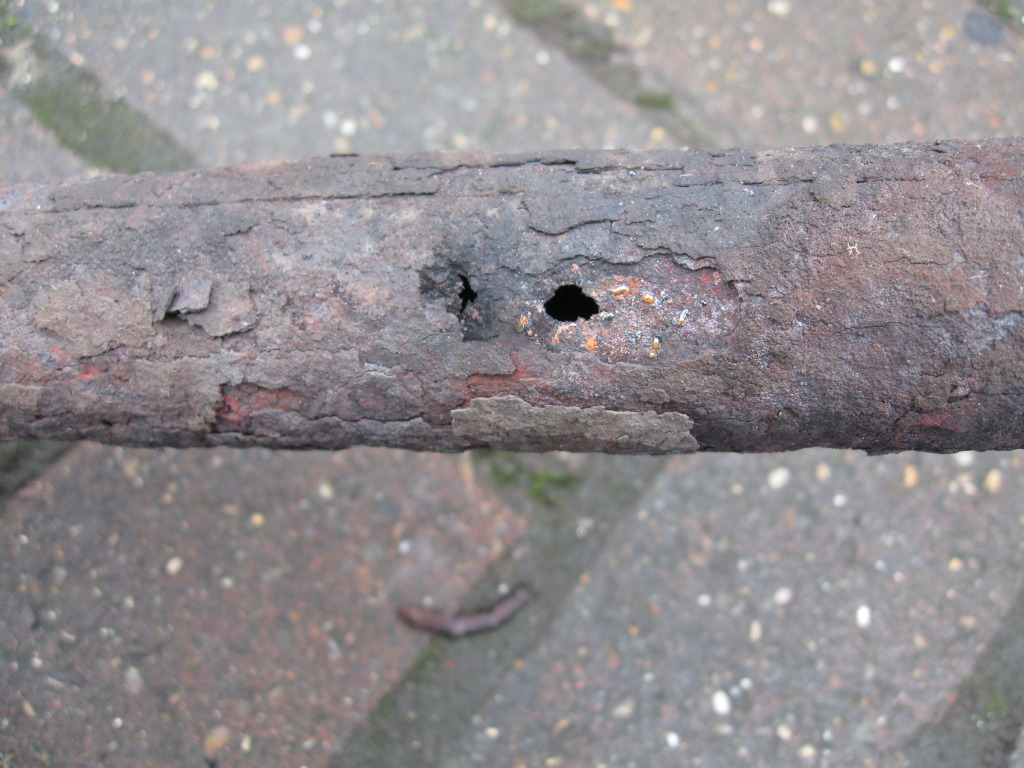
I replaced my Rialto 2's exhaust down pipe today after it became holed (and noisy) earlier this week. A big thank you to Simon (Madblokey) for bringing the mild steel down pipe round to me.
The old and new down pipes side by side:-
The old down pipe was blowing quite badly:-
A few nice NOS bits I planned to use:-
Sadly, I could not fit the NOS Reliant stainless silencer as the mild steel down pipe and the silencer are of the same diameter (in other words they do not fit together). I decided to fit the old silencer onto the new down pipe for now and it's a lot quieter than it was before.
I have contacted one of my mates from the Valley Vee Dubbers forum to see if he can help me with fabricating a stainless down pipe for my Rialto 2 (he usually fabricates custom aircooled VW exhausts).
phade
Posts : 475 Join date : 2011-08-19 Location : Kent / South East London
Subject: Ignition coil replacement time (and the coil's only about 9 months old !). Sun Mar 31, 2013 7:33 am
23rd February 2013
Hi everyone,
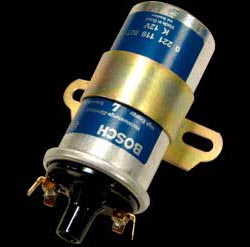
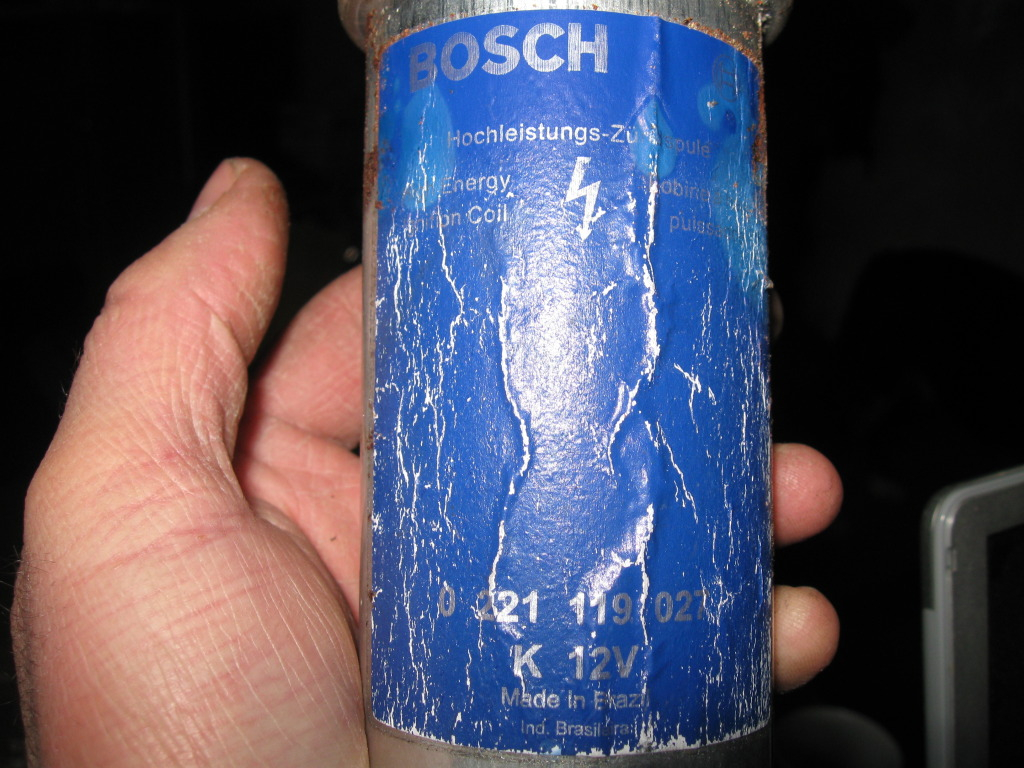
I've had a very occasional misfire on my Rialto 2 (for about a second at a time or less and it improved by using Super Unleaded) which happens once every 20 to 100 miles or so. Long story cut short, I think I may have traced it to a counterfeit "Bosch blue" ignition coil sold to me by a motor factor. I only found out about that a few days ago from here http://www.ratwell.com/technical/BlueCoil.html#bad (third ignition coil down) which appears to be a Lucas silver coil with a Bosch sticker on it (and I paid good money for that as well !!).
Anyway, I'll let the pics do the talking.
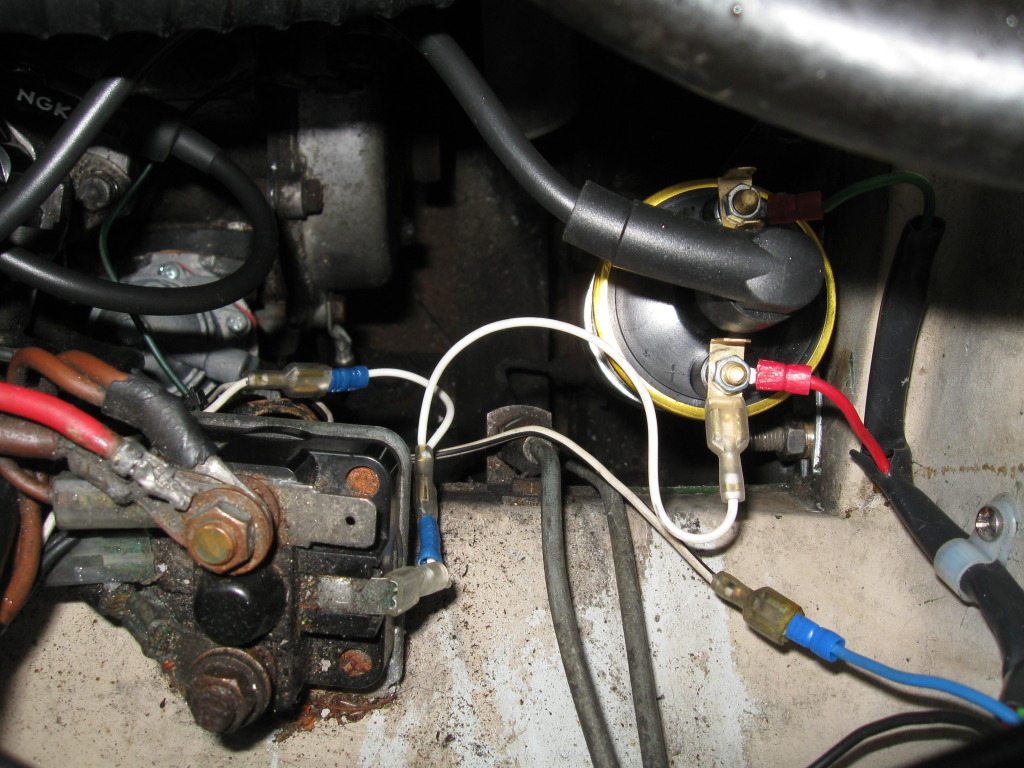
The "Bosch blue" coil as it was before I removed it:-
New Lucas DLB105 sports coil fitted:-
phade
Posts : 475 Join date : 2011-08-19 Location : Kent / South East London
Subject: Closer inspection of the 9 months old "Bosch blue" coil Sun Mar 31, 2013 7:38 am
23rd February 2013
Paper sticker falling off:-
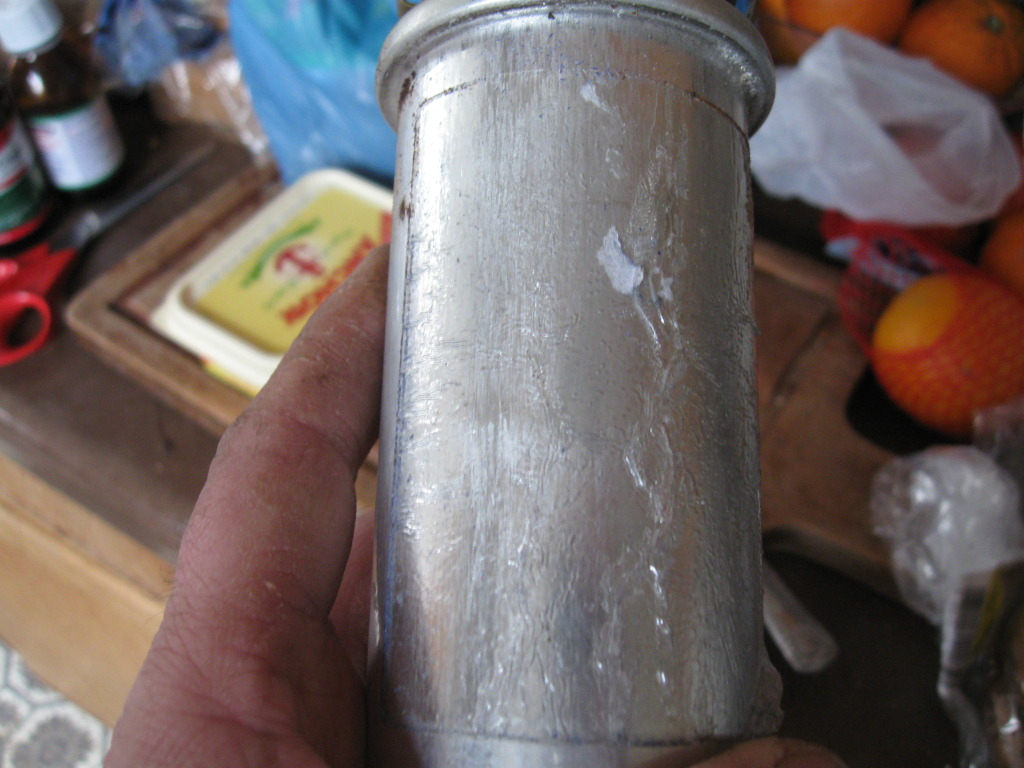
....that reveals a clear adhesive piece of plastic underneath it:-
Adhesive plastic sheet removed:-
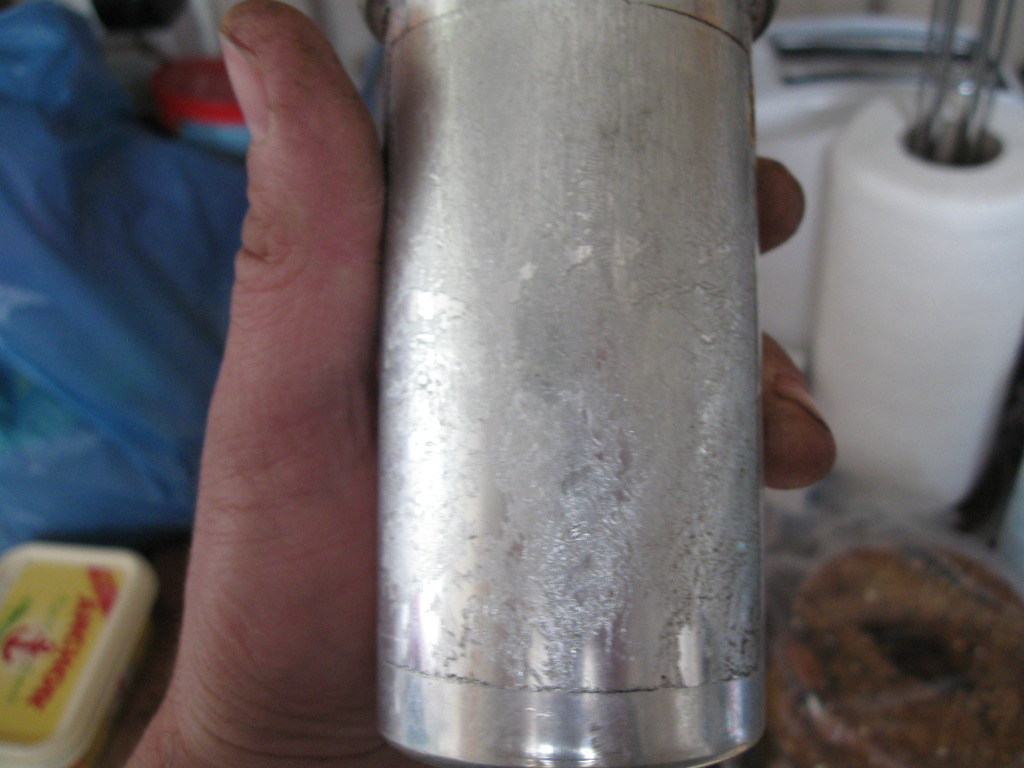
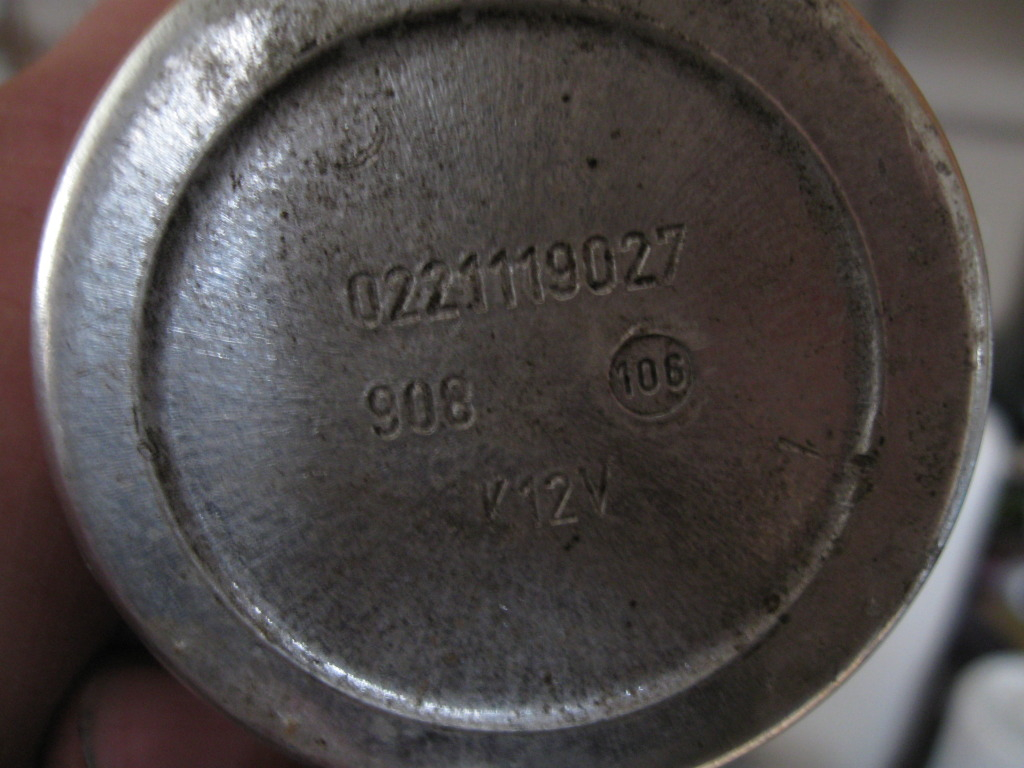
Bosch type fonts stamped into the coil's base:-
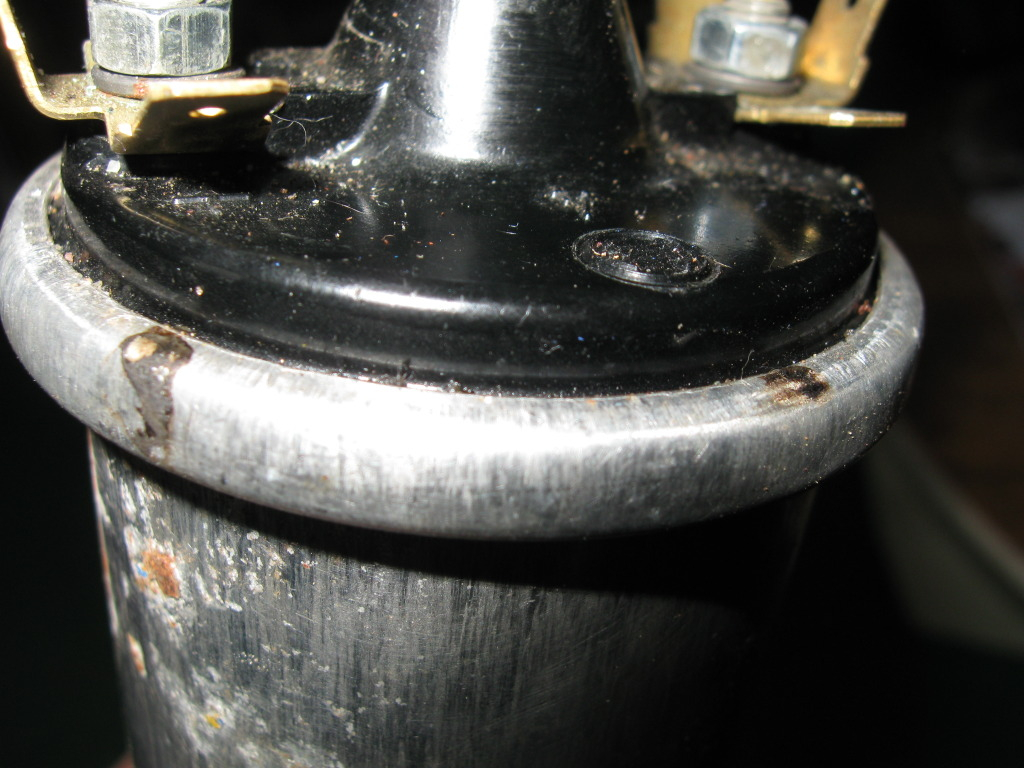
Top of ignition coil:-
Coil starting to get too hot/leak oil ??
phade
Posts : 475 Join date : 2011-08-19 Location : Kent / South East London
Subject: Re: 1985 Lap Rialto 2 (hopefully a more concise version of it) - this may take me time to update it. Sun Mar 31, 2013 7:39 am
24th February 2013
Hi everyone,
I drove my Rialto 2 out today for about 12 miles and it had one misfire/dropping power during the entire trip (it happened once under load for about a second and a half).
I'm now guessing that either the fuel filter will need to be replaced (and the fuel cycled through the petrol tank to remove any possible sediment) or there may be some sediment within the carburetter's float chamber.
Hopefully, I'll soon get to the bottom of that problem as I have looked at practically everything else (including wiggling the ignition switch whilst stationary).
One thing I did find out is that my Rialto 2 runs better on super unleaded than it does on standard unleaded petrol.
phade
Posts : 475 Join date : 2011-08-19 Location : Kent / South East London
Subject: Re: 1985 Lap Rialto 2 (hopefully a more concise version of it) - this may take me time to update it. Sun Mar 31, 2013 7:41 am
3rd March 2013
I think I have now got my Rialto 2 to run properly and it appeared to be the fuel filter as there was a fair amount of fine sediment within it. I also decided to pump out the fuel tank via another disposable fuel filter and pumped the fuel back in (also via the same disposable fuel filter).
I took it for a 12 mile test drive, slightly weakened the fuel mixture by about 1 flat (1/6 turn) after I got back. The car itself ran without any problems at all.
I'll soon find out when I take it for a 50 mile+ test drive at some point this week.
phade
Posts : 475 Join date : 2011-08-19 Location : Kent / South East London
Subject: Took my Rialto 2 out for a run today Sun Mar 31, 2013 7:42 am
9th March 2013
Hi everyone,
I decided to take my Rialto 2 out for a run and check everything again (after it's temp gauge went up to 5/8 whilst driving to Surrey Branch's club night on Tuesday) and found out that I had set the fuel mixture 1 flat (1/6 turn) too weak. I simply adjusted it and the engine now seems to run properly.
I also checked it's ignition timing and it hasn't slipped (it's about 10 1/2˚ to 11˚ BTDC) and the engine idles smoothly at 900 RPM.
I then checked it's CO emissions just for fun and I was very surprised that it was 2 3/4%.
phade
Posts : 475 Join date : 2011-08-19 Location : Kent / South East London
Subject: Reliability and fuel economy are both good. :) Sun Mar 31, 2013 7:44 am
22nd March 2013
Hi everyone,
I've just been driving my Rialto 2 (a fair bit) on a daily basis for a while now and it seems to be reliable without any misfires and it's temperature gauge remains about normal (rises when driving up hills then falls back again). It has only used a small amount oil and it hasn't lost any coolant.
I also worked out it's fuel economy over 206 miles consisting of 40 miles of roadworks (50 mph speed limit), occasional traffic jams on the M25 and 70 mph driving, which worked out to be 70.4 MPG using Super Unleaded petrol.
Anyway, hopefully my Rialto 2 will be consistent and reliable.
phade
Posts : 475 Join date : 2011-08-19 Location : Kent / South East London
Subject: Flushed it's cooling system and another minor bit of work. Fri Jul 05, 2013 1:51 am
Hi everyone,
I decided to flush my Rialto 2's cooling system after it's temperature gauge was about 3/4 on the way back from the Southern Area Rally (ambient temperature 25˚C).
Whilst I was draining my Rialto 2's coolant, it appeared to be wee colour after about 7,000 miles. Having said that, I think a lot of that may be down to the remains of wire wool within the cylinder head (after Dan had cleaned it up with wire wool some time ago before he sold it to me).
I also managed to break a couple of the carpet fasteners on the front N/S floor, so I decided to replace them with new ones and secured them with stainless M3 countersunk screws, M3 nylocks and M3 repair washers.
phade
Posts : 475 Join date : 2011-08-19 Location : Kent / South East London
Subject: Sorting high coolant temp issues and nearly broke a fan belt Sun Jul 21, 2013 4:47 am
Hi everyone,
I've had coolant temp problems with my Rialto 2 during the recent hot weather (the temp gauge went to 1/2 needle width on 'H' yesterday with an 82˚C thermostat) and fitted a 75˚C thermostat today. It seems to have sorted out the coolant temp problem until I drove uphill at about 70, where the temperature gauge went up to about 5/8 then dropped again (ambient temperature 20˚C) and I thought that all may be well.
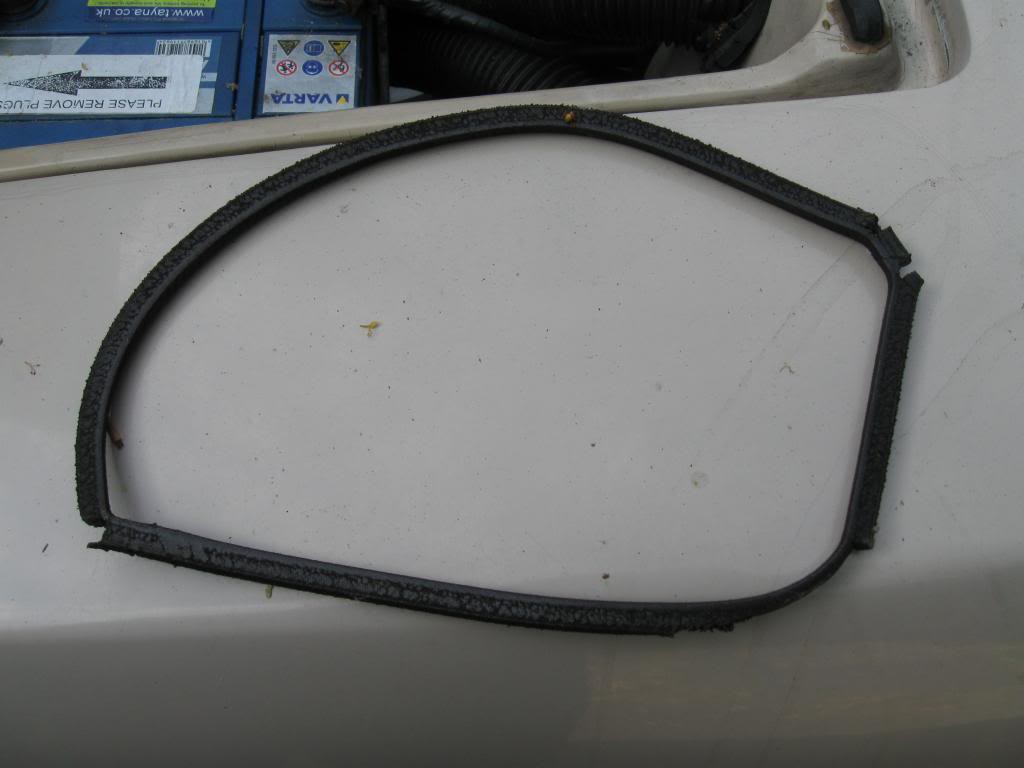
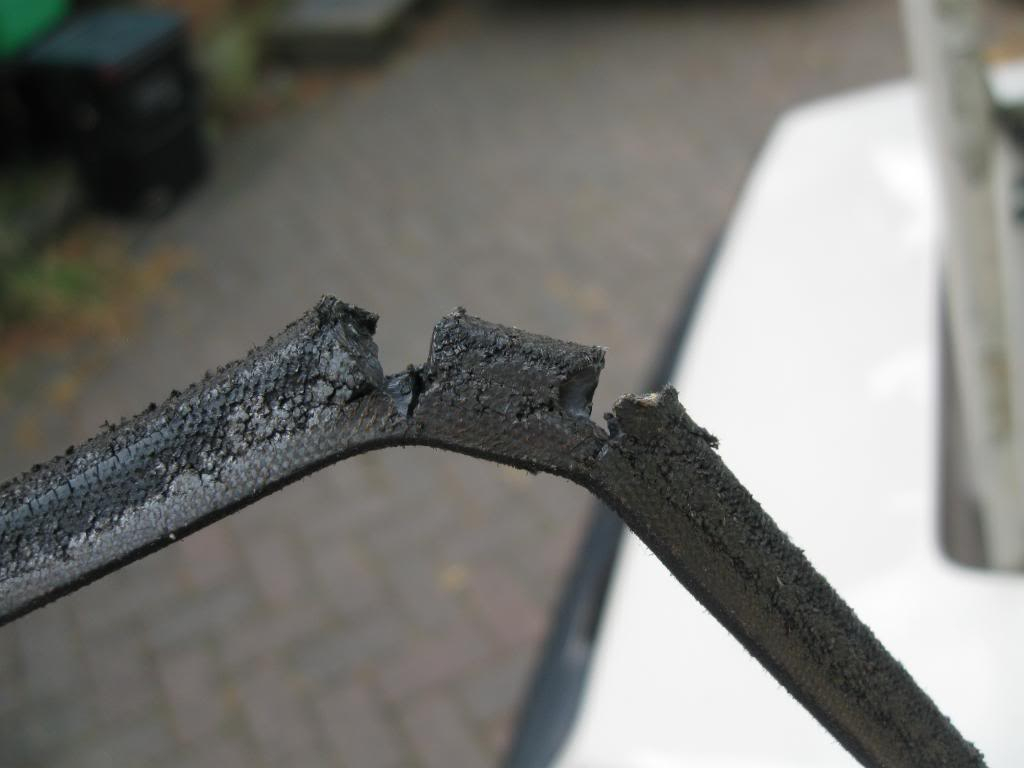
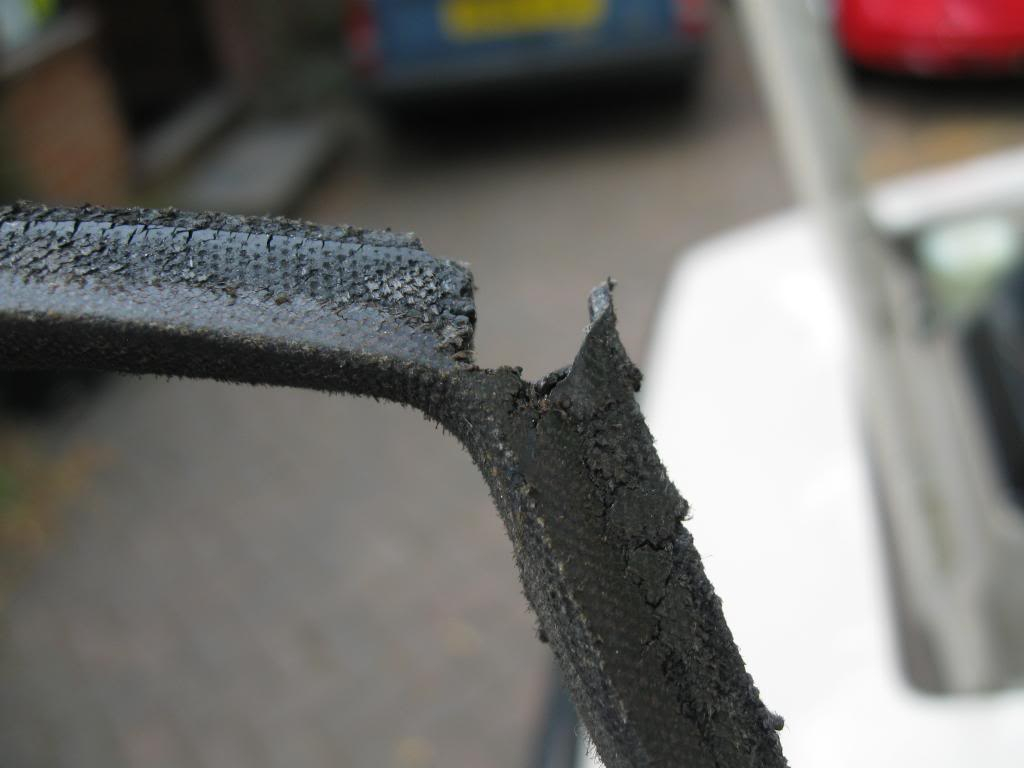
However, when I got it home, I had noticed that the fan belt had flipped its self over and nearly ripped its self to bits (the fan belt looked ok before I drove it this morning). Anyway, this is what happened to the fan belt (thankfully it didn't break):-
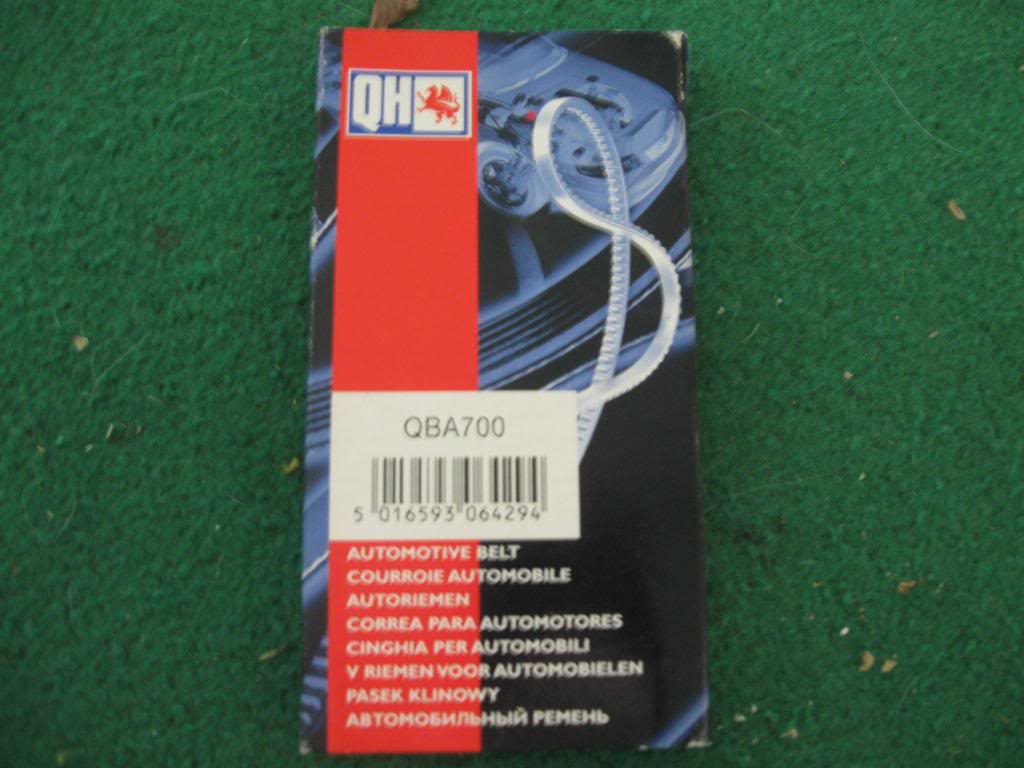
Fortunately, I was able to get a QH700A fan belt from my local motor factor (as Halfords have discontinued the HB700A fan belt and they were not in stock).
I found that the 700mm fan belt was a very tight fit, so I'll order a QH710A from eBay and replace my Rialto SE's fan belt as it is also the same type of Reliant NOS v-belt.
I won't be going to the Uxbridge Auto Show tomorrow as I don't really want to chance it at the moment.
phade
Posts : 475 Join date : 2011-08-19 Location : Kent / South East London
Subject: A quick update.... Mon Jul 22, 2013 1:27 am
Hi everyone,
I drove my Rialto for a few miles today (I think about 10 miles) on a mixture of roads (from 40 to 70 on the flat, downhill and a slight gradient uphill) and the temperature gauge barely rose above normal.
After I got back, I checked the actual coolant temperature (measured with an infra-red thermometer with the radiator cap off) and it was 74˚C when the temperature gauge was 1/2 needle width below normal (ambient temperature 22˚C).
(I think the hot starting problem it's got could just be down to the current weather and the fact that my Rialto 2 does not have an expansion tank).
Sponsored content
Subject: Re: 1985 Lap Rialto 2 (hopefully a more concise version of it) - this may take me time to update it.
1985 Lap Rialto 2 (hopefully a more concise version of it) - this may take me time to update it.